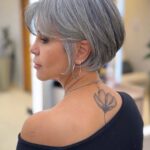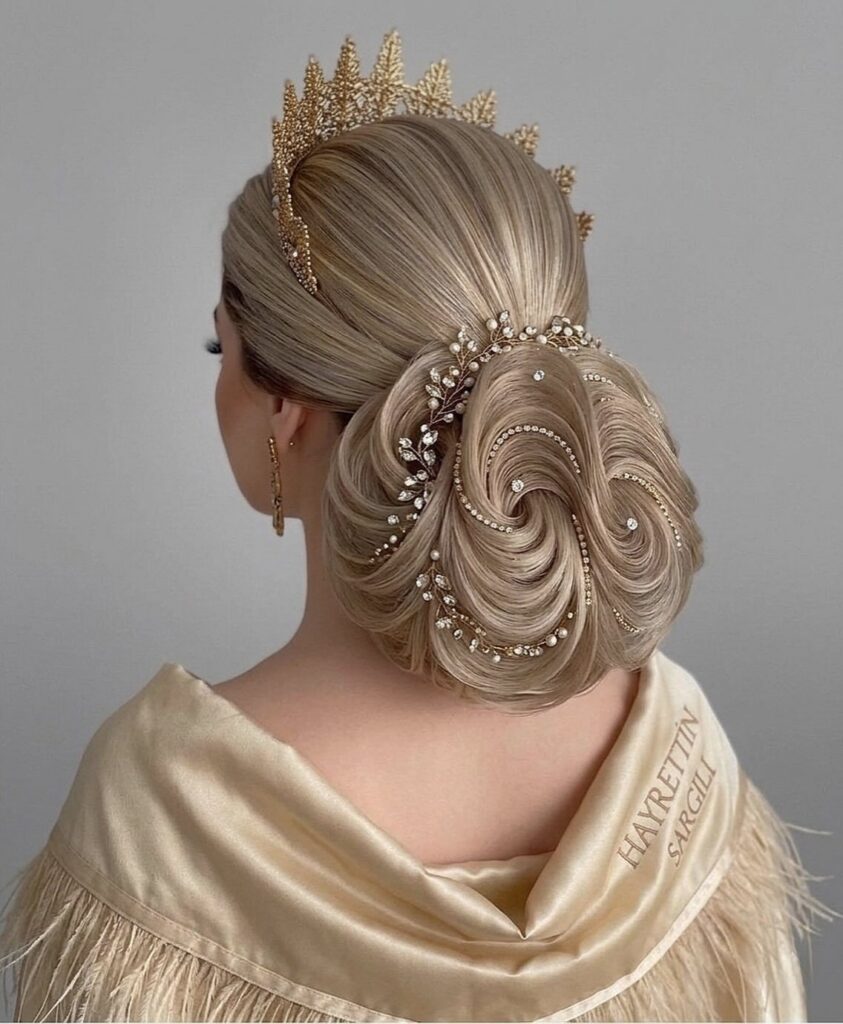
The looks here run from a low chignon pinned with crystals under a crown to a loose side-part blowout with no pins at all, and I’d set aside 60–90 minutes for styling.
Your own hair decides which one is yours: thickness, texture and layers determine whether a shape holds, and short layers may never reach the spot where an updo anchors.
A saved photo only tells you what the look should be, so I’d ask a stylist whether your hair has the thickness and hold to pull it off.
1. Textured Updo
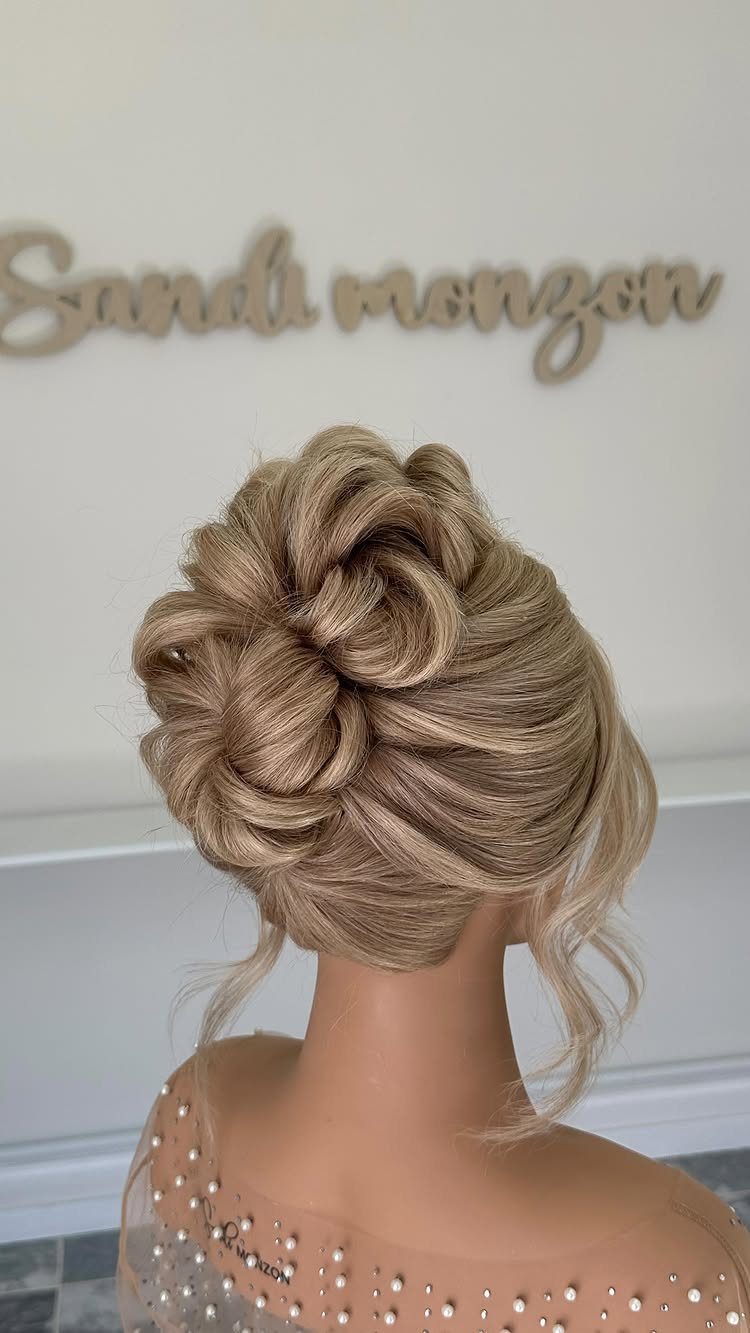
Loose curls and pinned sections build the volume here, and nothing gets slicked flat. The shape looks relaxed because the pins hold pieces in place without forcing them into a pattern.
I’d ask for this by name, "textured updo," and bring a back view along with the front. The shape lives at the back, so that’s the angle your stylist needs to see.
2. Low Updo
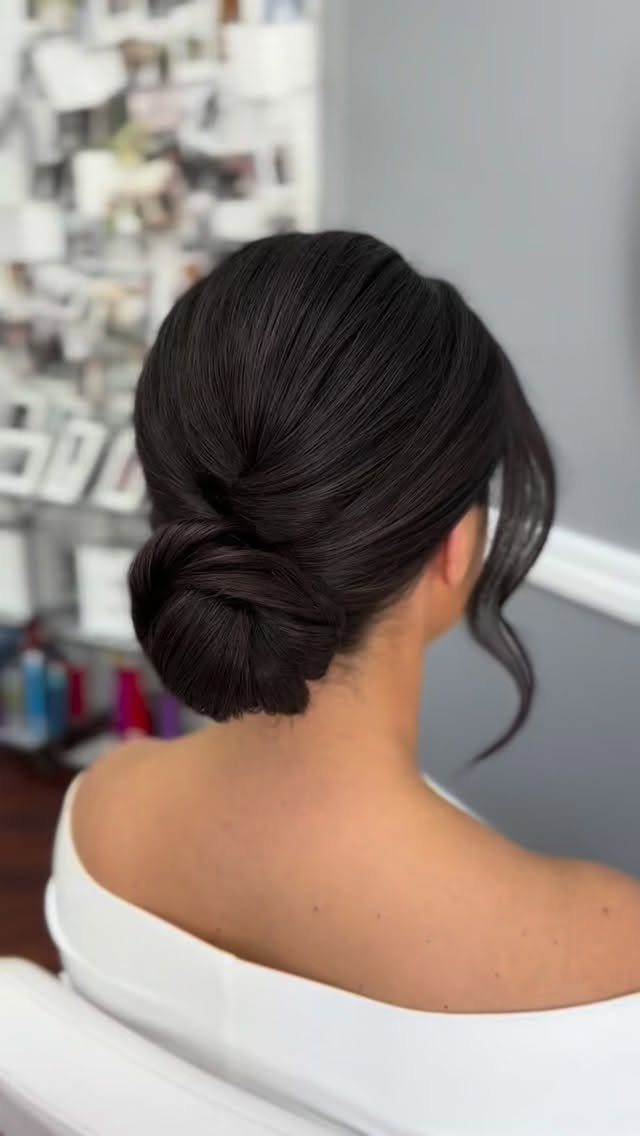
Everything gathers at the nape, which makes this the quietest of the updos.
A low updo can be smooth, twisted, tucked or wavy, and a clean bun with one loose curl left out at the front is the easiest version to ask for by name.
I like that single curl.
It softens the polish and costs nothing extra. Pick sleek or textured before your trial, since the two need different prep.
3. High Updo
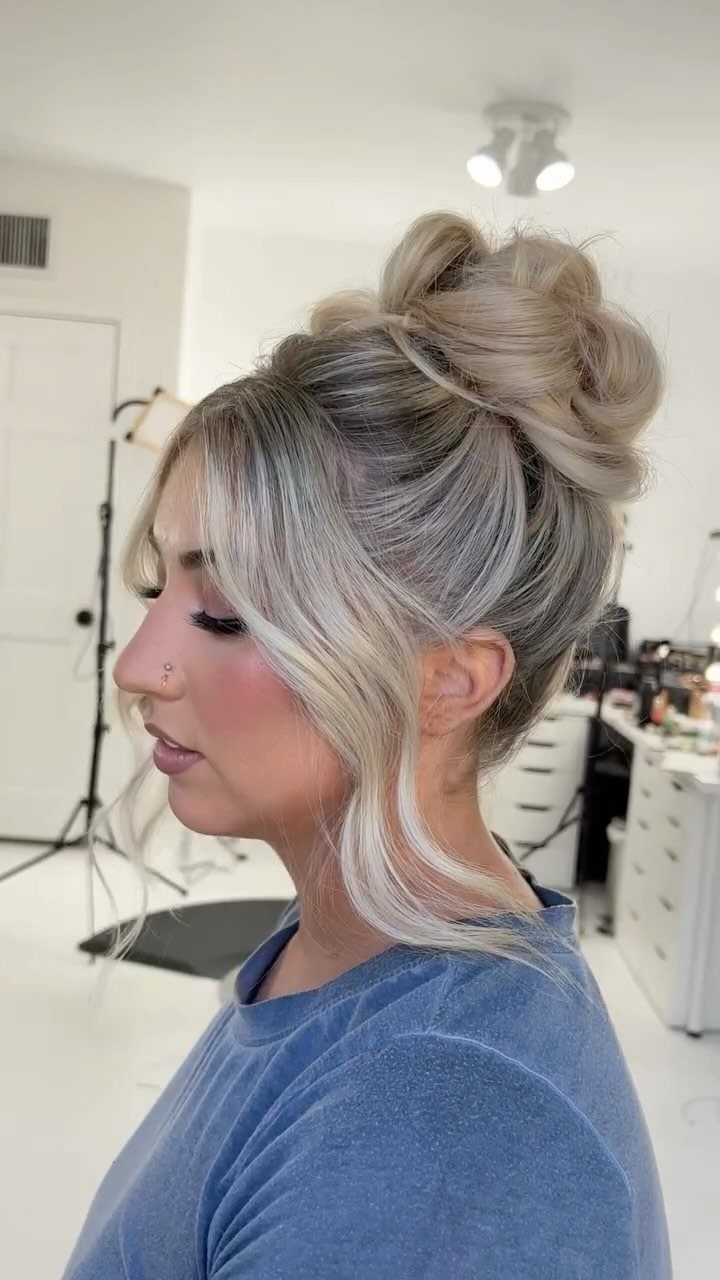
A bun set above the back of the head lifts the whole silhouette and shows off the neck and jawline. Leave a few strands loose at the temples and the high bun turns softer than a tight top knot.
I’d keep those face-framing pieces. They stop the height from looking severe, and they’re easy to ask for: "high loose bun, strands out."
4. Feathered Updo
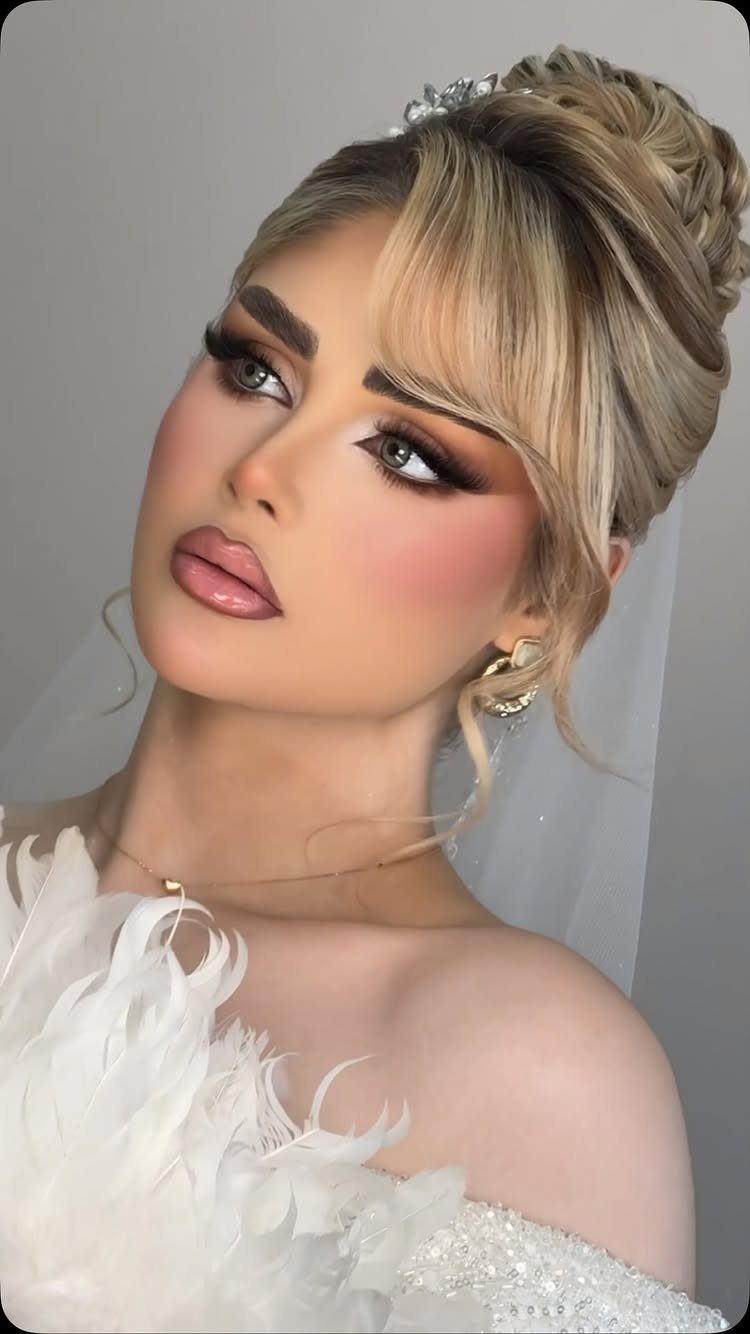
Layered pieces, some braided, some left loose, give this updo its light, dimensional look. This style looks airy instead of sculpted, with a few wispy strands left free near the cheeks and temples.
Because the detail is in the layering, I’d show your stylist a photo that includes the back. A veil sits well against this much texture, so plan the placement at your trial.
5. Crystal-Embellished Updo
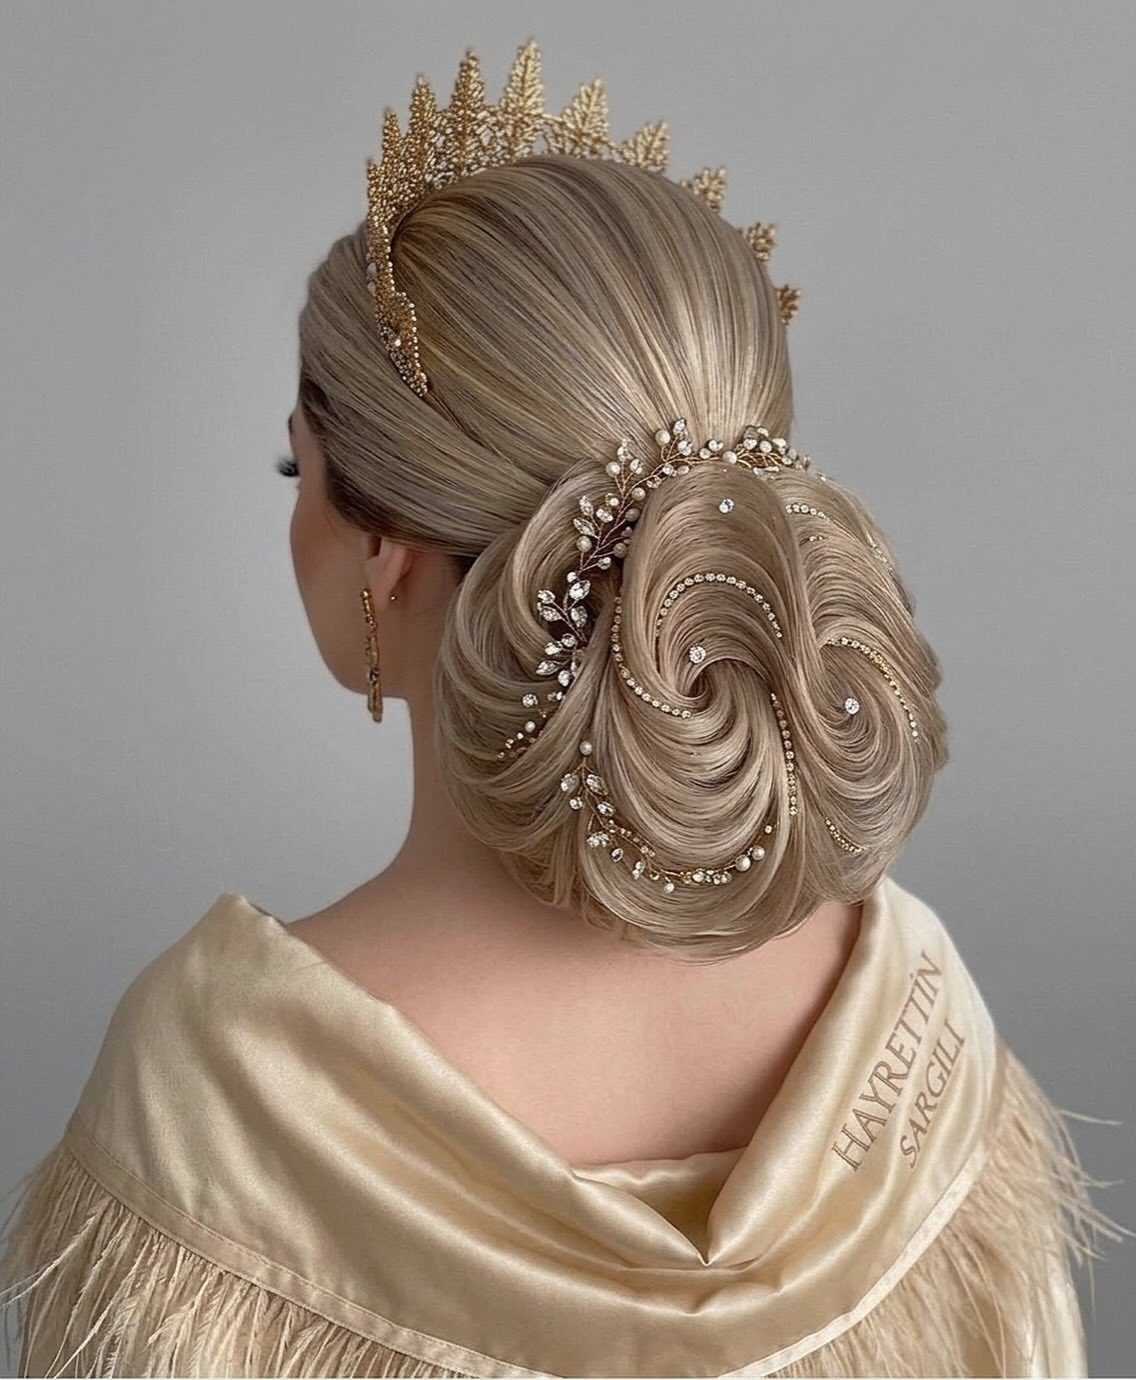
Polish is the whole idea: a smooth low chignon with curled loops, and crystal pins placed through it. The sparkle sits in the hair itself, so a heavy necklace may be too much.
Add a crown and the updo moves from polished to properly formal. For a quieter version, I’d keep the crystals and skip the crown.
6. Half-Up, Half-Down
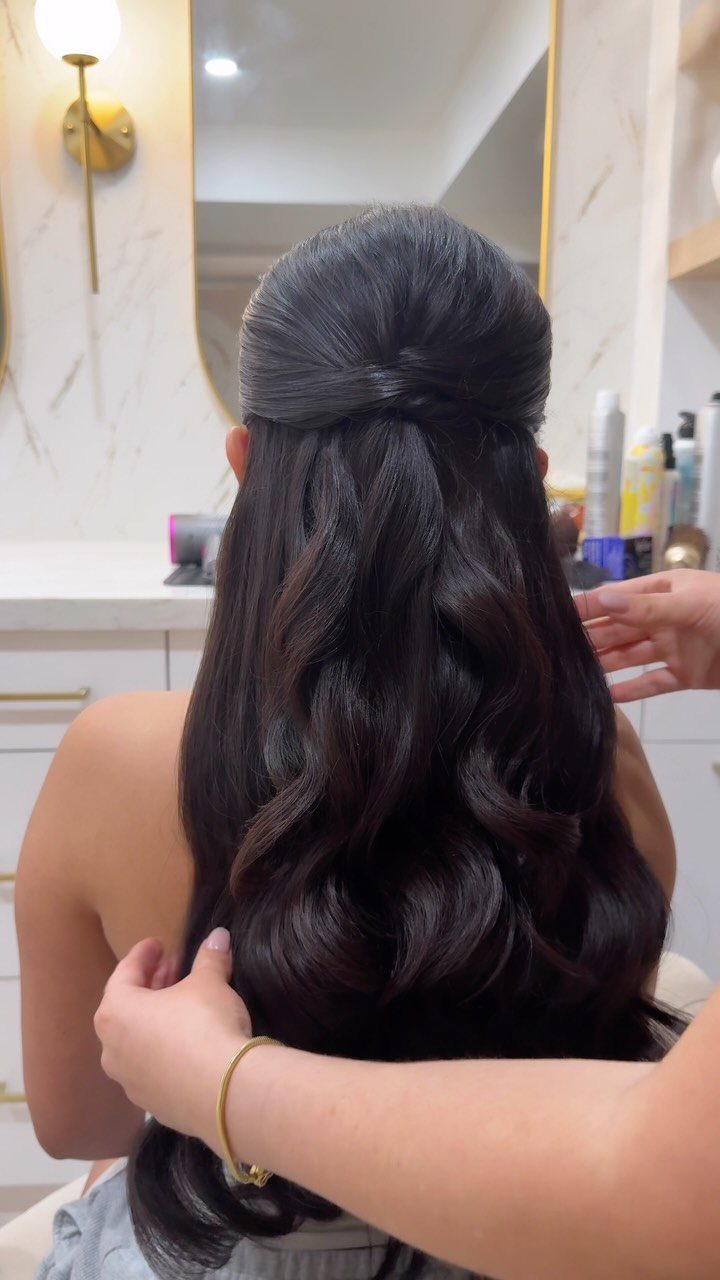
Dark, wavy hair pulled back at the top while the rest falls loose is the simplest way to keep length and still get hair off the face.
Pin or twist the upper section back, then let the loose waves below carry the look.
Choose the gathering point with your stylist, since that placement changes how the whole look reads.
7. French Twist
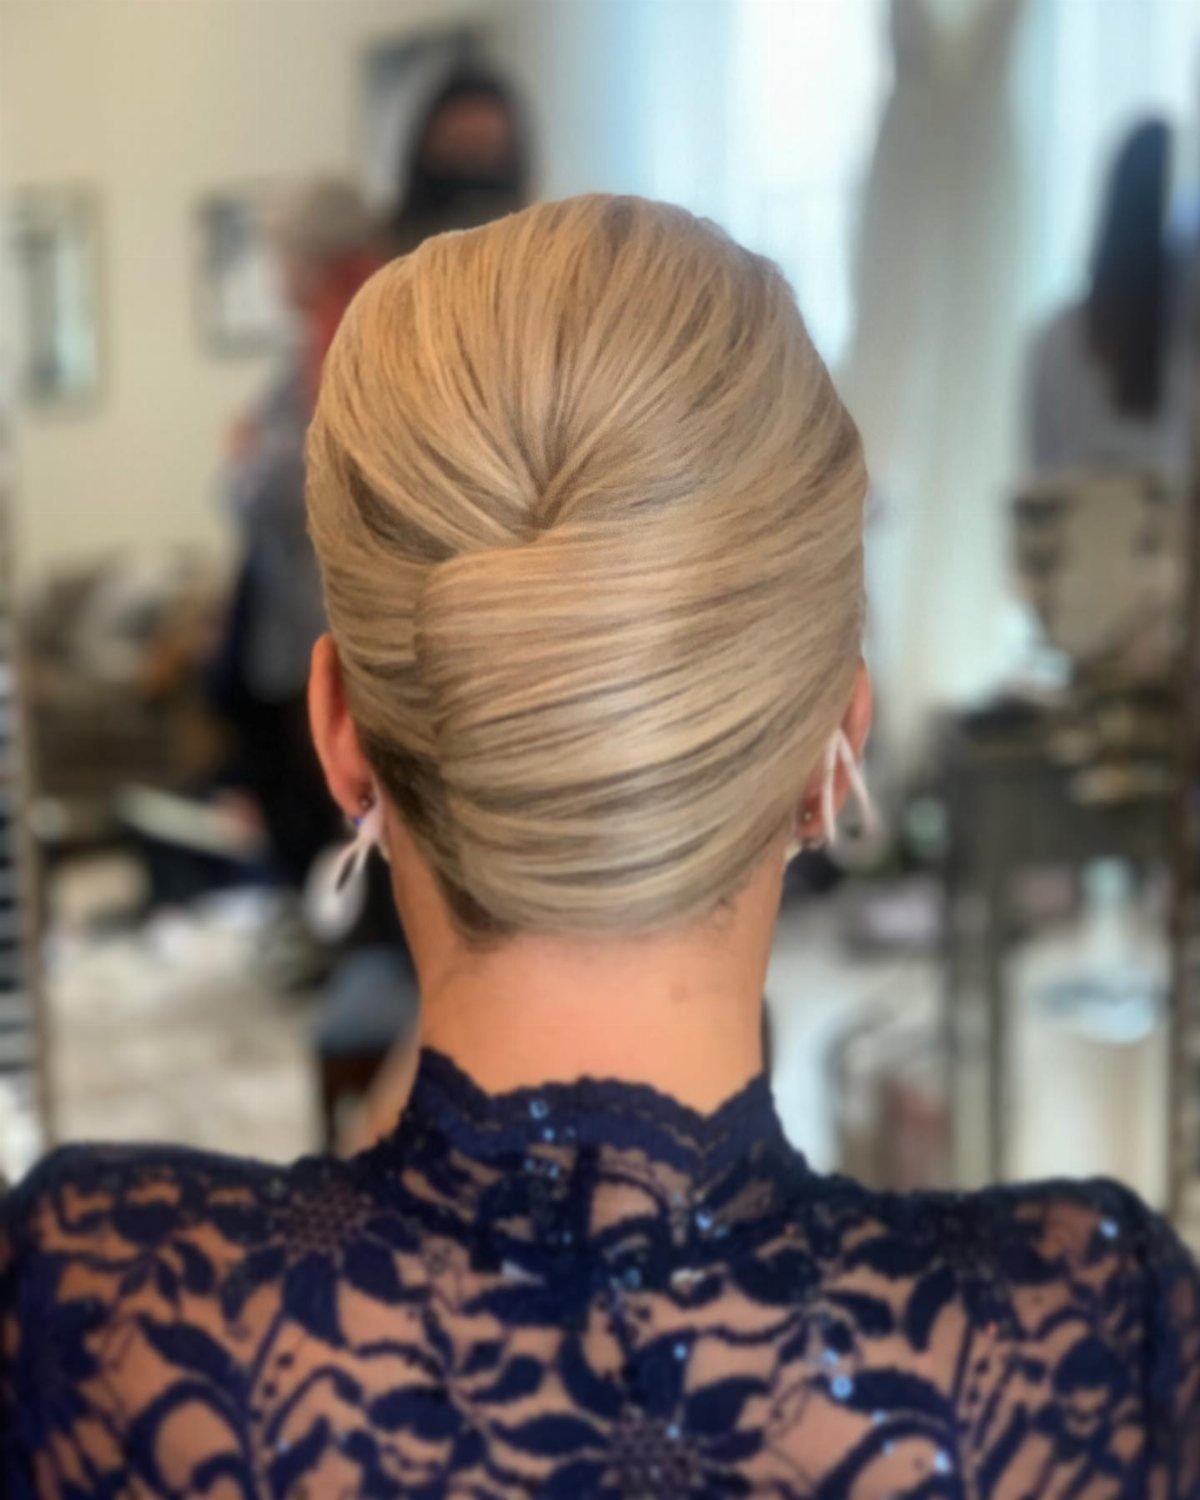
Rolled vertically and pinned along the back of the head, a French twist leaves the nape and neck clean, which pairs well with a lace back or a low neckline. The finish is smooth and tidy.
Mid-length hair can fill the roll without much trouble. I’d bring a back-view photo to your trial, because the line of pins down the center is where this look succeeds or fails.
8. Low Bun
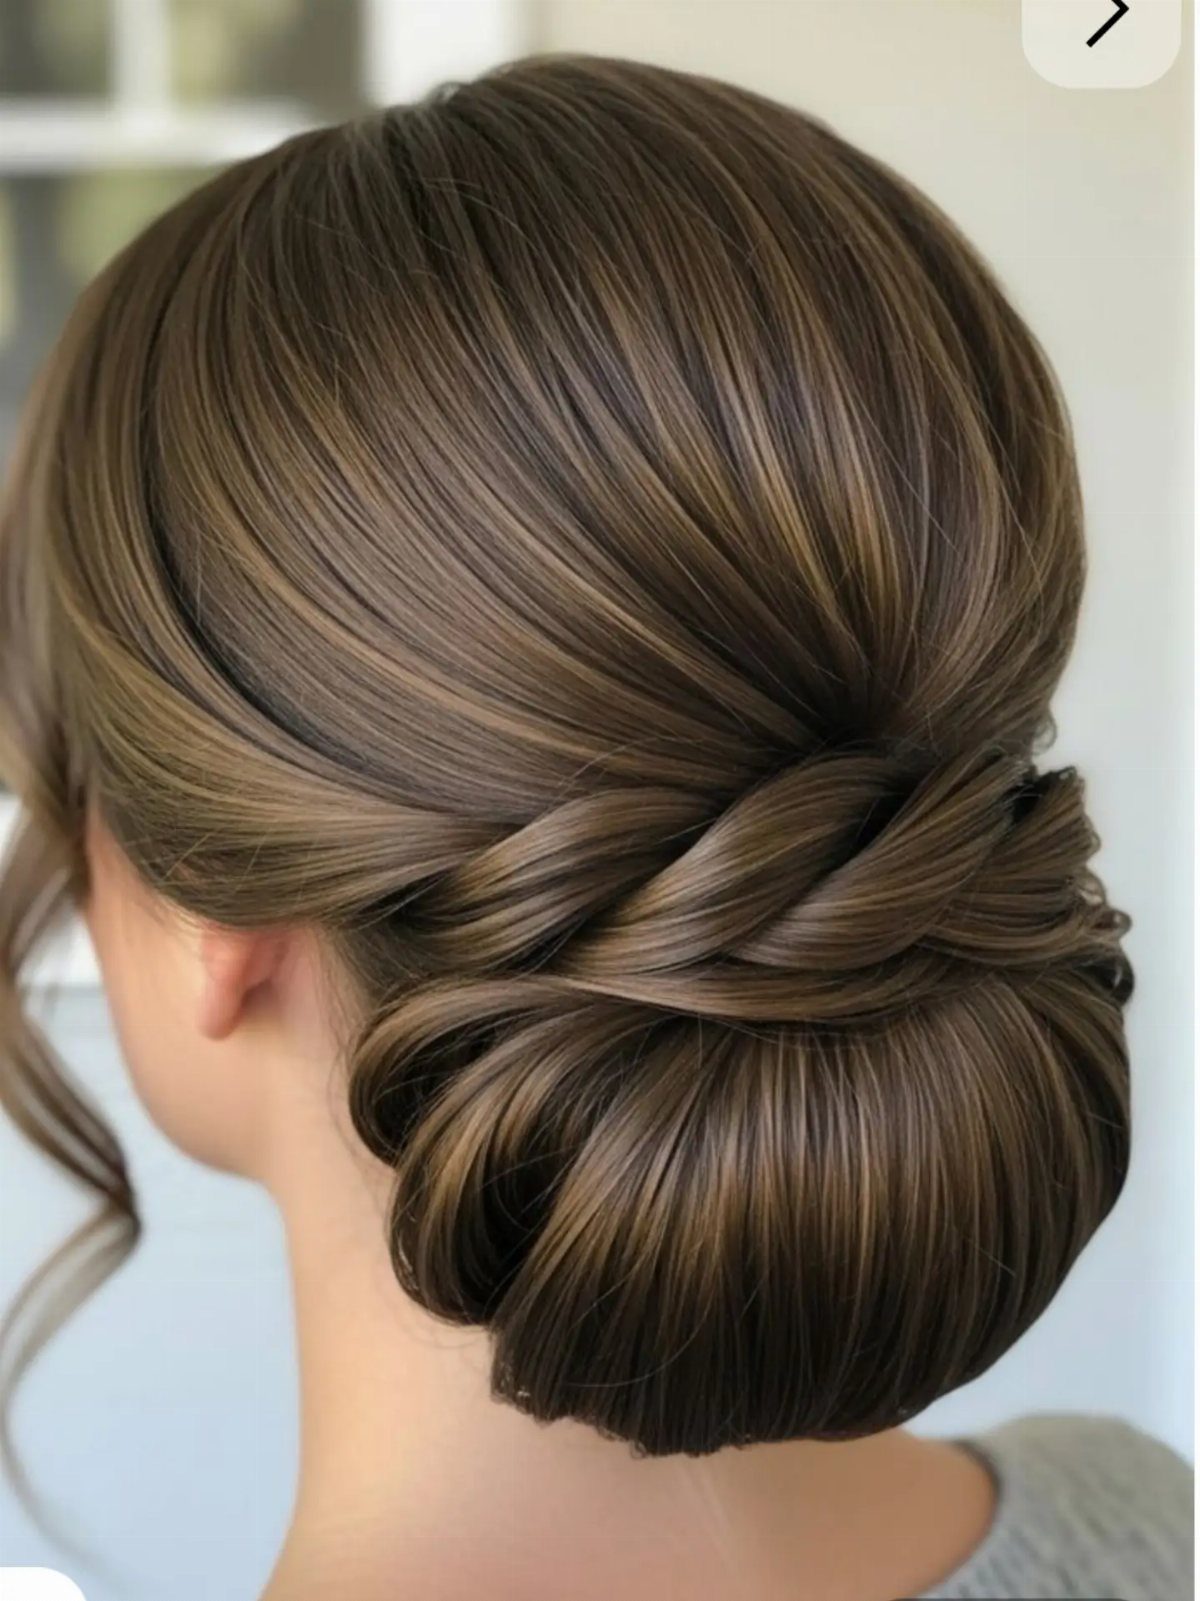
A twisted section wrapped across the nape gives this low bun a bit of detail without adding bulk.
A low bun can go sleek and polished, with a tight center part and smooth sides, or soft and textured, with a few loose pieces left around the face.
Both are easy to ask a stylist for by name, so say which finish you want.
Pick one before your trial, since smooth and loose set up differently. I lean toward the polished version for mid-length hair: the wrap makes the bun look fuller than it is.
9. Braided Low Bun
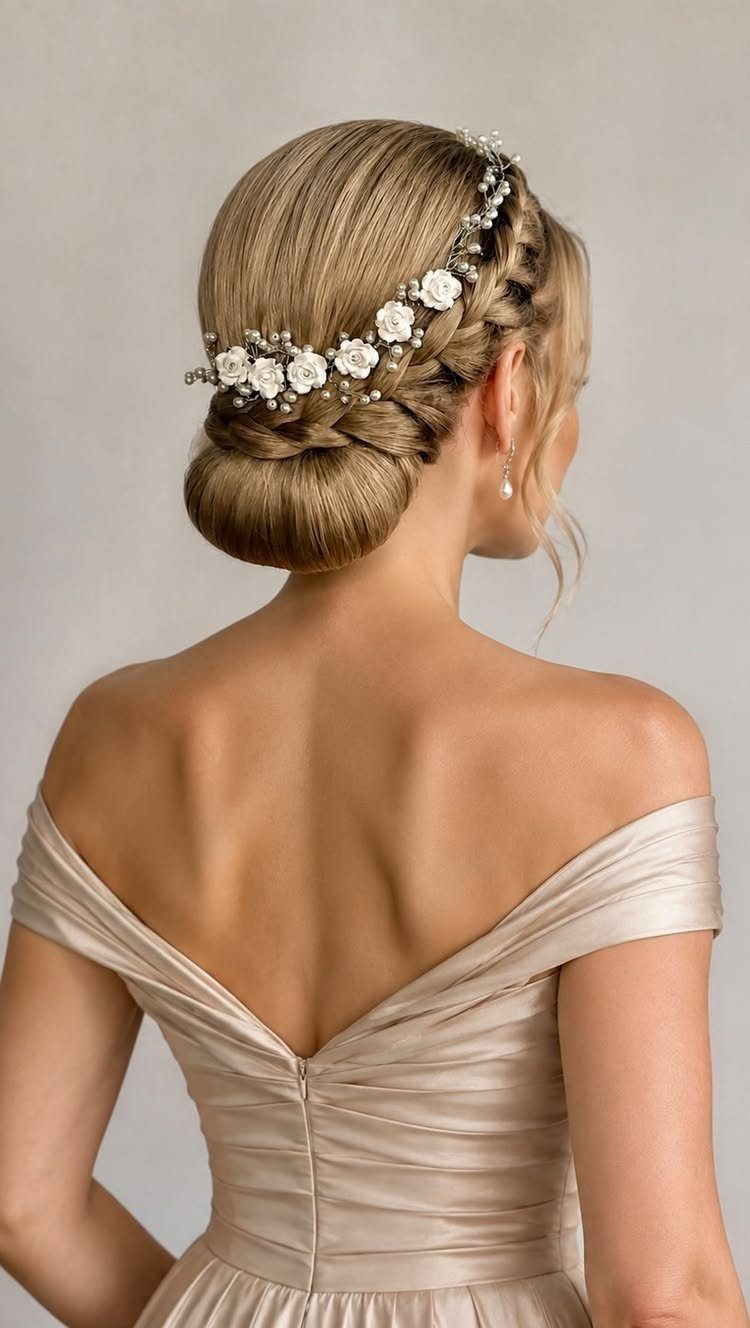
Braiding the hair and coiling it at the nape gives a low bun built-in texture, so the shape needs very little help. Small white floral pins tucked along the braid keep the look light.
An off-the-shoulder neckline leaves the bun fully visible from behind, and that’s the view I’d plan around. Ask your stylist where the braid ends and the bun begins; that join is where pins or flowers sit best.
10. Side-Swept Curls
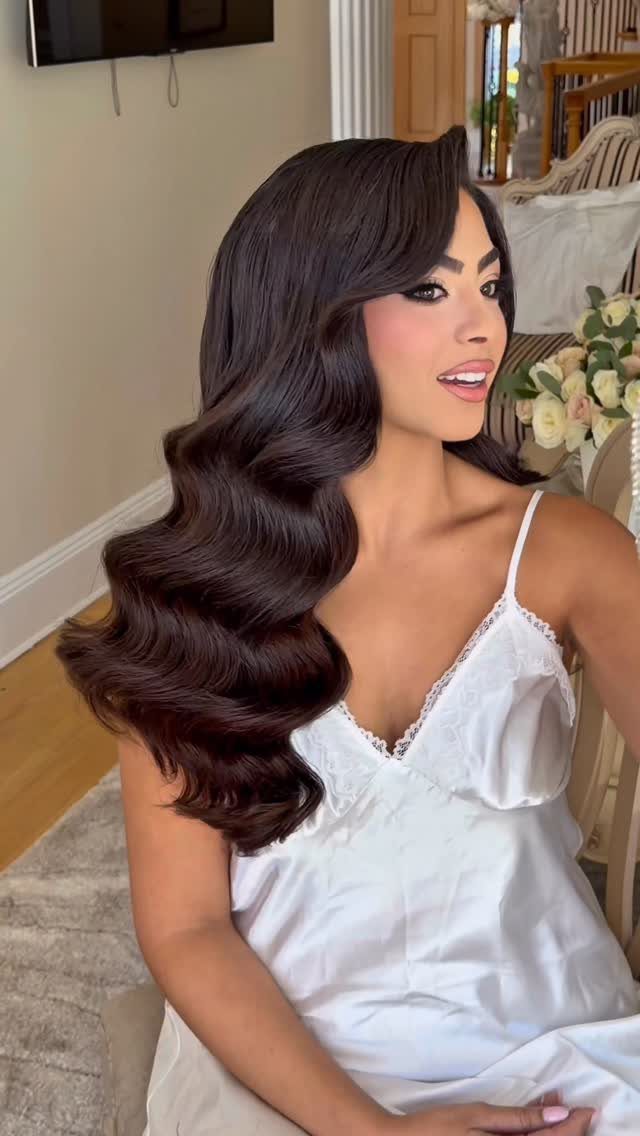
All the hair sweeps over one shoulder, which puts the waves on display and leaves the other side of the neck bare. Glossy, defined waves suit a simple slip dress, since the hair is the only thing doing the work.
For mid-length hair, I’d ask for the curls to start lower on the head so they reach the shoulder. Choose your side based on your part, so the sweep falls with your hair and not against it.
11. Shine-Set Bouncy Blowout
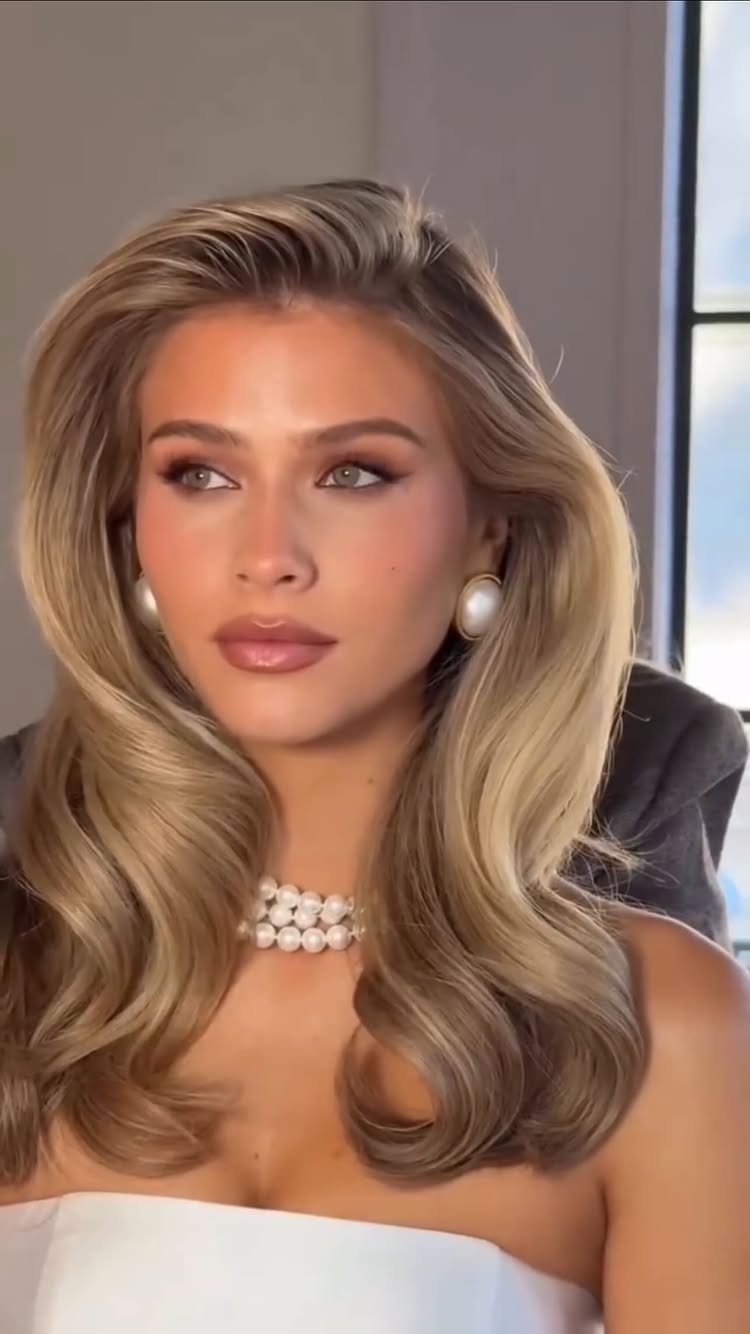
A blowout with curled ends gives shoulder-length hair a smooth, bouncy finish with lift at the roots. It’s one of the easiest ways to look polished without a single pin.
Pearls pair well with the clean lines of this style, and a strapless neckline lets the ends sit on show.
I’d ask for the bounce to be brushed out softly, not stiff, so it looks like hair and not a helmet.
12. Side-Part Blowout with Hair Down
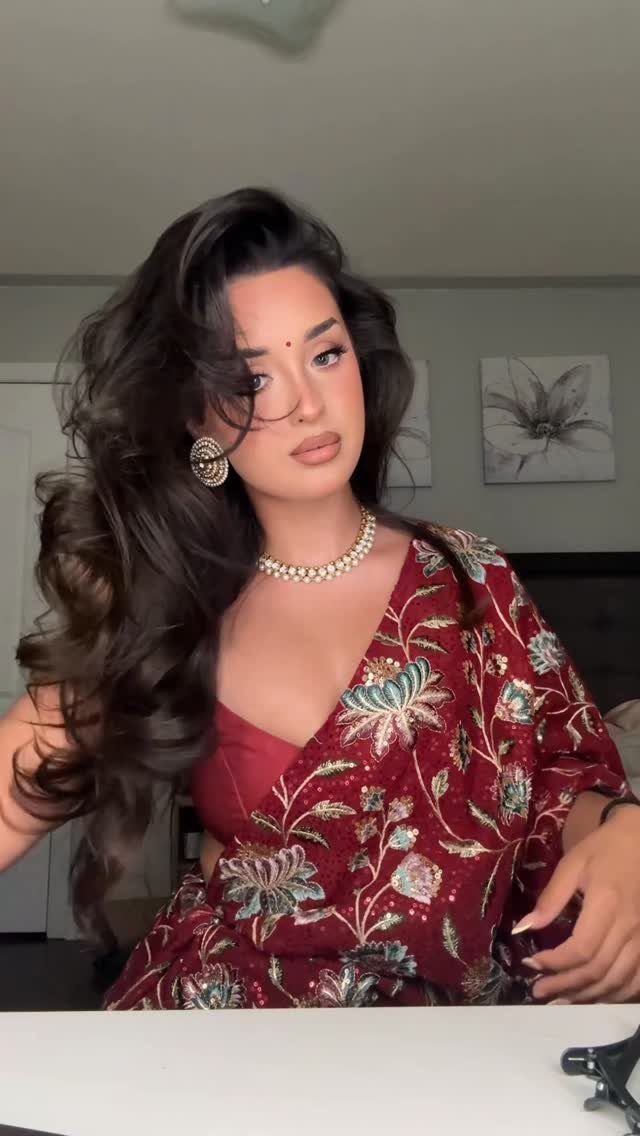
Hair stays down, parted to one side and blown out with volume. A side-part blowout holds up on the blowout alone, with no pins or braids to keep in place.
The side part adds shape on its own, so I’d skip heavy accessories and let the volume lead.
Jewelry shows well against loose hair, and a bold outfit color stands out without competing. Ask your stylist to set the part during your trial, since it’s the first thing people notice.
13. Romantic Curly Updo
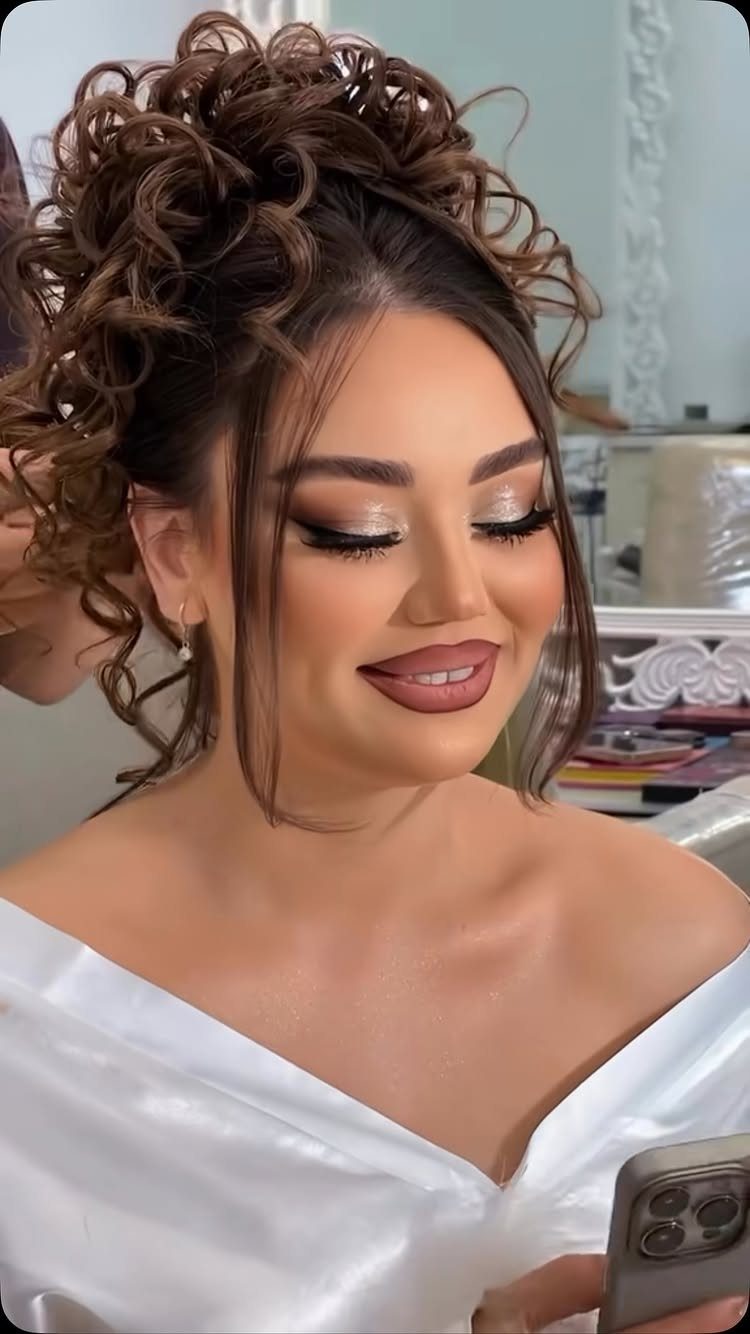
Curly hair gets pinned up loosely, letting the curl pattern shape the whole structure instead of smoothing it out. A few face-framing pieces stay free or get pulled out after pinning.
If your hair holds a natural curl or you’ve curled it beforehand, this reads as effortless without looking undone. The texture does most of the work, so styling time stays short once the curls are set.
Ask for light pinning that respects the volume. Too much tension flattens the curls and loses the softness that makes this one work.
14. Elegant Low Chignon
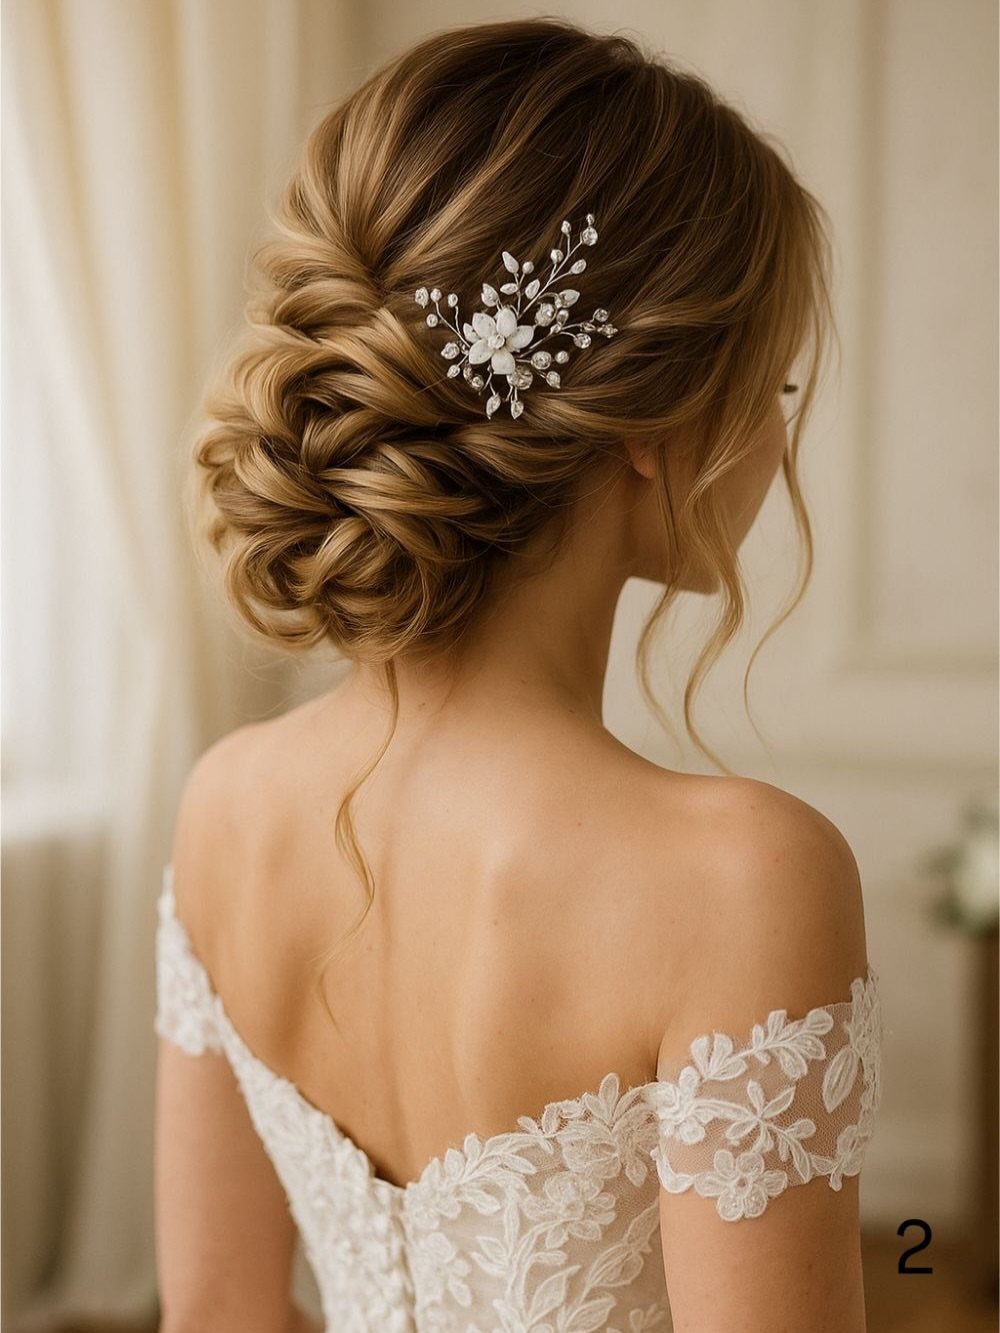
2 braids start at the temples and meet at the nape, where the rest of the hair twists into a low, rounded bun. The braided sides give a vintage structure without reading as overly formal.
Mid-length hair fits this one well since the bun sits low and the braids add enough detail to fill the upper half. A floral piece or small comb tucks into the bun where the braids end.
If you’re wearing a dress with lace or embroidery, the braided frame picks up that same handcrafted feel.
15. Loose Romantic Bun
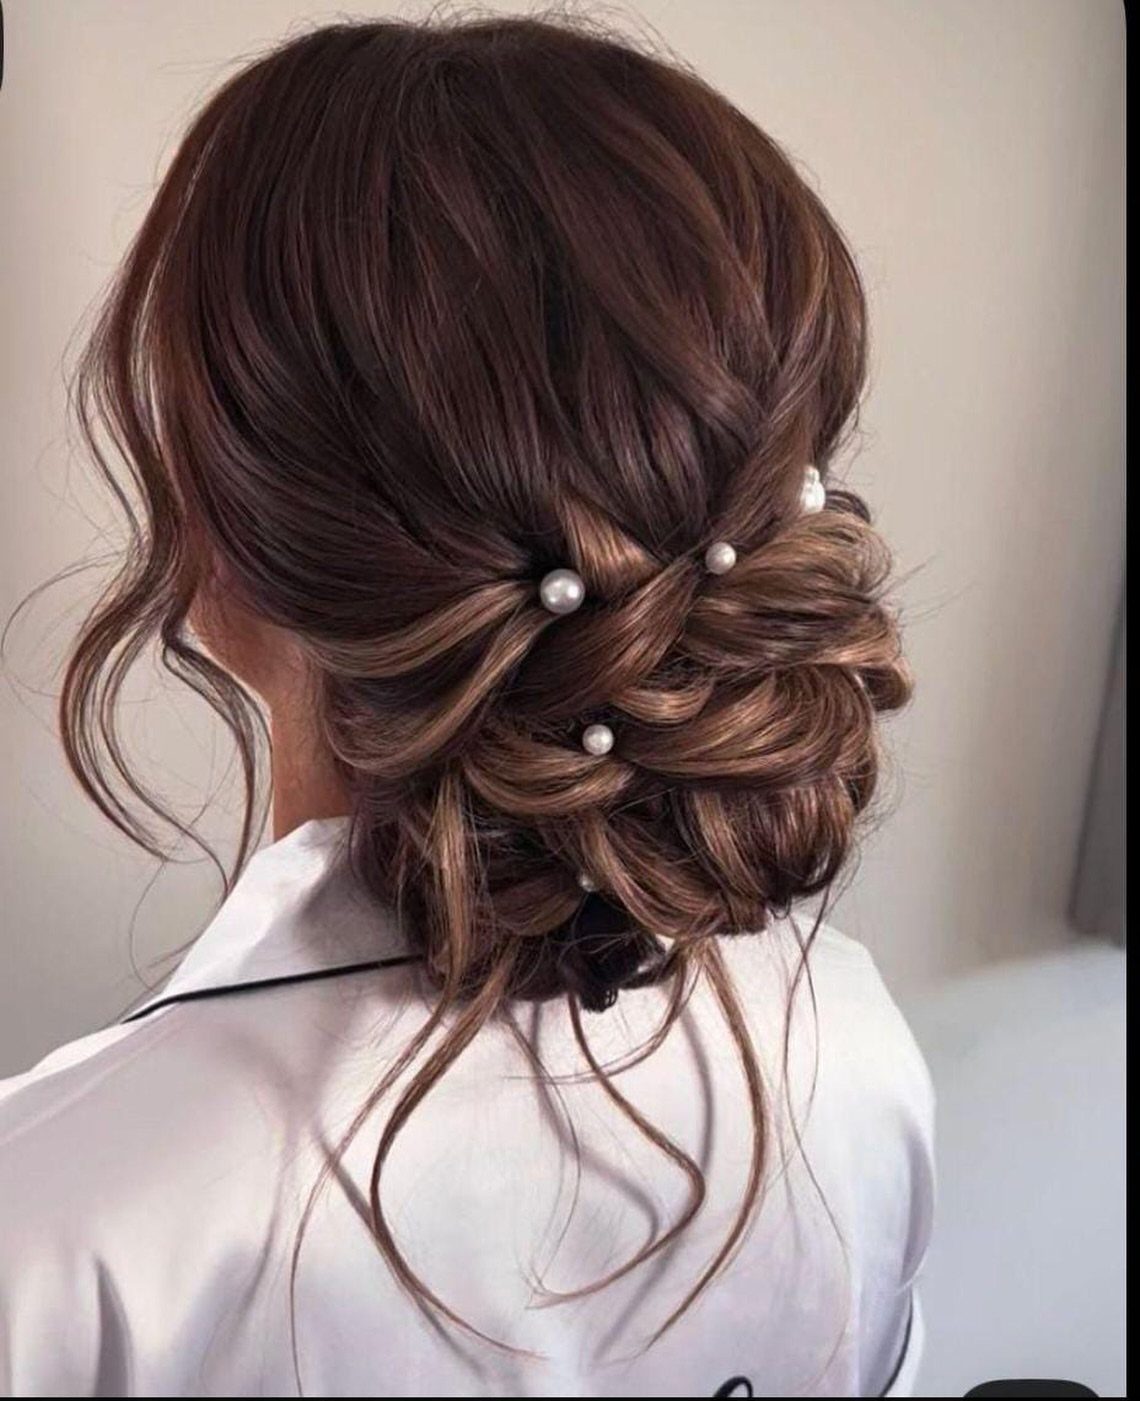
The bun sits low and soft, with sections loosely twisted rather than tightly coiled. Tendrils frame the face, and the whole shape feels lived-in instead of set.
Pearl pins or small clips add detail without covering the texture. Mid-length hair works here because the shorter pieces naturally fall free, giving you those tendrils without needing to pull them out.
This holds well through a ceremony but softens further as the day goes on, which suits the look. If you want something polished that still moves, this splits the difference.
16. Soft Bridal Waves
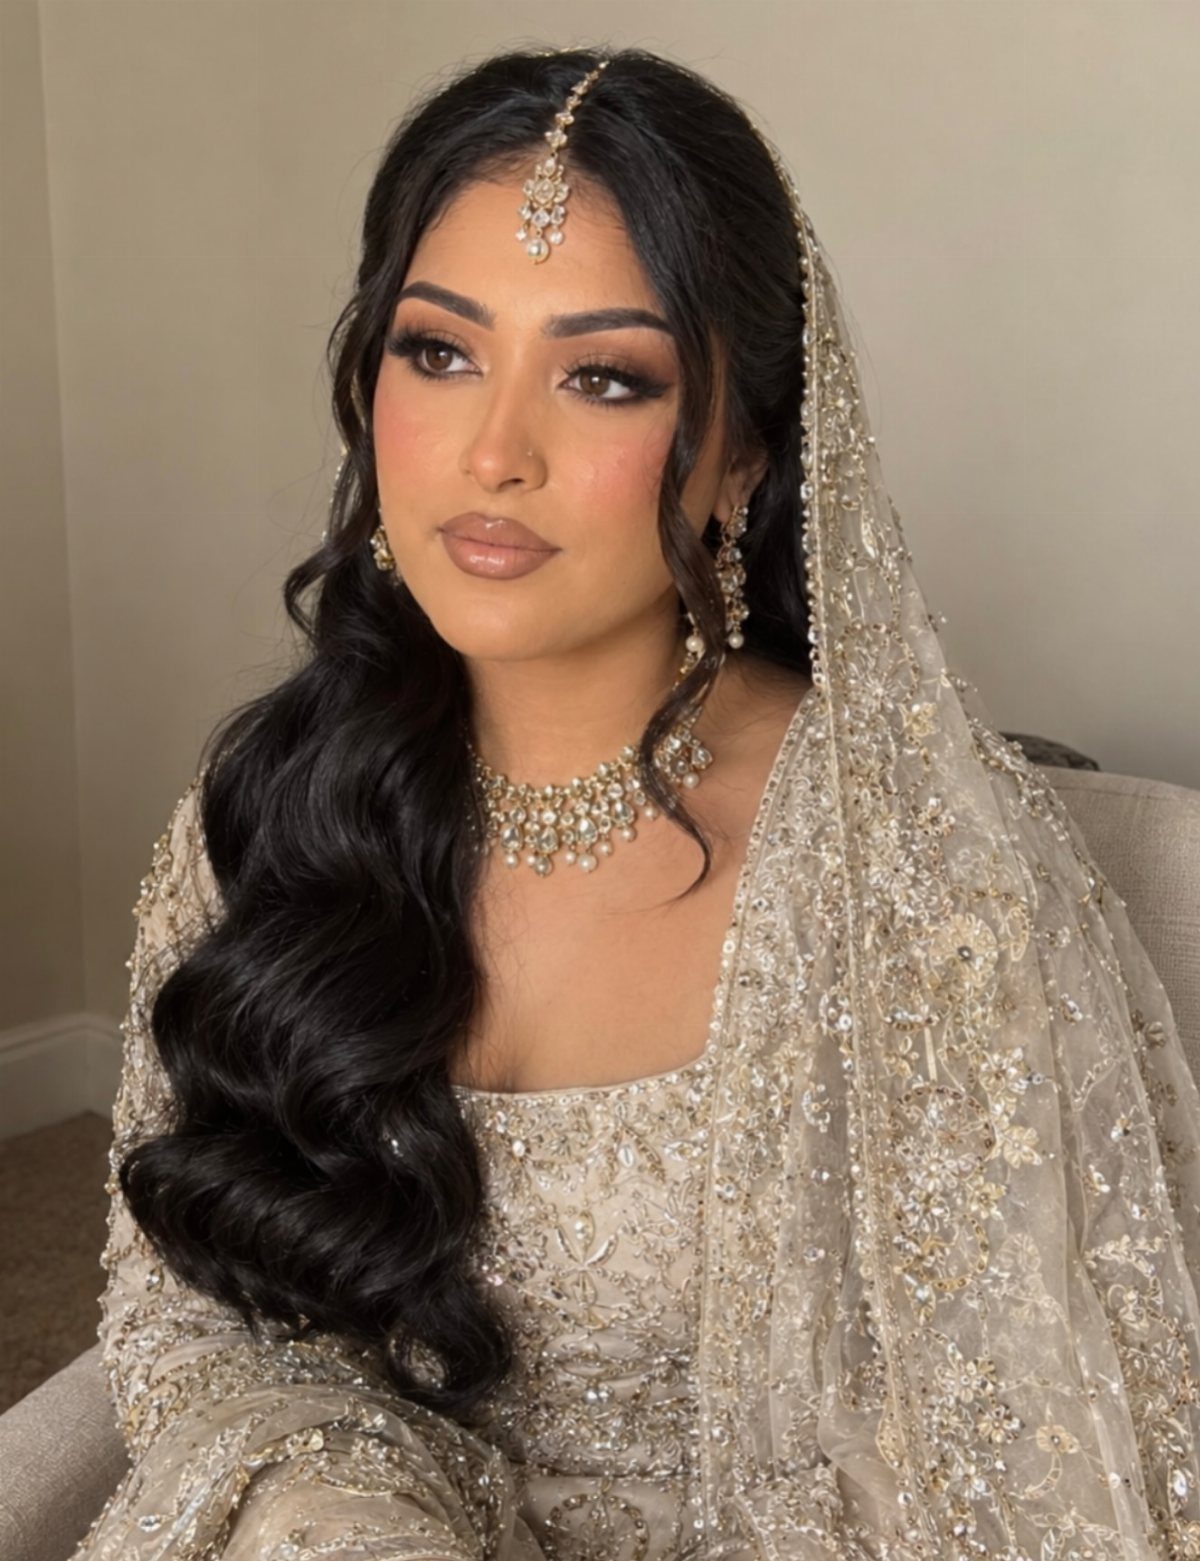
Hair stays down and gets curled into soft, open waves that move instead of holding a rigid shape. The part can sit center or slightly off, and the waves start mid-shaft so the roots stay smooth.
If you’re wearing your hair down most days, this feels familiar and photographs well without looking overly styled. A veil or hairpiece sits easily at the crown or back.
Ask for a curl that releases rather than a tight set. The wave should bend, not spiral, and the finish stays touchable instead of sprayed stiff.
17. Hollywood Waves
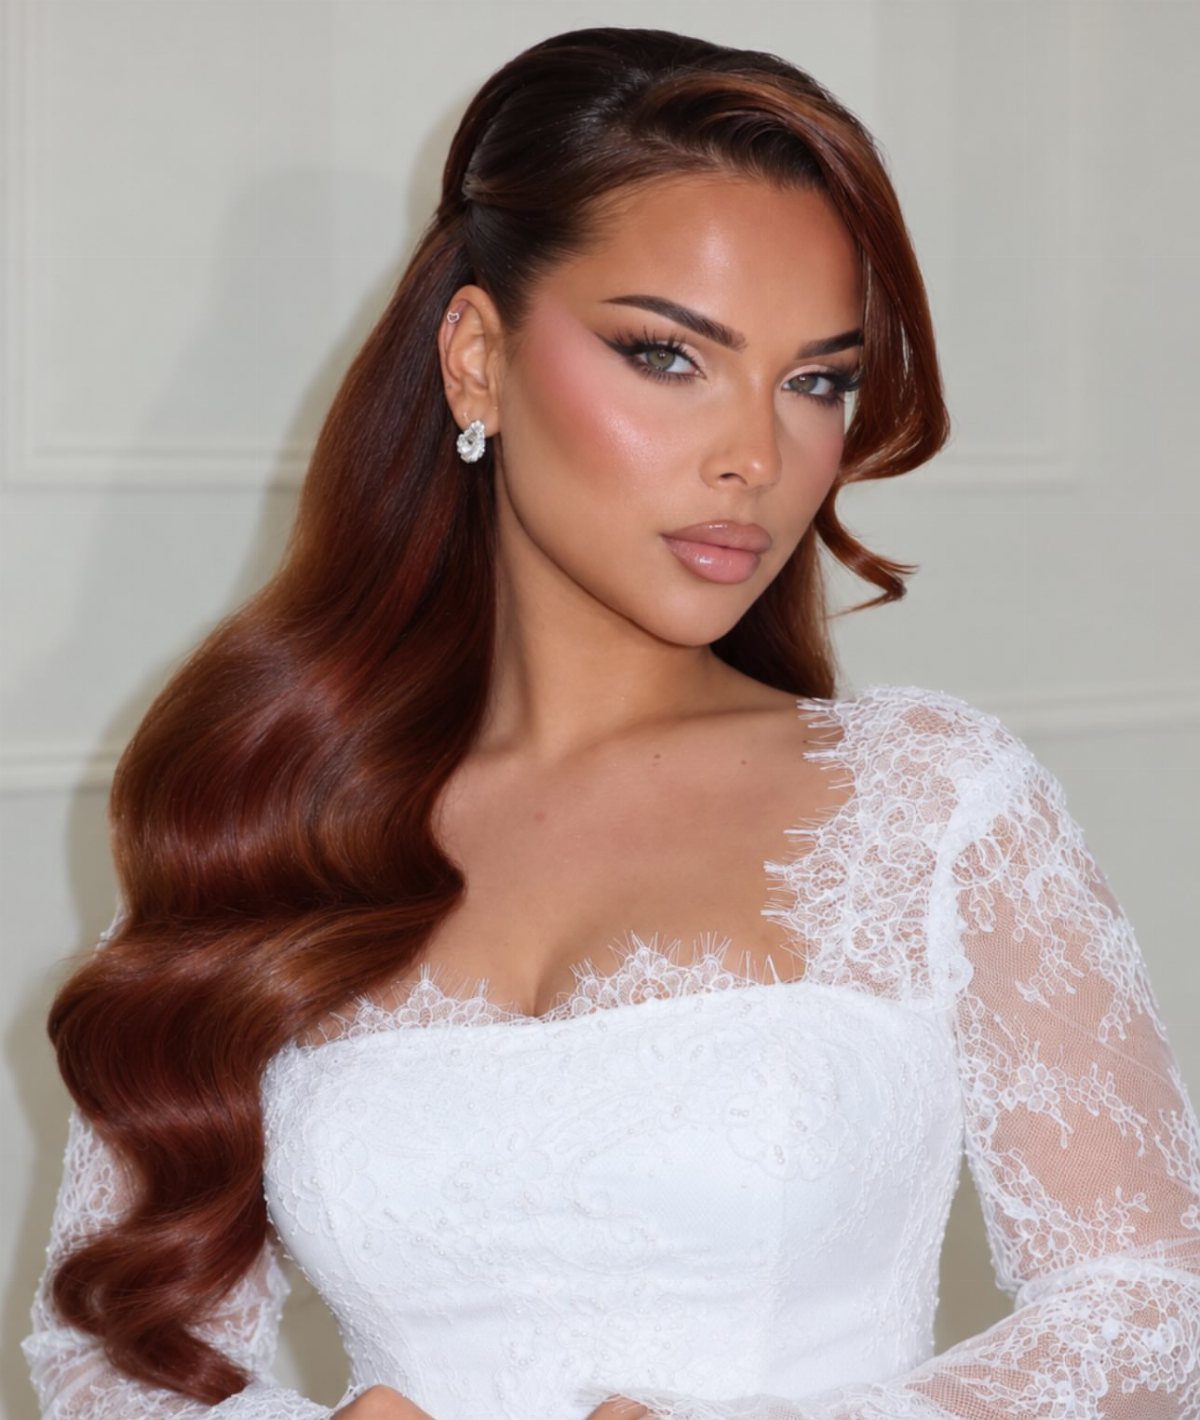
A deep side part and smooth, S-shaped waves create a classic red-carpet look with enough structure to hold through hours of photos. The waves sit close to the head and stay defined instead of relaxed.
This suits polished gowns and long veils, and photographs especially well from the side. The shine and control give it a formal tone, so if your wedding leans casual this may read too done.
Mid-length hair can carry this if the waves start at the ear and the part sits deep enough to show the shape. Ask for a wet-set or hot-tool finish depending on your stylist’s method.
18. Braided Crown Half-Up
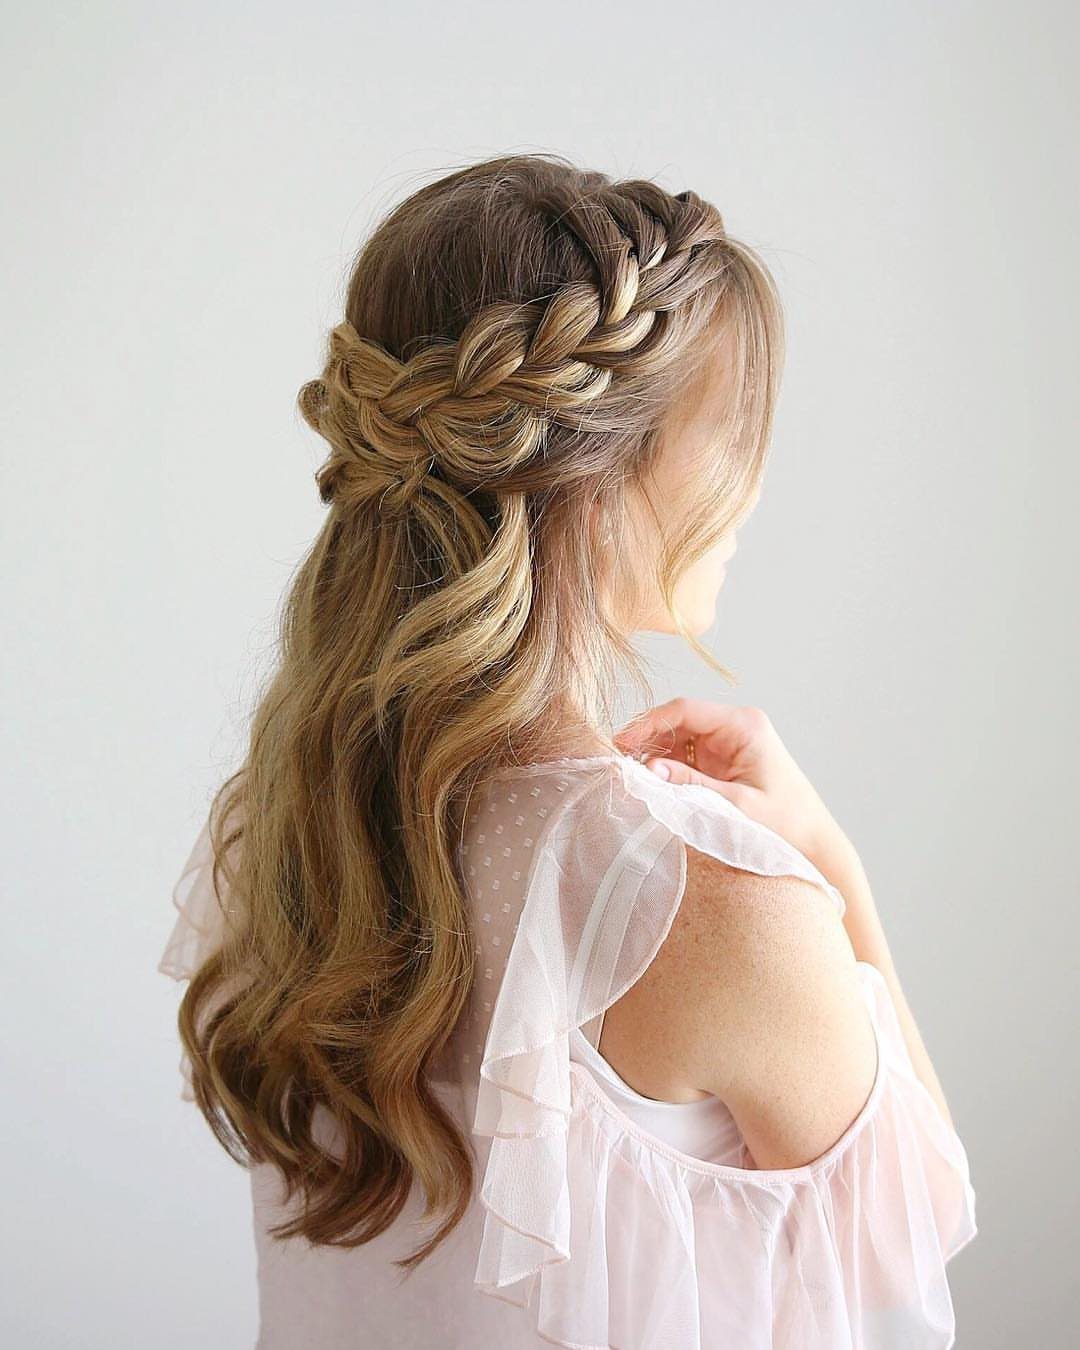
A braid runs across the crown from one side to the other, joining a gathered section at the back while the rest of the hair falls in loose waves. The braid adds structure without pulling all the hair up.
This balances coverage and movement, so if you want your hair mostly down but off your face, the braid does that job. Mid-length hair shows the waves without needing much length past the shoulders.
If you’re adding a veil, it can pin under the braid or behind the gathered section. The look stays soft but holds its shape through the ceremony.
Match Style to Hair and Dress
Start with your hair, not the photo. Thick hair packs a bun or braid with ease, though it wants sturdier pins to stay put; fine hair tends to look better in a smaller shape or with extra hair added in.
Strand thickness is a separate question. Fine strands slip and need more grip, and coarse strands hold a shape but can feel bulky.
Texture and layers come next. Short layers may not reach the spot where a style anchors, so ask your stylist to check before you commit to a reference photo.
Then look at the dress, the setting and the weather.
Plan around the length of the day: a long reception with dancing is harder on a style than a short ceremony, and I’d give comfort as much weight as looks, since a style you feel for hours isn’t doing its job.
Trial, Preparation, and Upkeep
Take your saved photos and the veil itself along to the trial.
Check comfort as well as looks. Pay attention to pin pressure, tightness at the hairline and any pulling, and watch where the loose strands land.
If the day is likely to be hot or humid, raise it with the stylist, who can tell you how the style is likely to react.
Wash your hair the day before, because slightly textured hair holds a style better. Use a heat protectant if curling irons or straighteners are involved, and finish with spray.
Budget 60 to 90 minutes for styling. A small kit of pins, mini hairspray and a comb is worth keeping close.
Hair Length, Weight, and Extensions
Medium length can’t always deliver what a reference photo shows, since some looks rely on more hair.
A stylist’s answer about whether your mid-length hair can carry the look shows whether the style or the hair should change.
Short layers can also change where pins land and how the proportions read. If you suspect that’s your situation, raise it early.
More length isn’t automatically easier. Added weight can affect how well a style holds, and a stylist may suggest subtle trimming or layers to help.
Frequently Asked Questions
Is medium-length hair enough for a bridal updo?
Yes, mid-length hair handles most updos. Low buns, chignons, braided buns and French twists all work, while bigger shapes like halos or full fishtail braids may need added hair.
Ask your stylist to confirm that your shortest layers are long enough to reach the spot where the style gets pinned.
Do brides with medium hair need extensions?
Not necessarily. Extensions come down to 3 things: the style you picked, how much hair you have and how exact a match to your reference photo you want.
A good question for your stylist: can my hair carry this look? If not, either the style or the hair has to change, and extra length isn’t automatically easier since added weight can affect hold.
Is it better to wear medium hair up or down?
Neither wins.
An updo keeps everything contained; loose and half-up styles give you swing and movement instead. For me, the deciding factor is how long the day runs: hours of dancing wear down a style far faster than a quick ceremony does.
What is the best wedding hairstyle for medium hair?
Loose curls, low buns, braided updos and half-up styles are the popular picks, and all of them are comfortable to wear.
Narrow the choice by your hair’s thickness, texture and layers first, then by your dress, the setting and the weather. A trial with your stylist settles the final call.
How early should I test my bridal hairstyle?
Book it with enough room left to adjust the plan and repeat the trial if the first run falls flat.
Take your saved photos to the trial and pay attention to how the pins feel, whether the hairline is tight and if anything tugs.
Can natural curls be worn naturally for a wedding?
Yes. Curls, coils and waves can keep their natural pattern, but they spring up shorter once dry, so tell your stylist how you usually wear them and plan for that shrinkage.
Low-tension updos and half-up styles keep curls secure, and light pinning matters because heavy tension flattens the curl and the softness that goes with it.
How do I make a bridal hairstyle last?
How long a style lasts comes down to 3 things: your hair’s texture, how it’s prepped and how the stylist builds it.
Shampoo the day before, because hair with a little grit holds better than squeaky-clean strands; add heat protectant ahead of any curling iron or flat iron, and seal the finished style with spray.
Find out how your stylist plans to anchor everything, and stash extra pins, a travel-size hairspray and a comb in your bag.
Should I bring my veil to the hair trial?
Yes, and pack the veil along with every other piece going in your hair, such as combs or a headband.
They change where the hair gets gathered and how securely it needs to be pinned. Placement is much easier to settle while the veil is in your hands.
Is it necessary to get your hair professionally done or can you DIY your hairstyle?
A stylist isn’t required, but one helps with intricate looks that stay put all day.
A pro can also match a style to your face shape, texture and length, which saves you the guesswork. If you book one, schedule a trial so you can finalize the style and test it before the wedding.
Should I curl or straighten my hair for a wedding?
Both look beautiful. A smooth blowout with curled ends sits between the two, giving lift and bounce without a single pin.
Are accessories good for wedding hairstyles?
Yes, when they suit the style.
Pearl pins, floral clips and decorative combs can match your wedding theme. Keep them light enough that they don’t cover the texture, and remember that adding a crown to a crystal-pinned updo pushes it from polished to very formal.