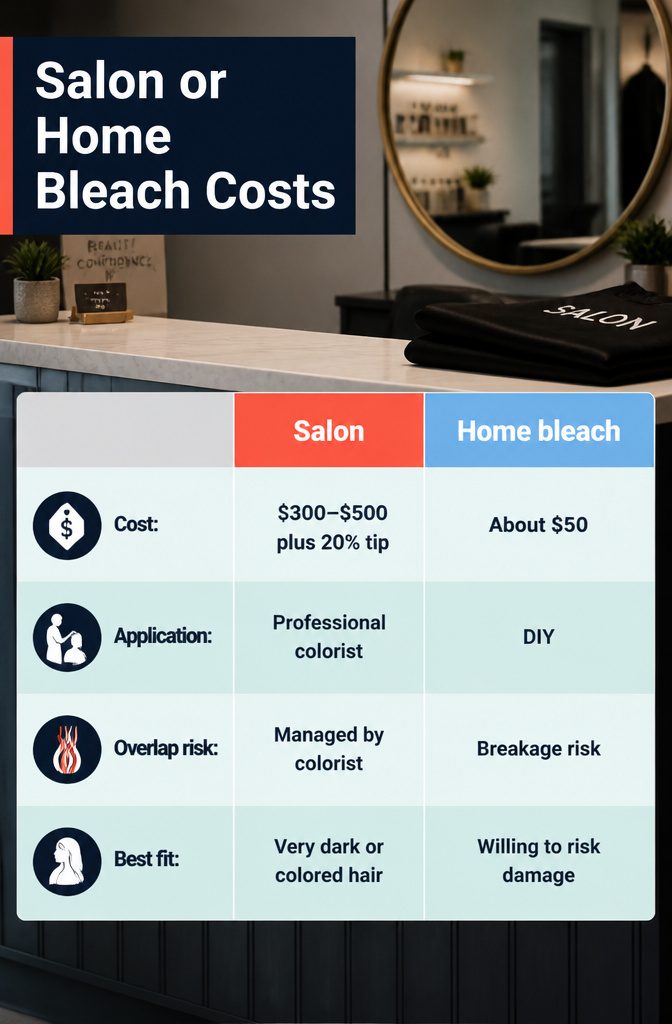
Bleaching your own hair costs about $50 in materials, against $300 to $500 plus a 20% tip at a salon, but the rinse-and-tone stage is where people slip.
Dark hair rarely reaches pale blonde in one round, and overlap on already-lightened sections is what causes breakage. Plan on two rounds about two weeks apart.
1. Prepare Hair and Workspace
The night before you bleach, apply coconut oil to your hair and sleep on it. If your oil is solid, scoop some into a bowl and microwave it until it becomes liquid and easy to work through.
About 2 tablespoons covers thick hair; use less if yours is finer. The oil stays in during bleaching to help protect the strands.
The day of, put on an old shirt you won’t mind staining and pull on gloves.
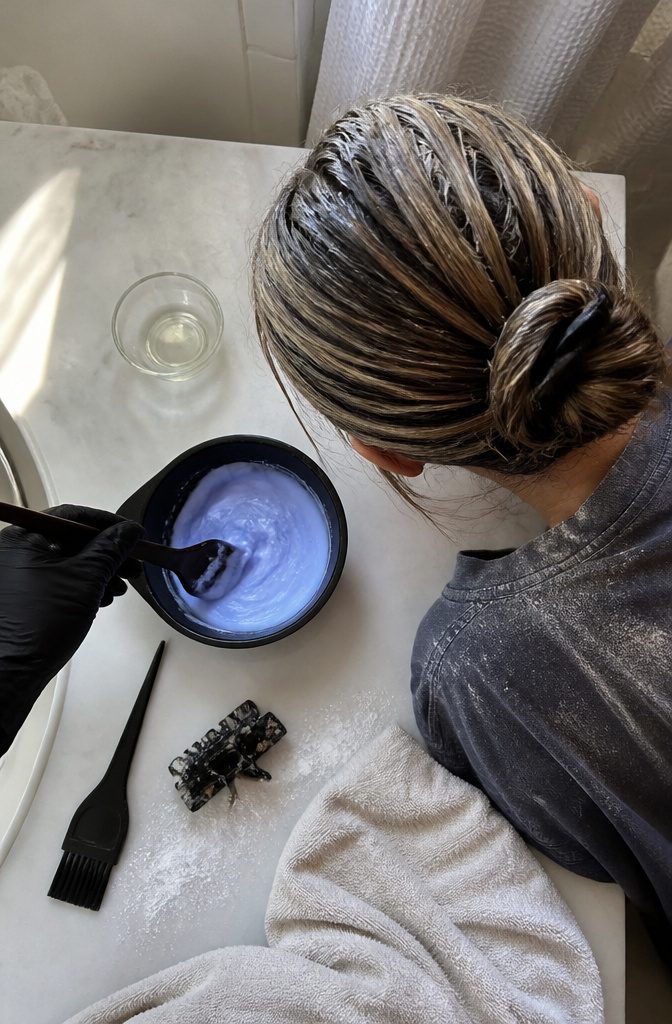
Mix bleach powder and developer according to the product directions. One approach is a 1:1 ratio with 30 volume developer—6 tablespoons of each, mixed into a bowl.
Another formula uses 1 scoop of powder with 1 ounce of 20 volume cream developer to a pudding consistency, while a third calls for powder and developer at 1:2, aiming for a mayonnaise-like texture.
Thicker hair may need double or triple the amount. Each author’s mix reflects her own product and hair; read your bleach packaging and follow its ratio first.
2. Apply the Bleach
Start at the mid-lengths and ends and save the roots for last, since heat from your scalp makes them lift faster.
Some sources apply bleach to the roots first and work down to the ends, while others recommend beginning about an inch away from the roots and returning to them last because root hair lifts faster from scalp heat.
If you want the most even lift and are willing to take a bit more care, start mid-length and come back to the roots at the end.
If you are dyeing over the bleach anyway and a slight difference in tone will not show, starting at the roots saves time.
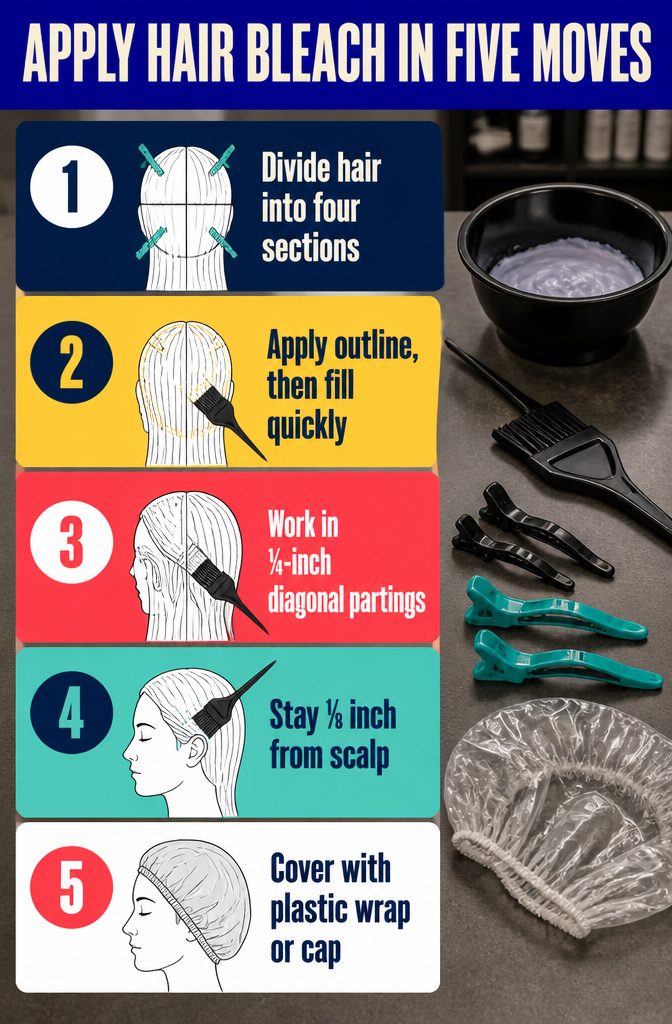
- Divide hair into four sections—down the center vertically, then horizontally above the ears—and clip them.
- Work quickly and apply bleach to the outline of each section first to keep the application neat, then fill in the rest. Only apply to regrowth if you are doing a touch-up; overlap causes uneven lifting or banding.
- Take thin sections—about ¼-inch diagonal partings—and work through each quadrant. Many prefer starting at the bottom back because that hair lifts more slowly, though some start in front to guarantee the face-framing pieces get enough time.
- Stay ⅛ inch away from the scalp if you are sensitive to irritation, and work quickly so timing stays consistent across the head.
- Cover with plastic wrap or a shower cap once application is complete so the bleach does not dry out.
3. Wait and Monitor
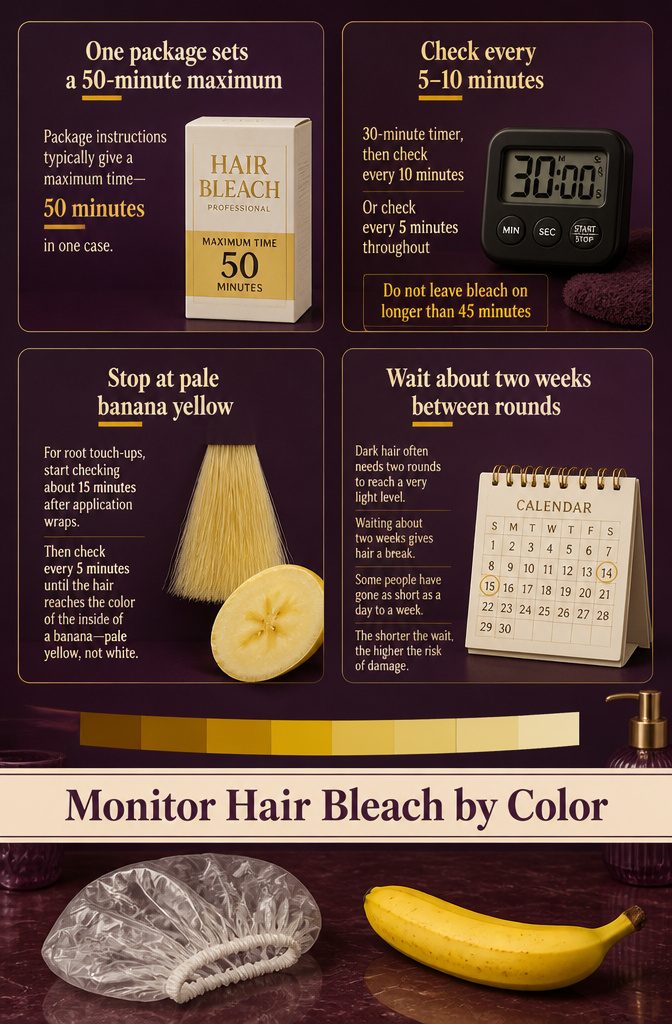
Package instructions typically give a maximum time—50 minutes in one case—but those limits assume starting color and goals that may not match yours. Covering the bleach with a shower cap keeps it from drying out while it works.
Checking by the clock alone is risky. I’d rather watch the hair itself.
One approach sets a 30-minute timer, then checks every 10 minutes until the color looks right. Another checks every 5 minutes throughout the process and warns against leaving bleach on longer than 45 minutes.
For root touch-ups, checking begins about 15 minutes after application wraps, then every 5 minutes until the hair reaches the color of the inside of a banana—pale yellow, not white.
Dark hair often needs two rounds to reach a very light level.
In those cases, waiting about two weeks between applications gives hair a break, though some people have gone as short as a day to a week. The shorter the wait, the higher the risk of damage.
4. Rinse the Bleach Out

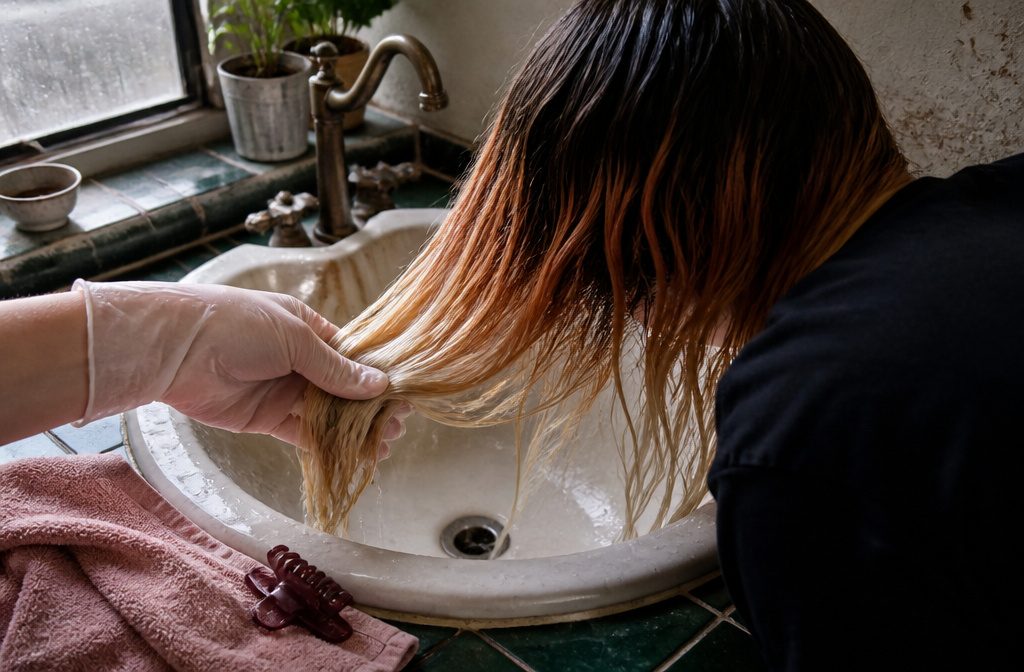
Once the lift looks right, rinse with warm water until it runs clear.
Shampoo to remove all traces of bleach. Rinse with shampoo or purple shampoo and skip conditioner before toning, because conditioner closes the cuticle and makes it harder for toner to take.
Another uses a deep treatment before toning because her ends are porous and she wants the toner to develop evenly across her hair.
Both approaches have logic behind them. If your hair has uneven porosity or very dry ends, conditioning first can help; if you are working with fairly uniform texture and want maximum toner grab, skip it.
Either way, toning and dyeing are separate stages that come after you have rinsed, dried, and assessed the lift.
Is Home Bleach Worth the Risk
Professionals who spoke to Allure were unanimous: skip home bleach.
Colorists pointed to overlap on previously bleached sections, accidental frying during root touch-ups, and the close attention it takes to keep bleach from going sideways. One colorist put it plainly:
When you bleach your own hair, it’s almost impossible to not overlap on already bleached hair, which means you could have a lot of breakages, it’s just not worth the risk.
— Allure
That risk matters most if your hair has been previously colored, especially if it’s very dark. Lifting that much pigment at home is a job for someone who knows what they’re watching for.
The cost difference, though, is hard to ignore. Salon bleach and dye visits run $300 to $500 plus a 20% tip, while the materials for home bleaching come in around $50.
One blogger who has bleached her own hair for years frames it as a personal calculation: she goes in knowing her hair could go wrong, but she’s willing to take that chance.
If you don’t share that "it’s just hair" mindset, the salon is the safer bet.
Your Starting Level and Lift
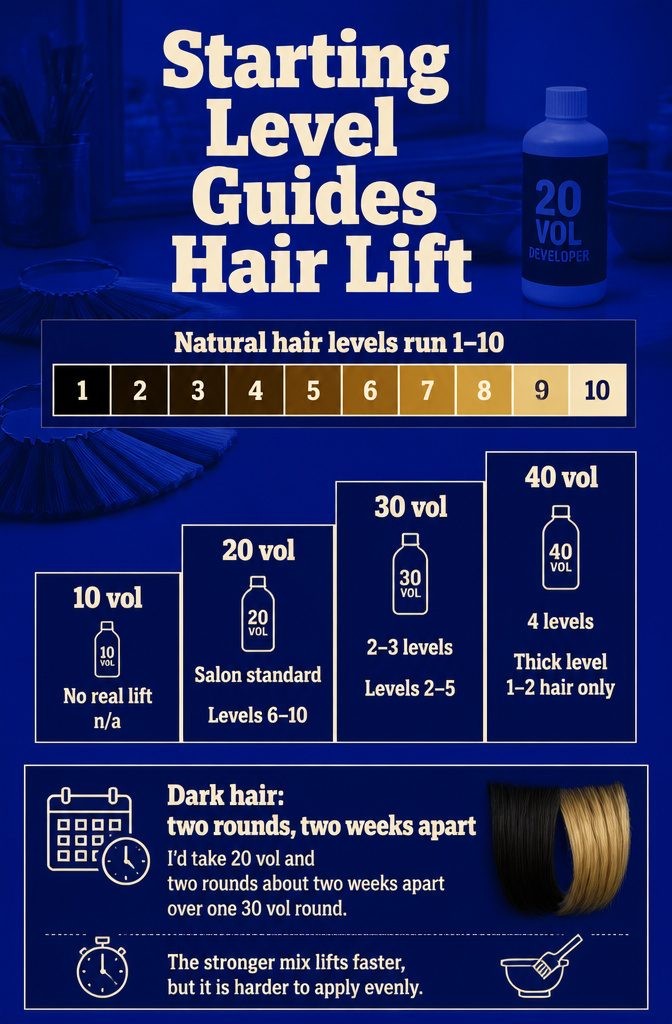
Natural color runs from level 1 (black) to level 10 (very light blonde), and dark hair generally cannot reach very light in one round.
A level 5/6 reached a 10 in two sessions. Developer advice shifts with your starting level:
| Developer | Lift | Suggested for |
|---|---|---|
| 10 vol | No real lift | n/a |
| 20 vol | Salon standard | Levels 6–10 |
| 30 vol | 2–3 levels | Levels 2–5 |
| 40 vol | 4 levels | Thick level 1–2 hair only |
On dark hair, I’d take 20 vol and two rounds about two weeks apart over one 30 vol round. The stronger mix lifts faster, but it is harder to apply evenly.
Tools and a Strand Test
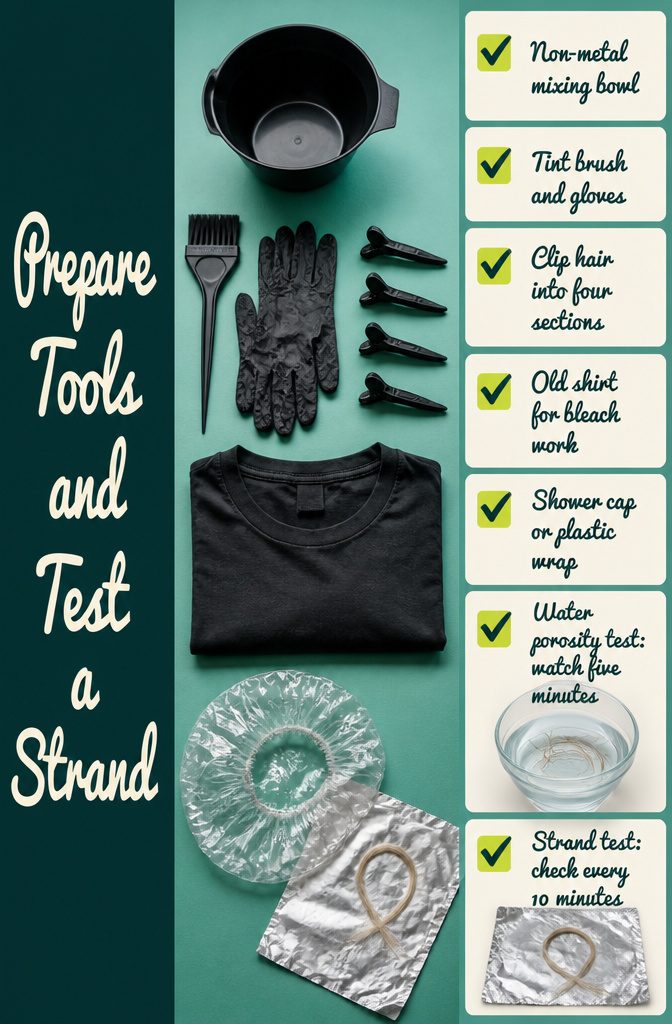
Gather your supplies and test a strand before you commit to the full process.
Section your hair into four parts and secure each with clips.
You’ll need non-metal mixing bowls (bleach reacts with metal), a tint brush or applicator, gloves, an old shirt you can ruin, and either a shower cap or plastic wrap to keep the bleach from drying out as it lifts.
One source recommends a porosity test to predict timing: drop a few strands of clean, product-free hair into a bowl of room-temperature water and watch for up to five minutes.
Hair that sinks immediately is high-porosity and absorbs quickly; hair that floats after five minutes is low-porosity; slow-sinking hair is normal.
That difference changes how your hair lifts and holds color, so a drugstore box with no way to account for it often delivers a surprise.
Run a strand test before you apply bleach to your whole head.
Mix a small amount of bleach and developer, apply it to a less-visible piece of hair on foil, and check every 10 minutes until it reaches the shade you want, then rinse.
The test shows you both the timing and the condition of the lightened hair.
If it’s frayed or the color isn’t what you expected, skip the full bleach. One medical source says to follow the label’s timing and check for frizz or damage before proceeding; another recommends testing to avoid guesswork.
Toning Yellow and Orange
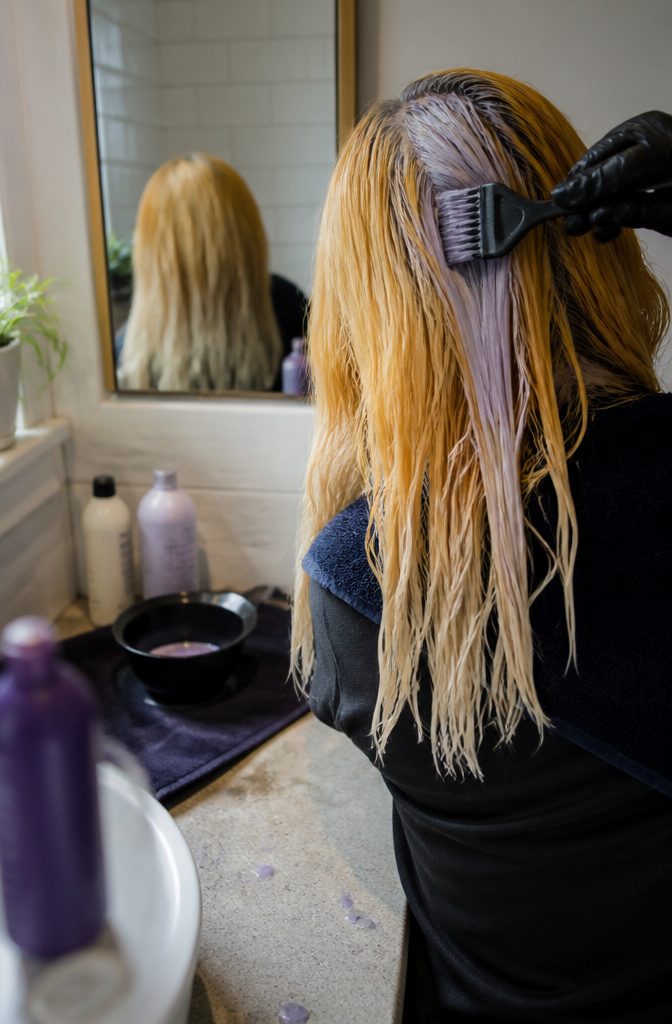
Toner shifts the tone of lifted hair rather than making it lighter, so you need to reach the right level of lightness first before applying it.
If your hair is still too dark or brassy, the toner will not correct the level—it will only neutralize the undertone that is already there.
The color wheel gives you the rules: blue neutralizes orange, purple neutralizes yellow, and green neutralizes red. A common choice is Wella T18 mixed with 20-volume developer, left on for about 20–30 minutes while checking often.
Apply toner to your regrowth first because the ends are usually more porous and will absorb it much faster; once the roots begin taking the toner, work quickly through the ends.
Rinse when you see the color you want, then condition well. Purple shampoo helps maintain the tone between toning sessions, and conditioning masks or Olaplex can repair some of the damage from lifting.
Frequently Asked Questions
How does bleaching hair work?
Bleach opens the cuticle and breaks down the pigment inside the strand, and lighteners rely on hydrogen peroxide to do it.
Hair lifts from red to orange to yellow, so orange tones show up first on dark hair. The process also strips natural fatty acids from the hair shaft, which is why bleached hair can turn brittle.
How do you protect your hair while bleaching?
Coat your hair in coconut oil the night before and leave it on during the bleaching.
About 2 tablespoons covers thick hair, and finer hair needs less. Skip shampooing the day before too, so your natural oils stay in place.
Is it better to bleach dirty hair?
Hair that is a day unwashed is better than freshly shampooed hair.
Natural oils act as a buffer against the bleach, and shampoo tends to strip them out. Clean, product-free hair is still what you want for a porosity test, though.
How many times do you need to bleach dark hair?
Very dark hair usually needs 2 rounds to reach a light blonde, because it generally cannot get there in one.
A level 5/6 reached a 10 in 2 sessions. If your hair is mostly new growth, it lifts more easily and 1 round can be enough.
How long should you wait between bleaches?
Wait about 2 weeks.
Some people go as short as a day to a week, but the shorter the gap, the higher the risk of damage. Very fine or fragile hair may need up to a month to recover.
How long do you leave bleach on your hair?
Go by the color of your hair and the clock together. Set a 30-minute timer, then check every 10 minutes (or every 5 minutes if you prefer) until the hair reaches pale yellow, like the inside of a banana.
Do not leave bleach on past 45 minutes, and for any specific brand, follow its packaging first.
Can you bleach your hair at home?
Yes, it is possible, but the colorists Allure spoke to advise against it. Overlapping on already bleached hair is hard to avoid and can cause breakage.
Home materials cost around $50 versus $300 to $500 for a salon visit, so the choice comes down to how much risk you accept. Previously colored or very dark hair carries the most.
What precautions should you take before bleaching your hair at home?
Do a strand test first. Mix a small batch, apply it to a hidden piece of hair, check every 10 minutes, then rinse and look at the shade and the condition.
If the strand is frayed or frizzy, or the color is off, skip the full bleach. Also wear gloves and mix in a non-metal bowl.
What is the best bleach for dark hair?
No single product is singled out here, and developer strength matters more than brand.
On dark hair, 20 vol developer in 2 rounds about 2 weeks apart is gentler and easier to apply evenly than one round of 30 vol. Reserve 40 vol for thick level 1–2 hair only.
What is hair porosity, and why does it matter for bleaching?
Porosity describes how readily your hair absorbs color or moisture, and it affects how fast your hair lifts and how well it holds color.
To test it, drop a few clean strands into room-temperature water and watch for up to 5 minutes. Hair that sinks right away is high-porosity, hair that floats after 5 minutes is low-porosity, and slow-sinking hair is normal.