The veil and the neckline narrow this list faster than hair color does.
A long veil is heavy, so the style underneath has to hold it: a bun, set curls or a textured updo gives the comb real hair to grip, and a shorter fingertip veil is light enough to stay put on a half-up.
The styles also range from a messy bun that hides mistakes to a slicked-back bun where every bump shows, so I would settle the veil first and then decide how much DIY risk you want to take.
1. Textured Chignon
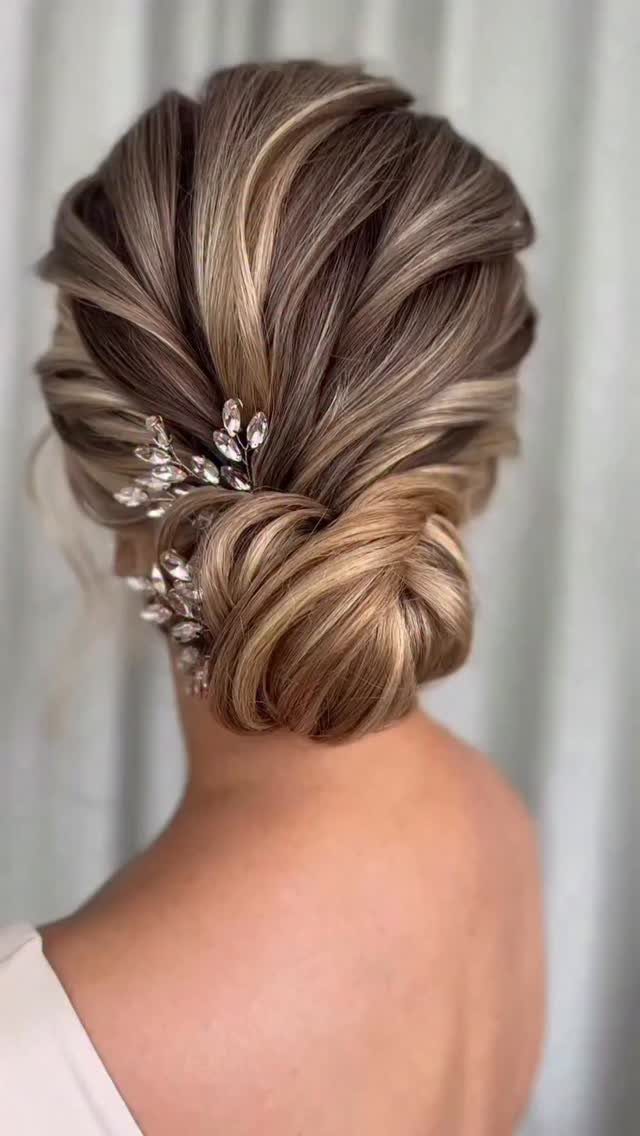
Twists left slightly loose give this chignon its character, so a bump or a stray piece reads as part of the design. That makes it forgiving for DIY and for a stylist working against the clock.
Jeweled pins or a small floral piece show up well against highlighted hair, and I would place them near the base of the twists. A chignon this textured needs no veil to look finished, but it leaves room for one.
2. Low Ponytail Waves
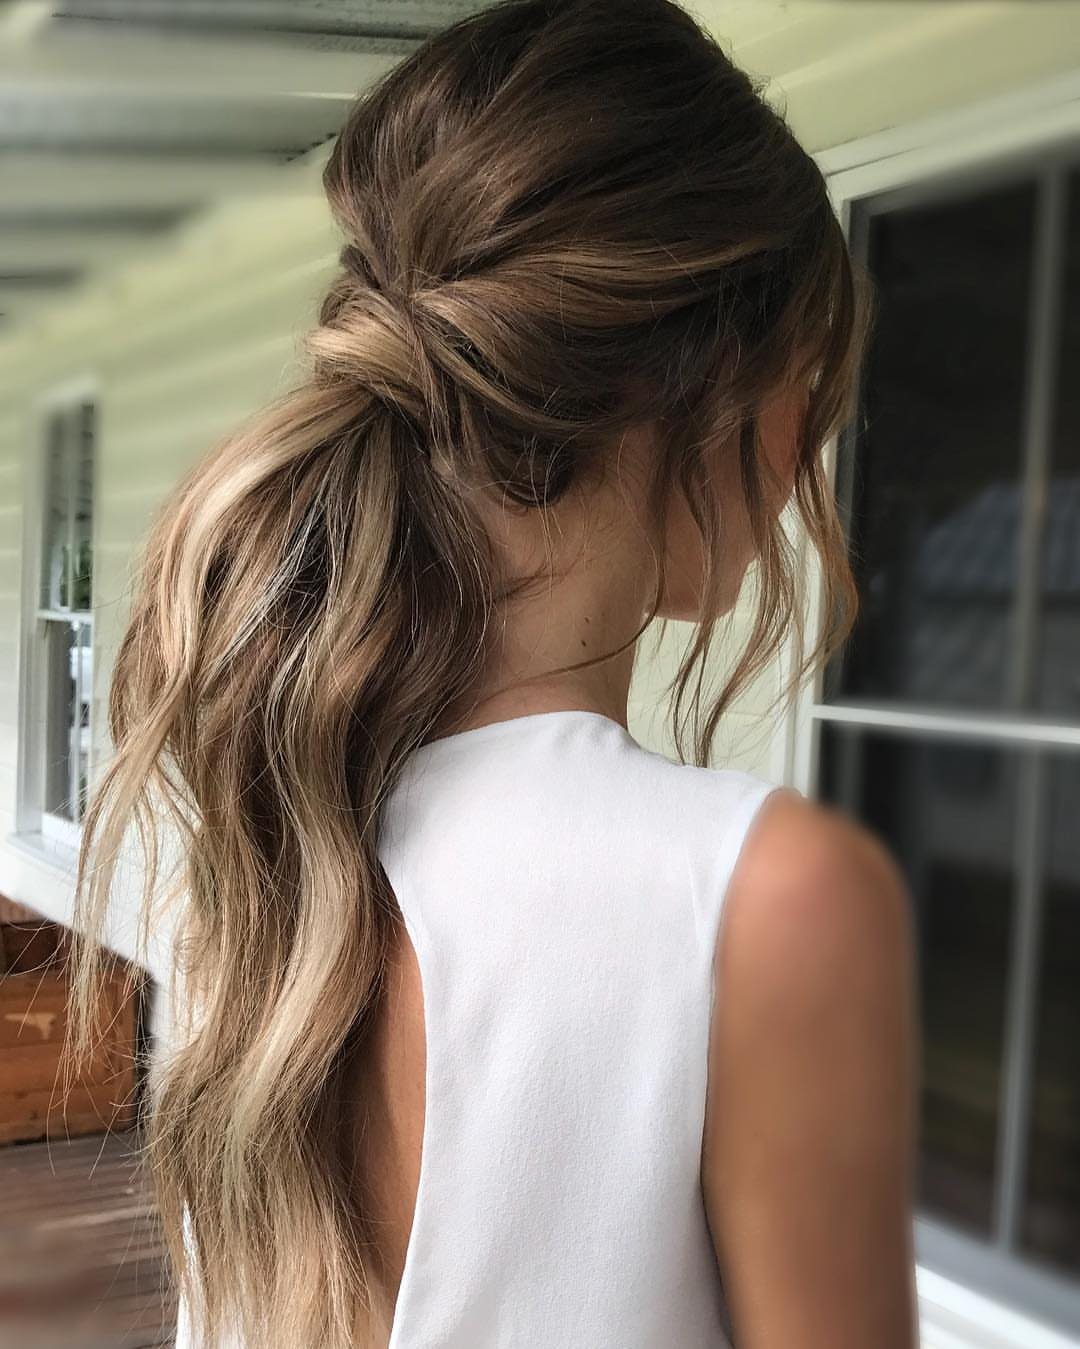
Waves give this ponytail its shape, and sitting it low keeps the look gentle instead of sporty. Wrapping a section of hair around the elastic hides it and finishes the base in about a minute.
For something you can practice at home, I would pick this over a fully pinned updo. The wave pattern does most of the work, so spend your effort there.
3. Braided Bun
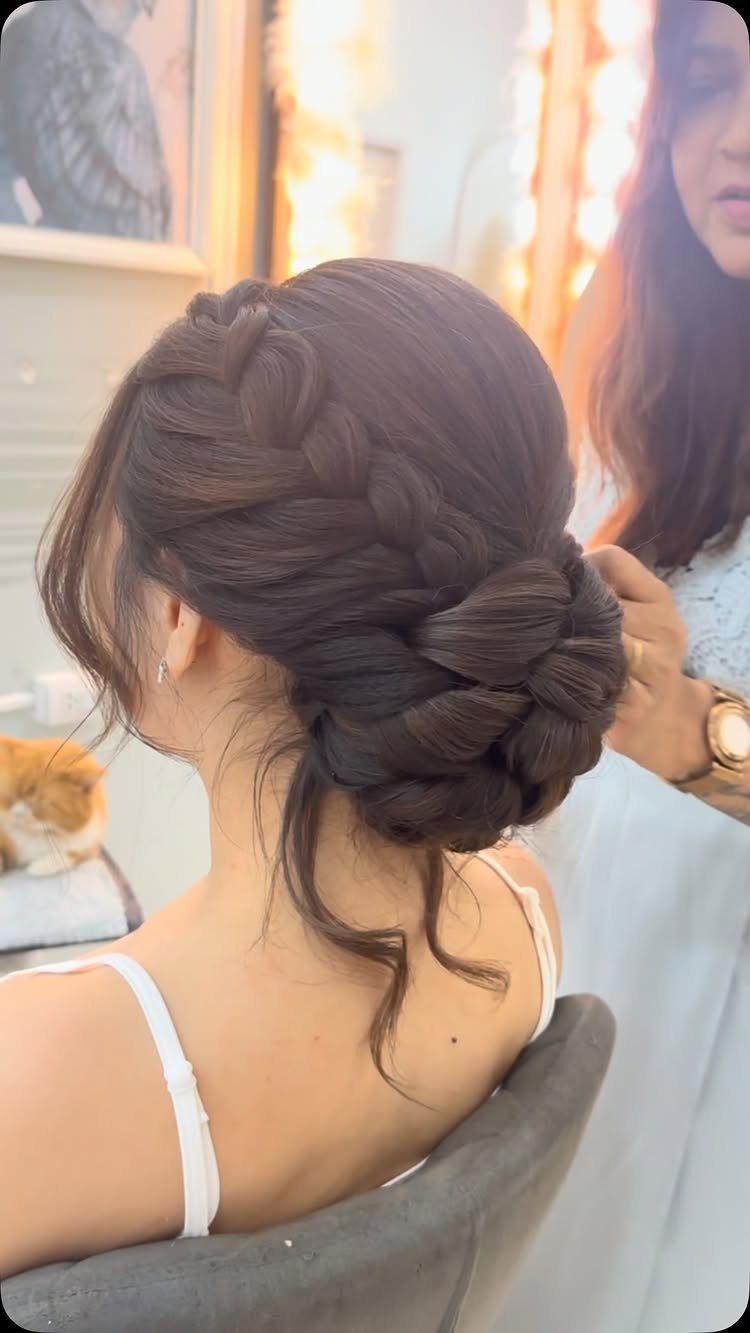
Braiding first and pinning second gives a bun a woven surface that a plain twist can’t match. Here the braid sits low at the back of the head, which keeps the shape quiet and lets the pattern show.
Book a trial run with your stylist well before the wedding, so you can test the style and change it while there is still time.
A braided bun is easy to get wrong in the coil, and you want to see the finished back view in a mirror.
4. Curly Wedding Updo
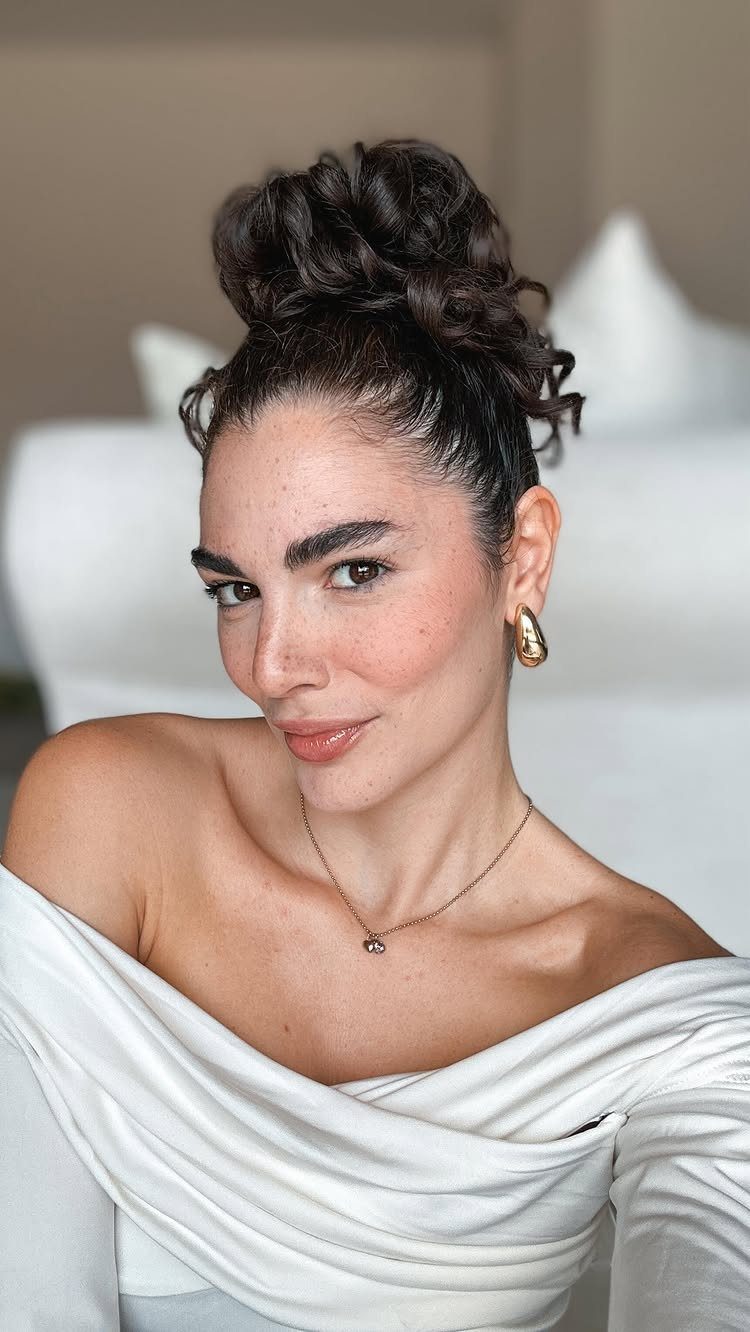
Curls do the heavy lifting in this updo, so the best version works with your natural pattern rather than flattening it. Pile the hair high, keep the volume, and pull a few tendrils loose near the temples and cheeks.
An off-the-shoulder neckline pairs well with it, since the high shape leaves the neck and shoulders bare. Gold earrings finish it without competing with the curls.
5. Textured Plait
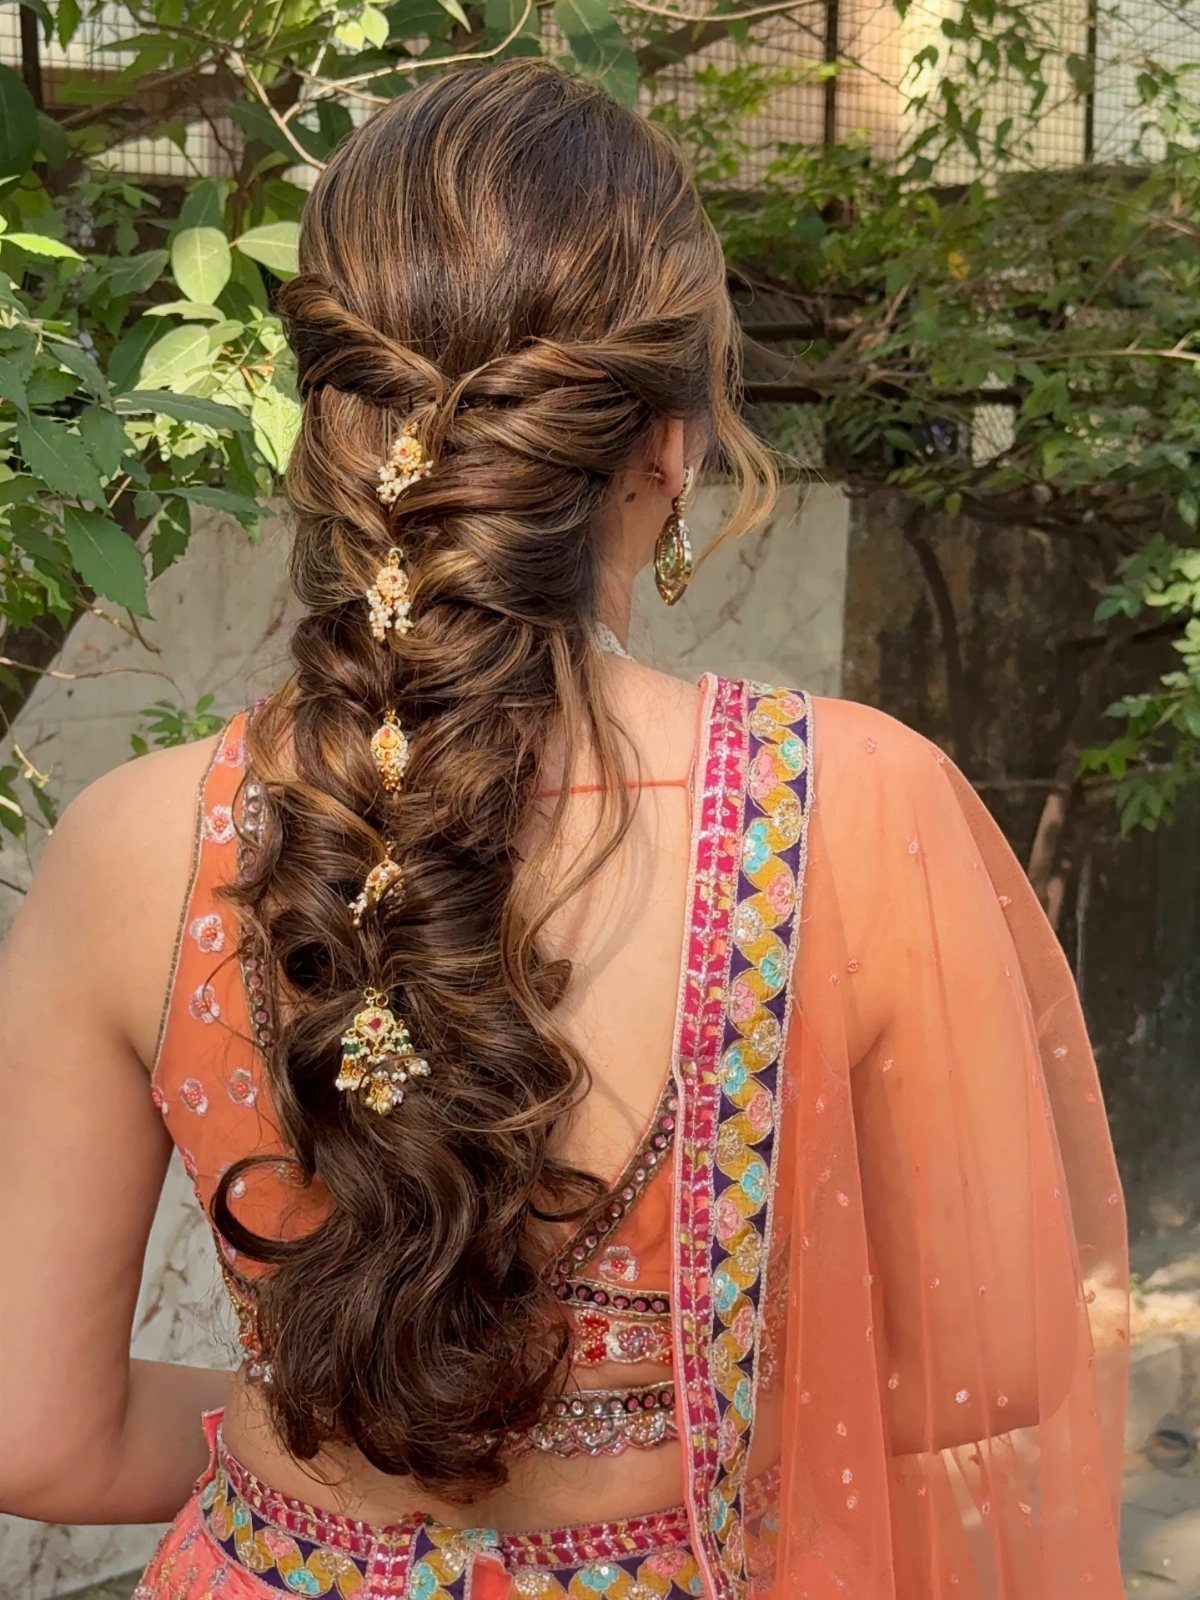
Gold ornaments sit best in a plait with some give, so pull the braid slightly loose instead of keeping it tight.
This works only on long hair, and I like it most with a traditional outfit in strong colors. Space the pieces along the length rather than bunching them at the top.
6. Low Chignon
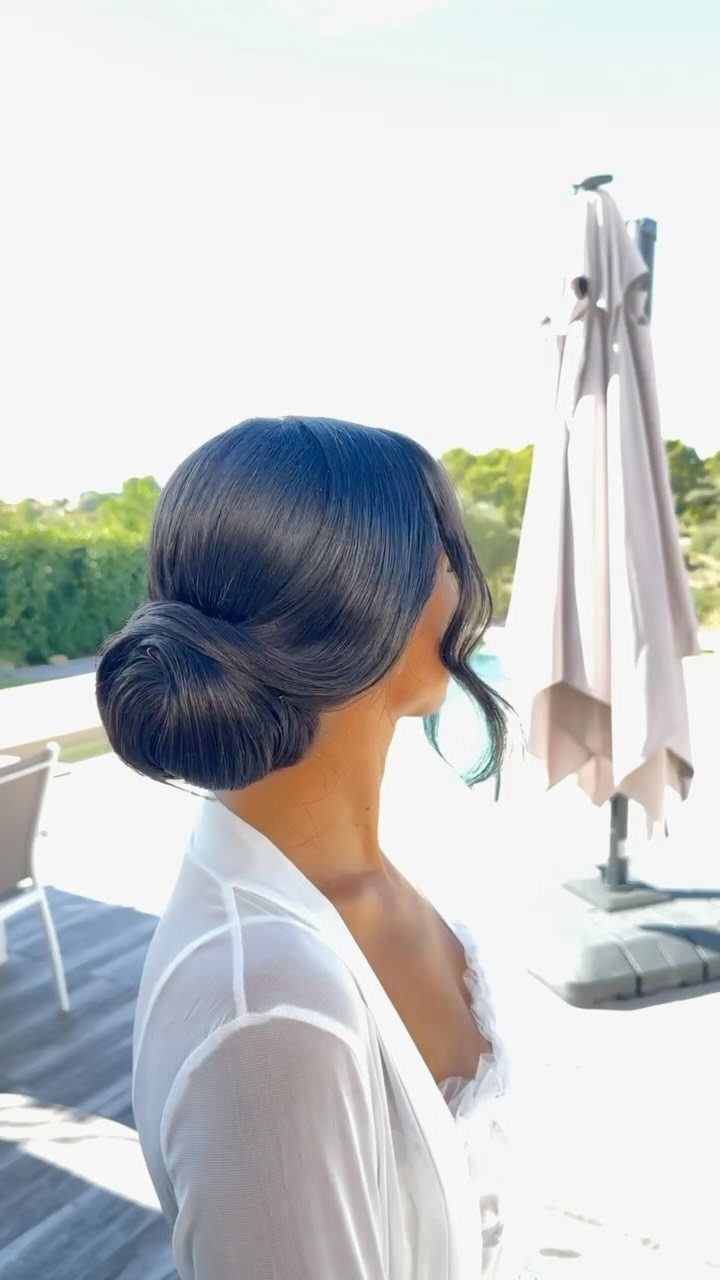
Low at the nape, a chignon can go sleek, textured or undone, and my pick is sleek with one tendril left out at the face. That single loose piece keeps the polished shape from looking stiff.
A low placement also works for most outfits and necklines, and it leaves the crown free for a veil or comb.
7. Sleek Low Bun
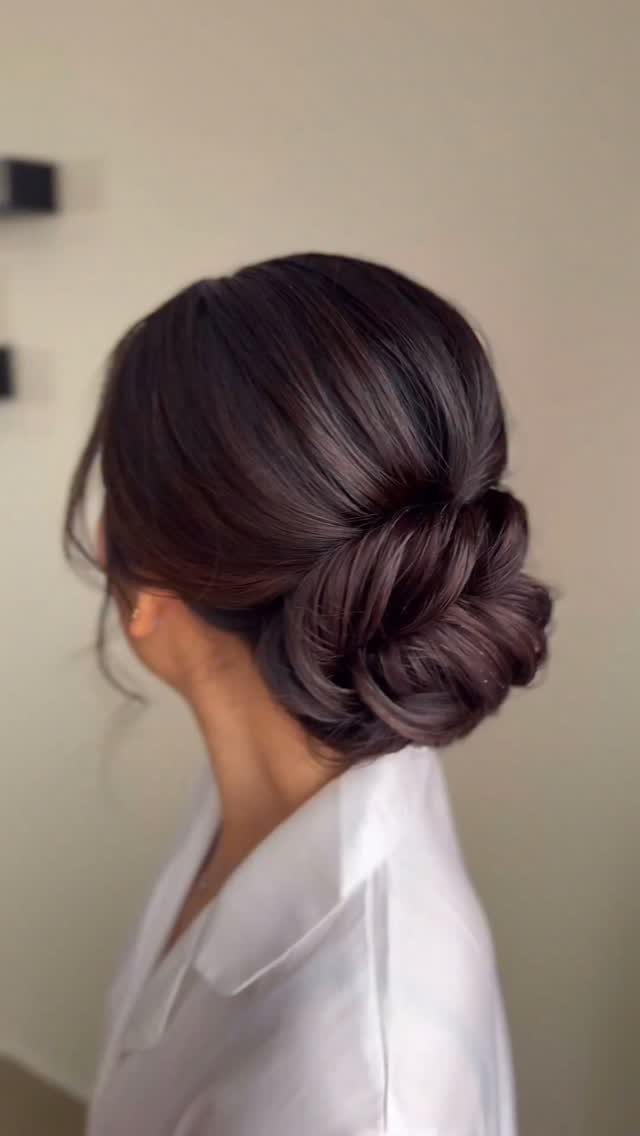
Smooth hair twisted into a low bun looks polished without trying hard, and the low placement leaves the crown clear. A bare back and neckline suit it, since nothing competes with the shape.
With a sleek finish, every bump shows. I would spend the effort on a clean, even surface and a tidy base, because that is where this style succeeds or fails.
8. Twisted Updo
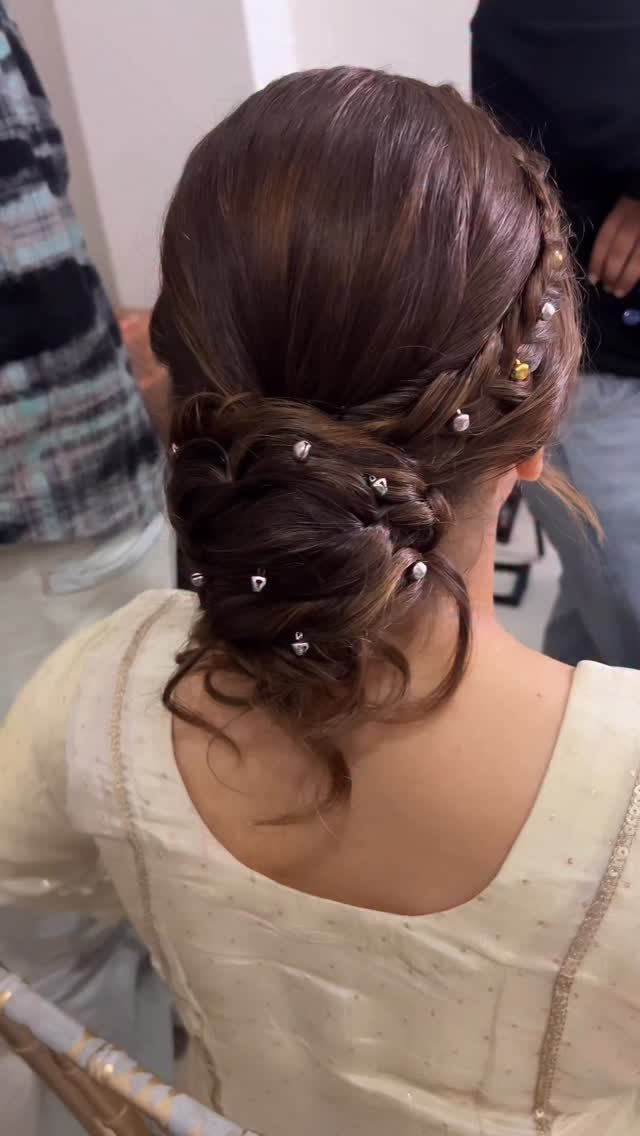
Twisting and pinning builds this updo in layers, and a few small braids add detail without making the shape busy. Small pins in a pearl-like finish suit it, and I would scatter them along the twist instead of clustering them.
Hold the pins loosely at first and check the back in a mirror before committing. A low placement like this one works well under a veil or comb.
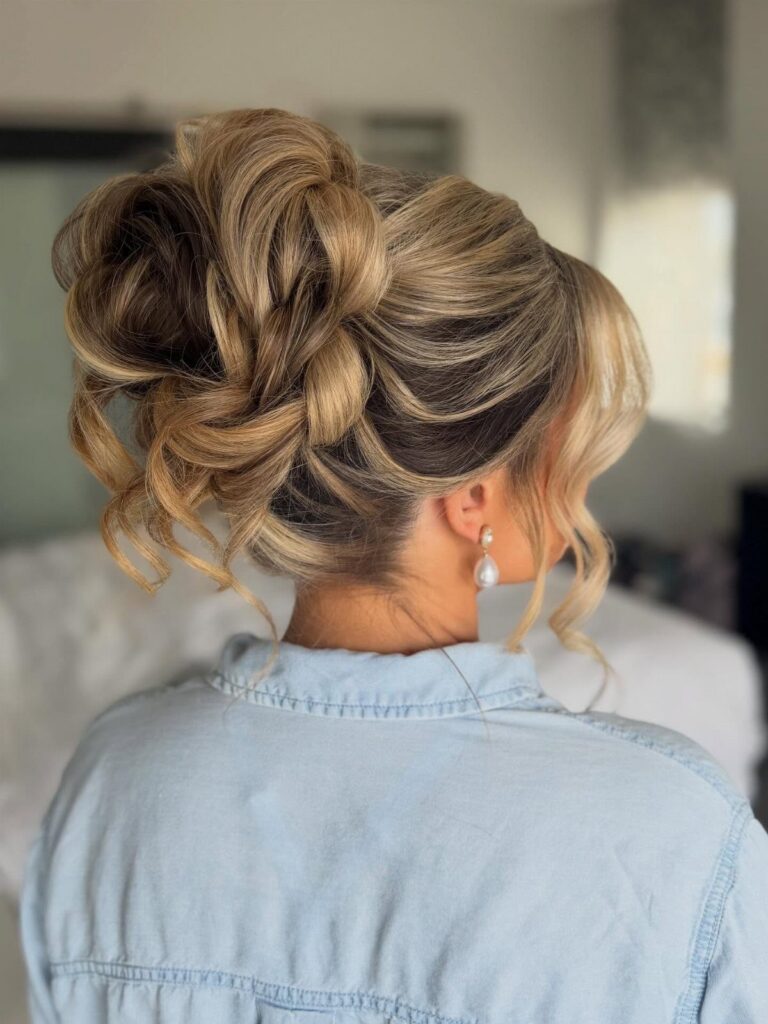
9. Messy Bun
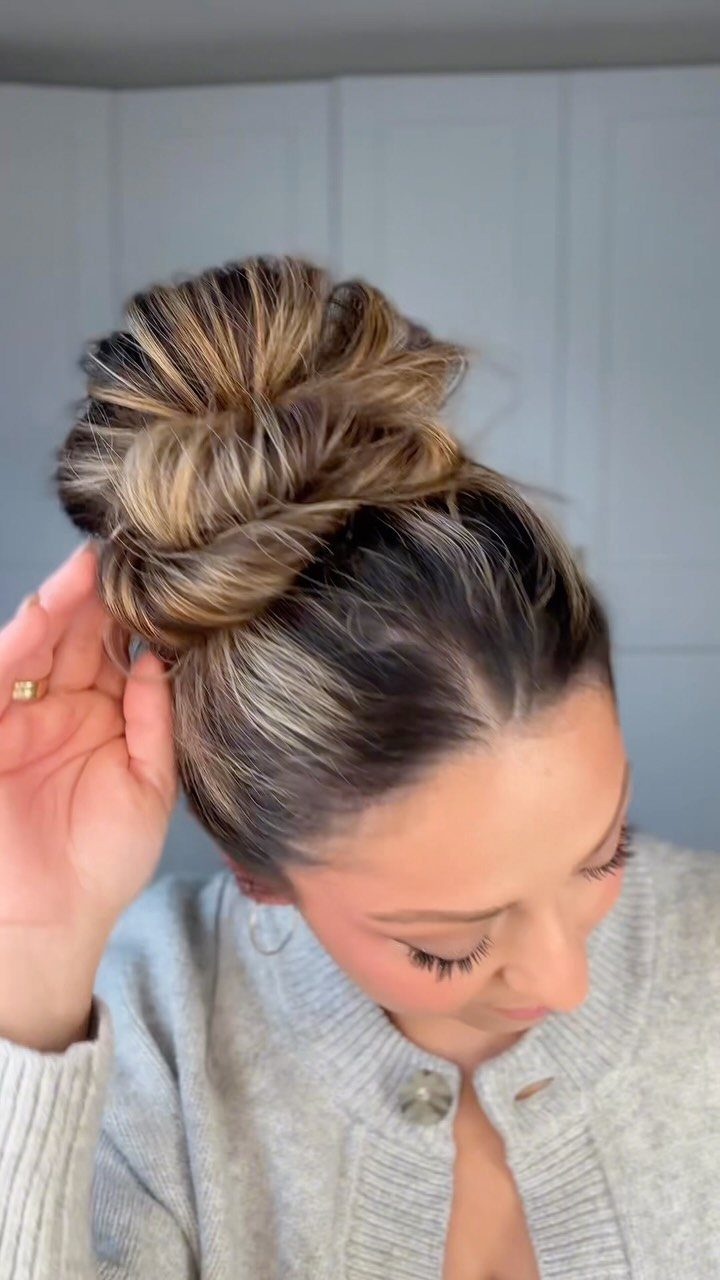
Highlights are what make a messy bun worth doing: the mix of light and dark strands shows up in every loose piece. Gather the hair high, then pull a few sections out on purpose so the texture looks planned.
This is the easiest style on the list to repeat at home, because mistakes read as part of the design. For a wedding, I would still practice it once, so the bun sits where you want it.
10. High Bun
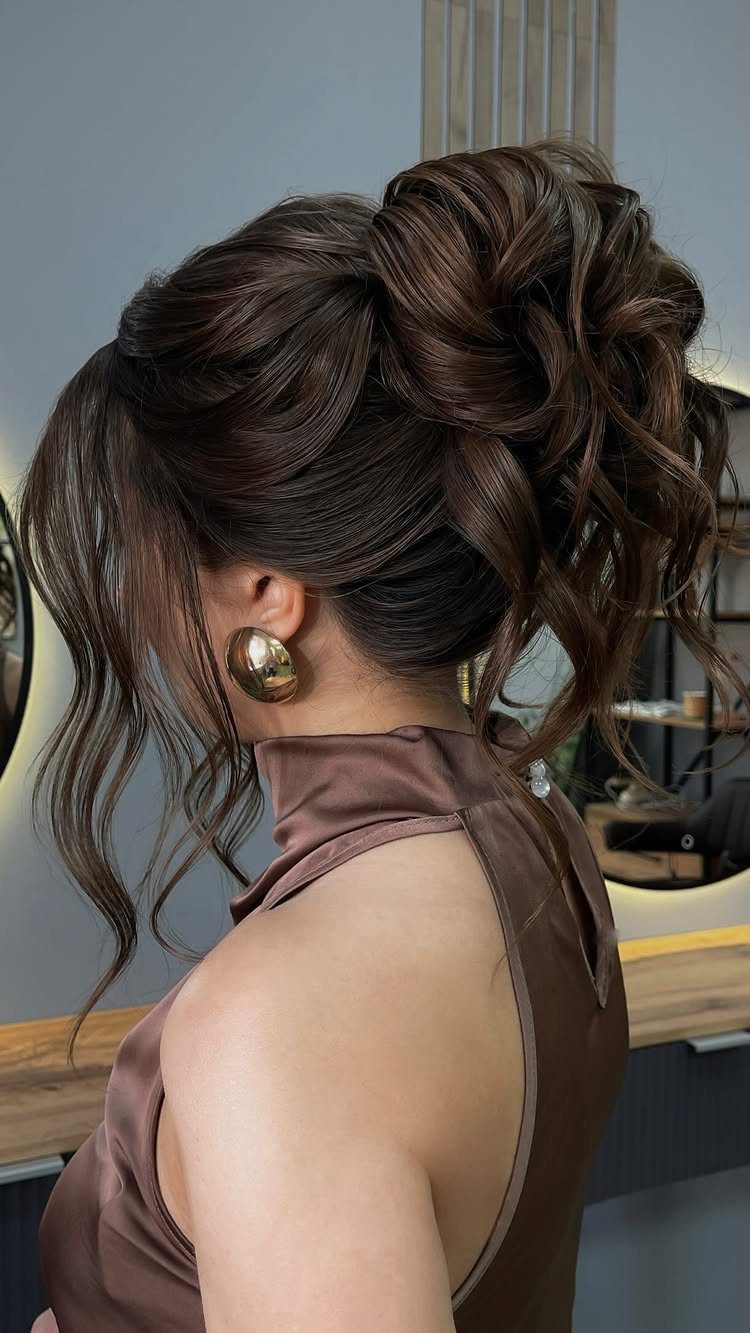
Volume is the point of a high bun, and braiding the hair before it is wound up gives the shape more body than a plain twist. A few loose strands framing the hairline soften the height.
A satin dress and gold earrings look right with it, and the high placement keeps the neck fully visible. For a bun that holds its own in photos, I would choose this over a sleek version.
11. Pearl Hair Pins
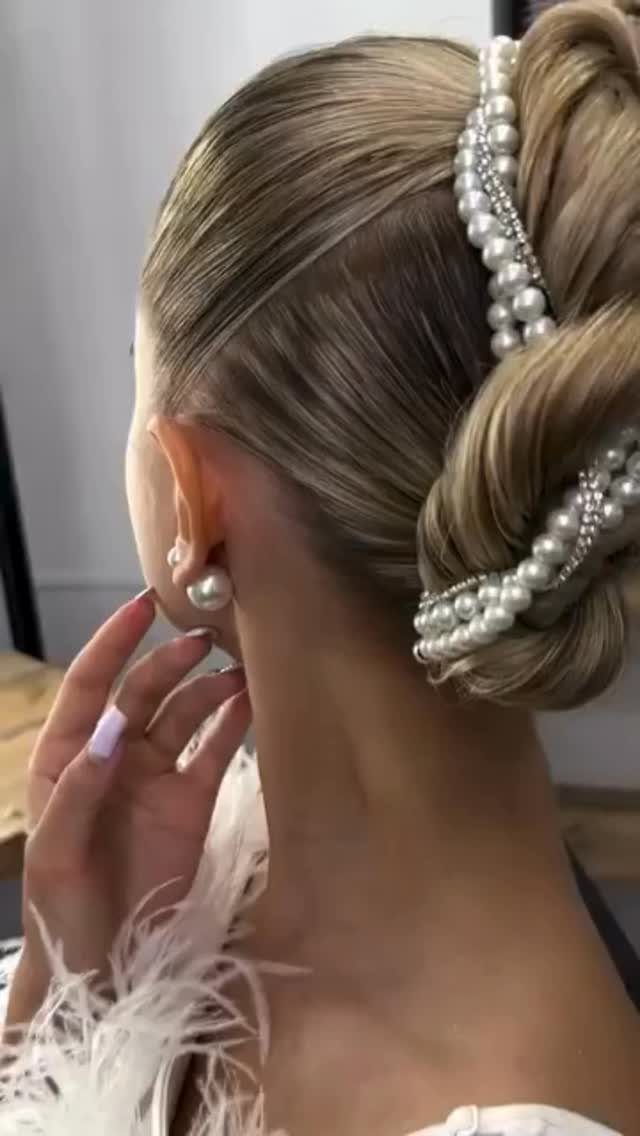
Pearl pins can turn a simple updo into a finished look. Layering 2 ponytails into a sculpted, twisted chignon gives the pearls a sturdy base, so they can be woven through the twists and stay put.
I like pearls on blonde hair because the soft shine stays visible without overpowering it.
Matching pearl earrings keep the whole look in one tone. Weave the pins in after the chignon is set, so they don’t pull the twist loose.
12. Sleek Twisted Bun
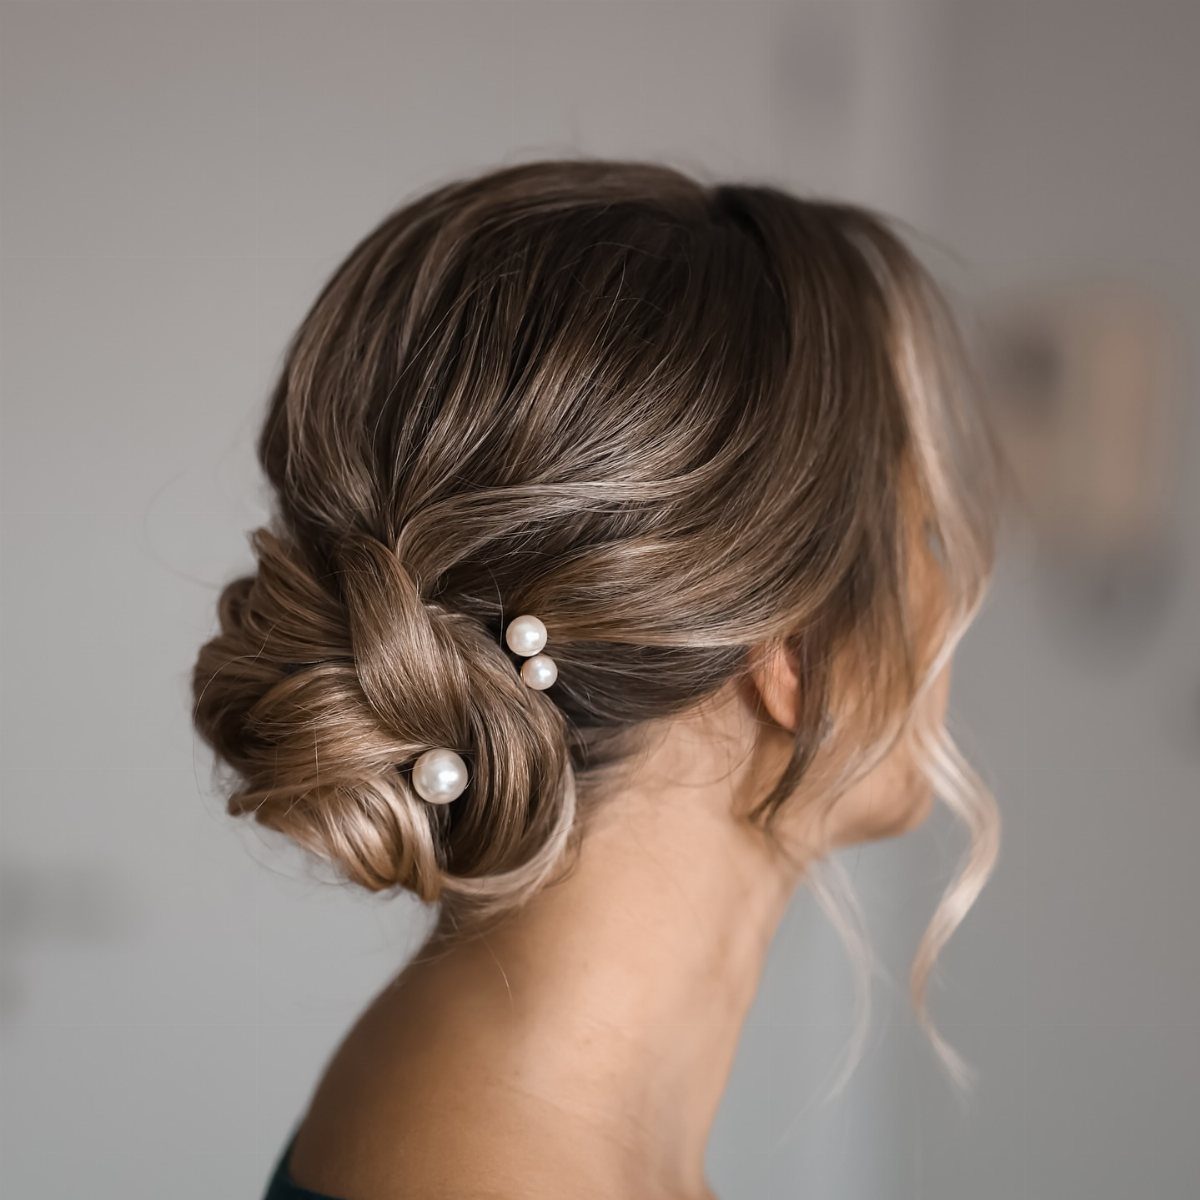
Glossy, smooth hair is the whole appeal here: the twist runs low and clean, and pearl pins add small points of light along it. Keep the pins few and evenly spaced.
I would choose this over a textured chignon for a simple dress, since the shine gives the look enough interest. A side view matters with this style, so check the profile in the mirror before the day.
13. Twisted Hair Knot
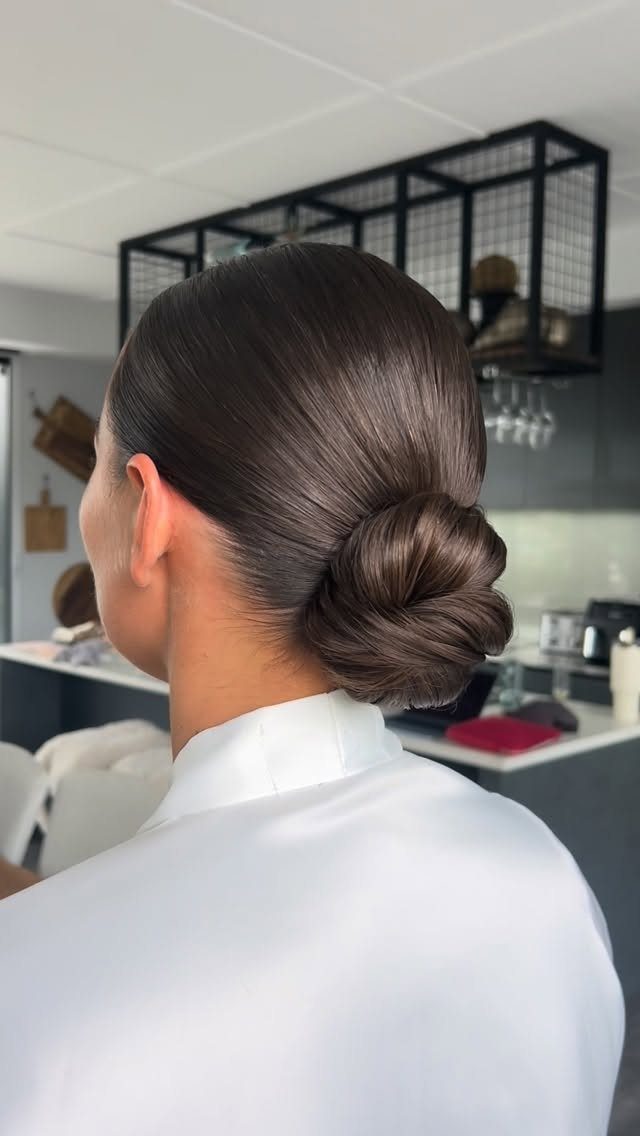
Dark hair in a low twisted knot reads best from the side, so have a friend photograph your profile while you practice. The twist should run smooth from the nape upward, with no ridges.
I would pick this for a dress with a clean neckline, since the knot is the only detail you need. Pins that match your hair color keep the surface unbroken.
14. Low Bun
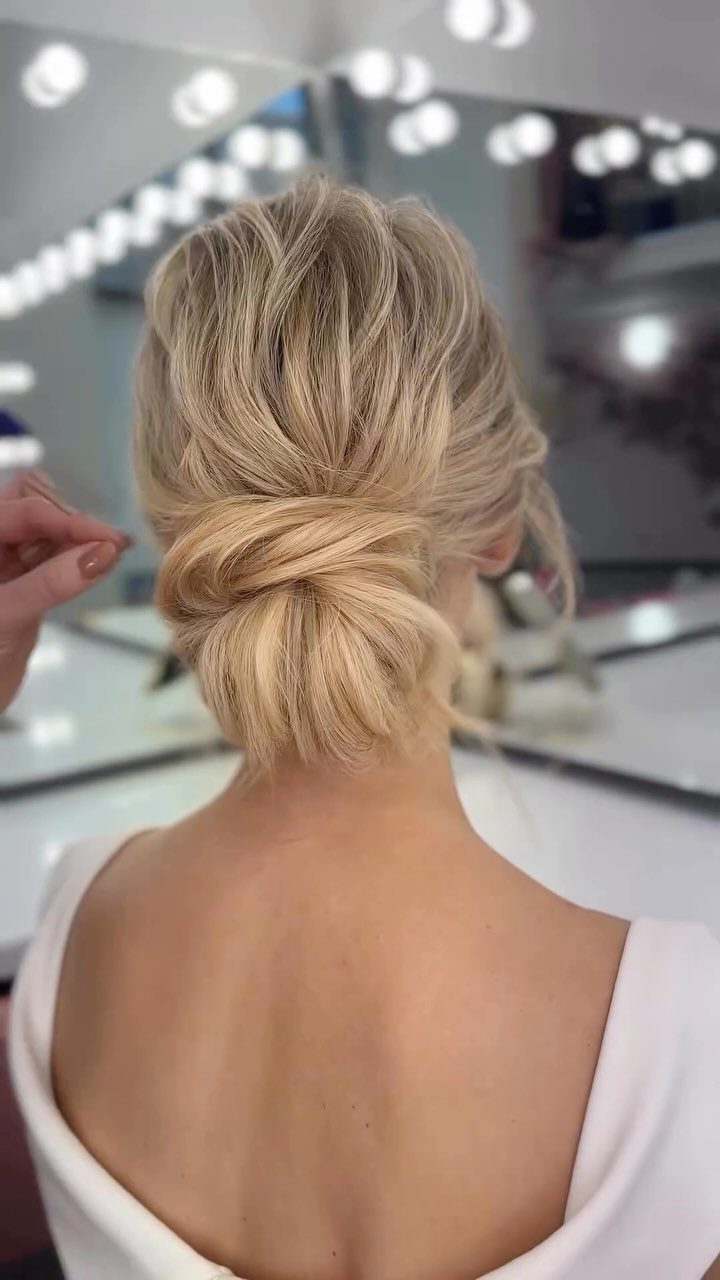
Waves and a loose twist make this low bun softer than a tight coil. Leave the surface slightly rough instead of smoothing it flat, and tuck the pins underneath so they stay out of sight.
For an embellished version, I would add one comb or a single pin at the side. The texture already gives the bun plenty to look at.
15. Braided Ponytail
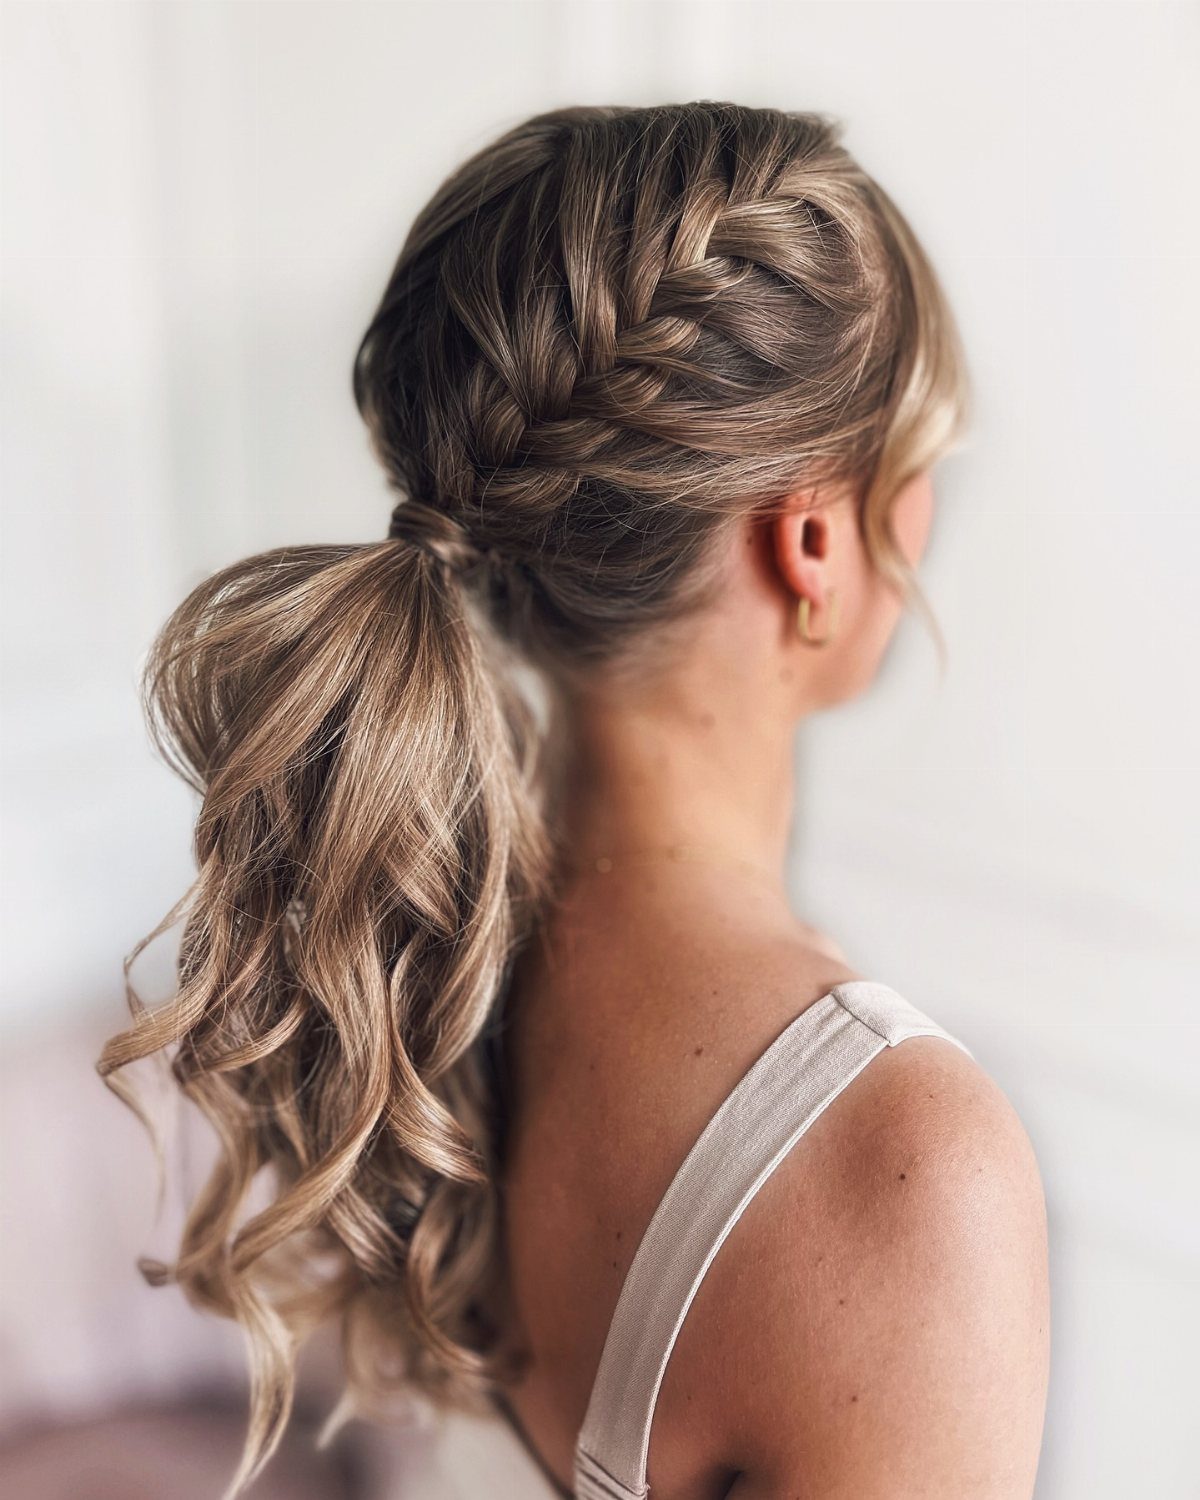
Braiding only the top of a low ponytail and curling the rest gives you two textures in one style. Keep the braid snug and the curls soft; that contrast is what makes it work.
Hair needs enough length to fall well past the braid, or the curled section disappears. I like this one for brides who want an updo that still moves.
16. Undone Chignon
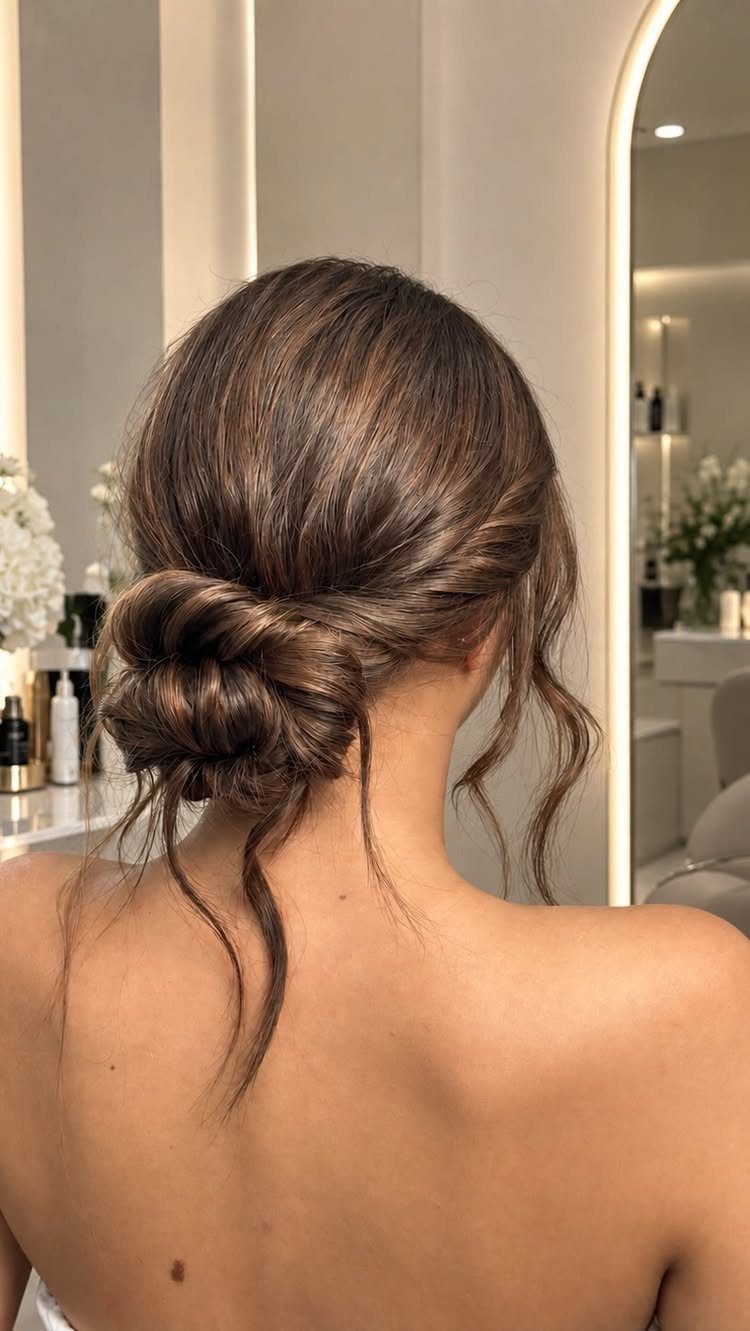
Wispy strands are the design in an undone chignon, so pull them out on purpose once the last pin is in. Aim for a few pieces near the face and nape instead of a ring all the way around.
This is forgiving for DIY: if one side sits lower, it reads as relaxed. I would still do one trial to see where the chignon lands against your dress.
17. Sleek Ponytail
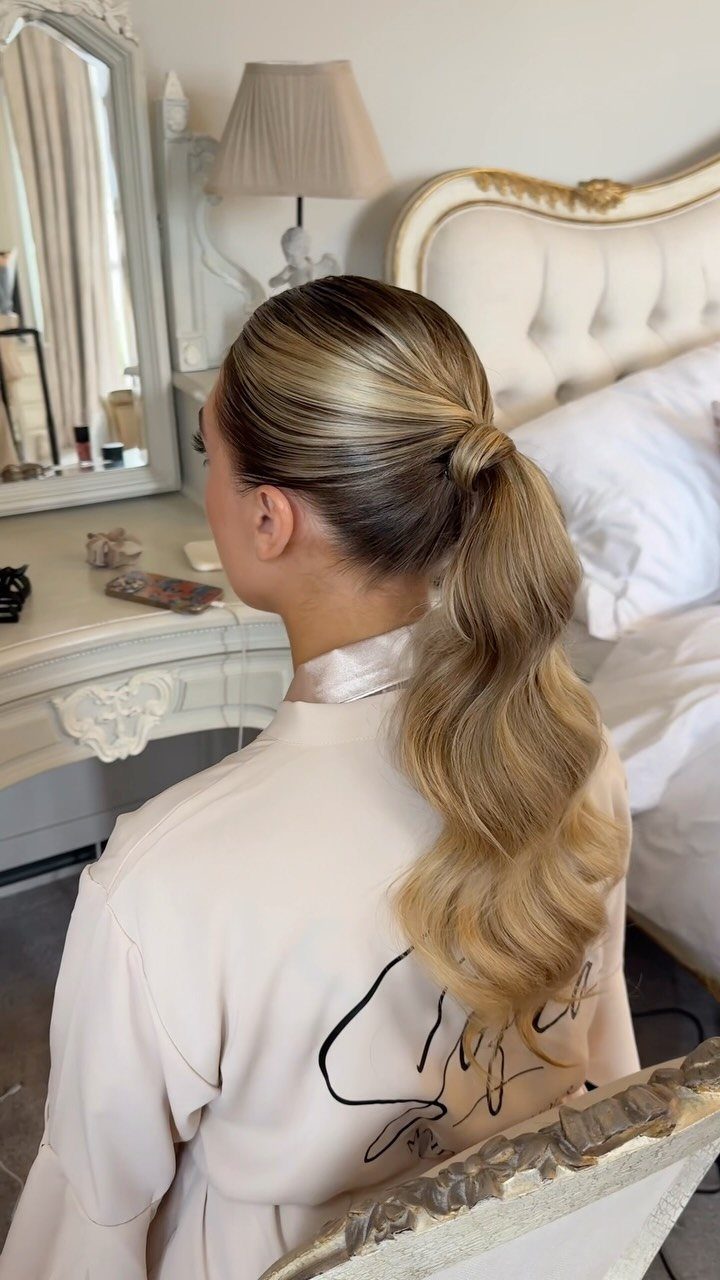
Smooth at the crown and waved through the length, this ponytail gets its polish from contrast. Brush the top flat, then let the waves stay soft below the tie.
Check the back view in a mirror, since that is the angle this style shows most. For long hair that stays visible, I would choose it over a pinned updo.
18. Ponytail Knot
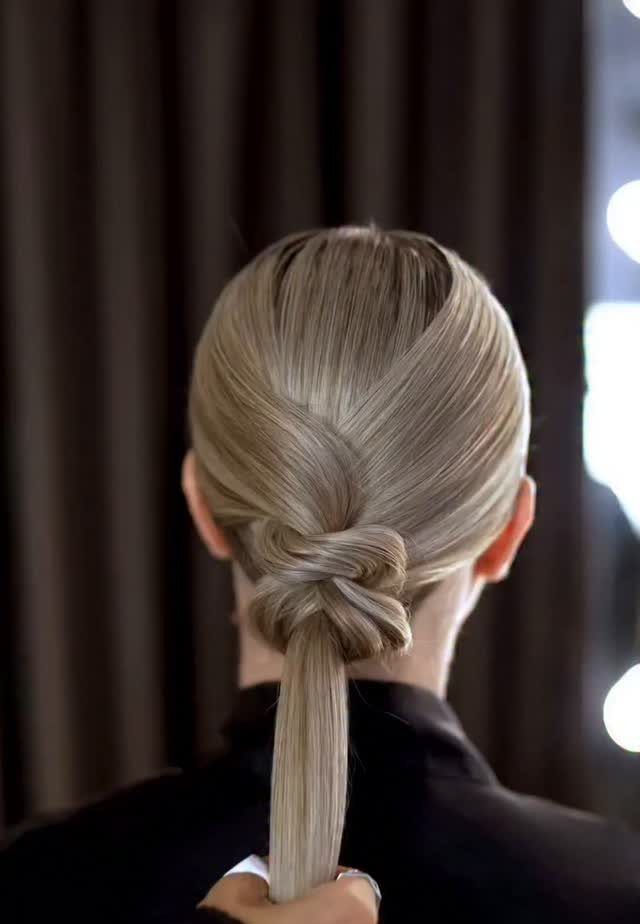
One knot just above the tail is the only detail here, so keep everything else clean. Cross the sections, pull the knot snug, and smooth the hair back from the hairline.
Blonde shows the crossing clearly. I would skip extra accessories; the knot is enough.
19. High Top Knot
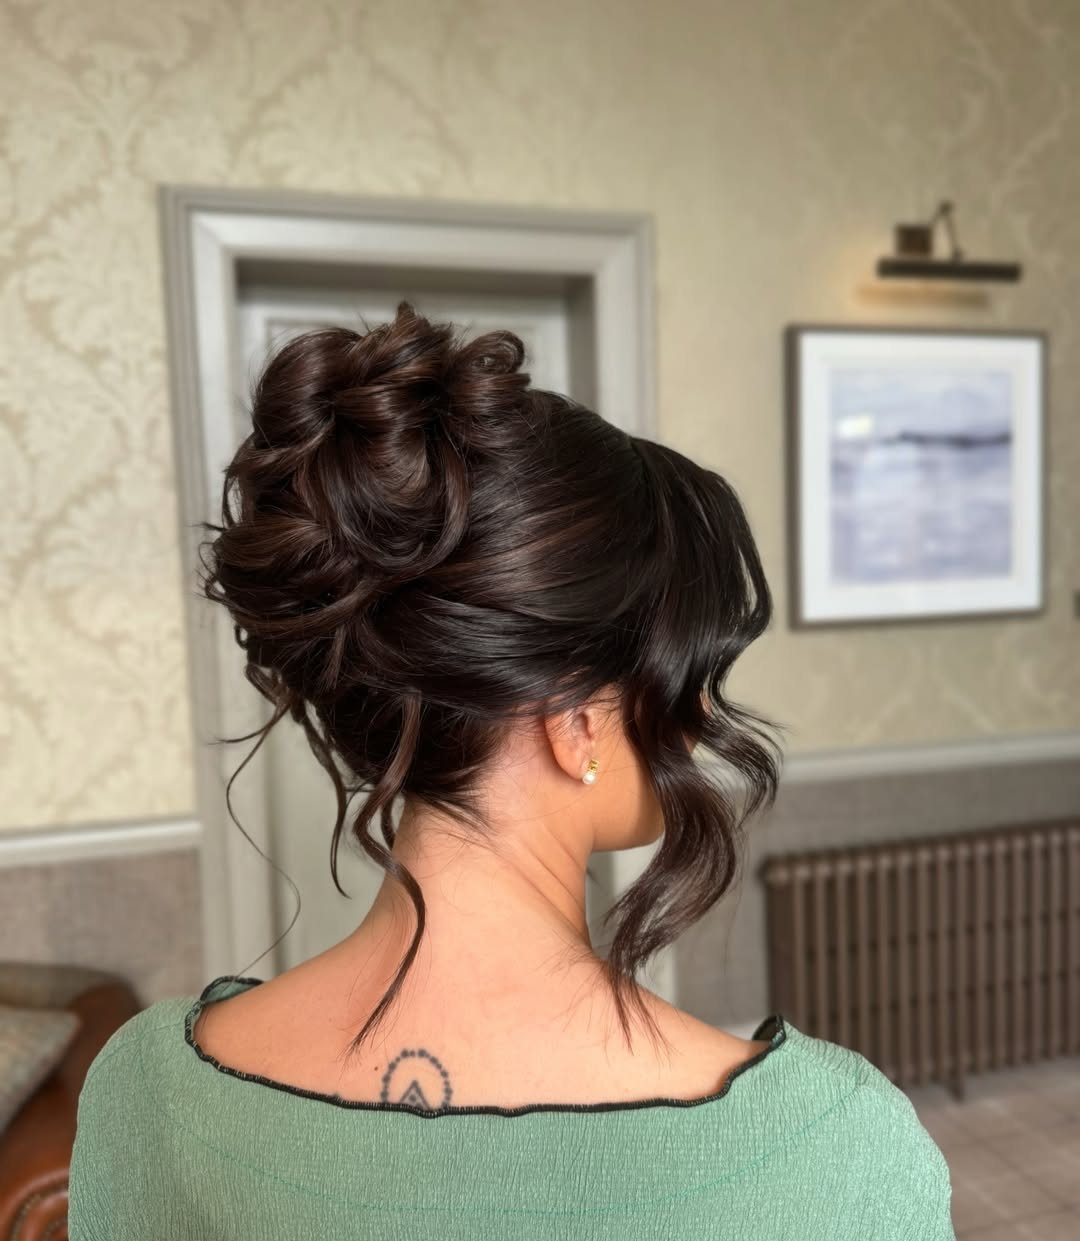
Height and volume carry this top knot, and the loose curls and face-framing tendrils soften it so it reads retro instead of severe. Leave the tendrils out before you pin the knot, then curl them last.
A plain neckline leaves the knot as the one statement, so that’s the dress I’d match with it. Skip a heavy veil; a comb tucked beside the knot is plenty.
20. Woven Bun
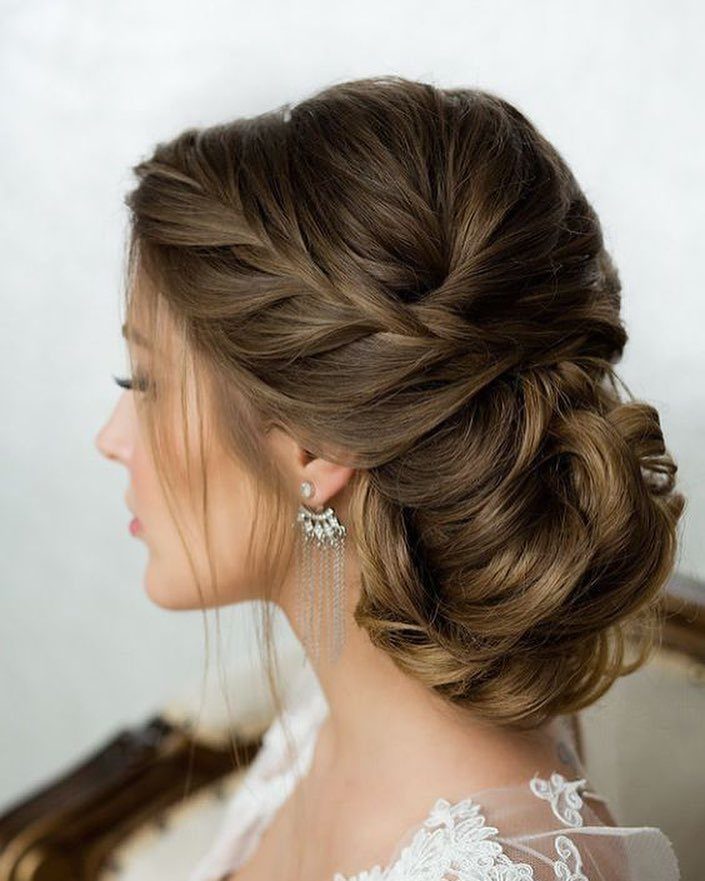
Keep the braids wide and a little loose so the pattern stays readable from the side.
A lace dress and dangling earrings suit it, since the bun is already the main detail. Hold a hand mirror to the side of your head, since the braid pattern reads clearest from that angle.
21. Curled Ponytail
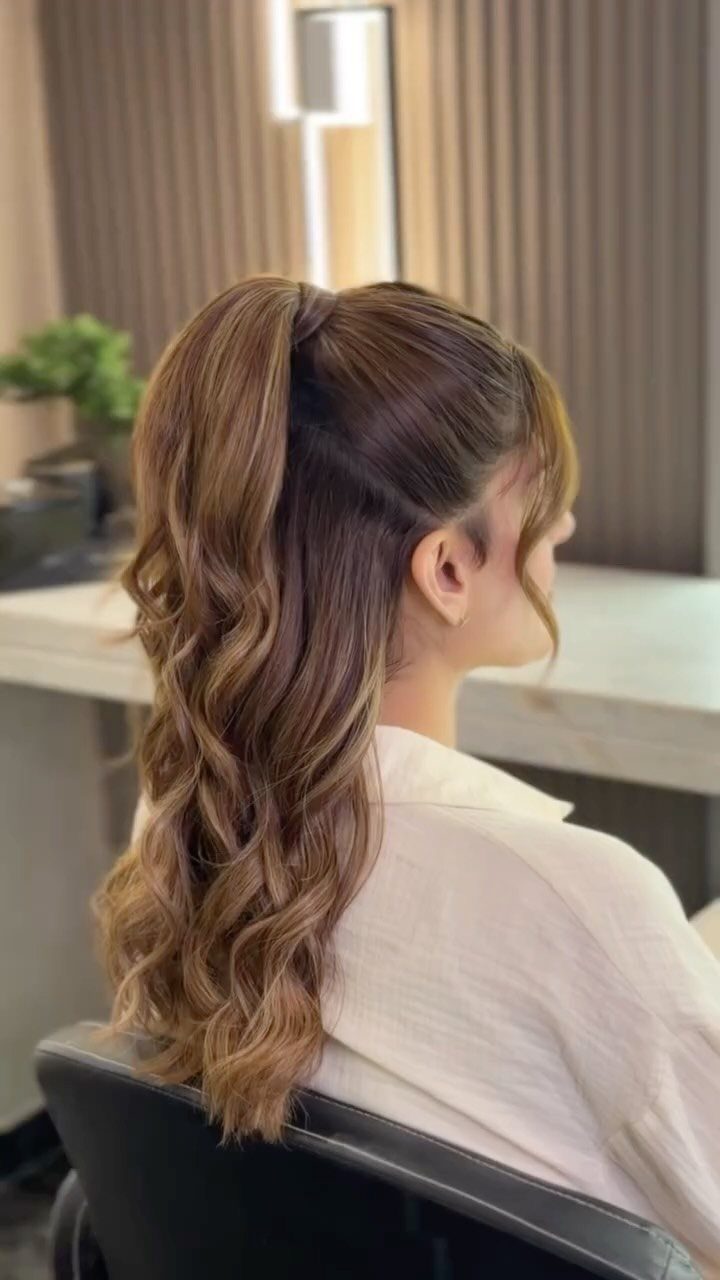
Curls kept to the ends are what separate this from a plain high ponytail: the top stays smooth and the length finishes in loose, soft spirals.
Curl in sections, and let them cool before you brush through so they don’t fall flat.
I like this for brides who want height without pins. Wrap a strand around the elastic to hide it.
22. Side Braid
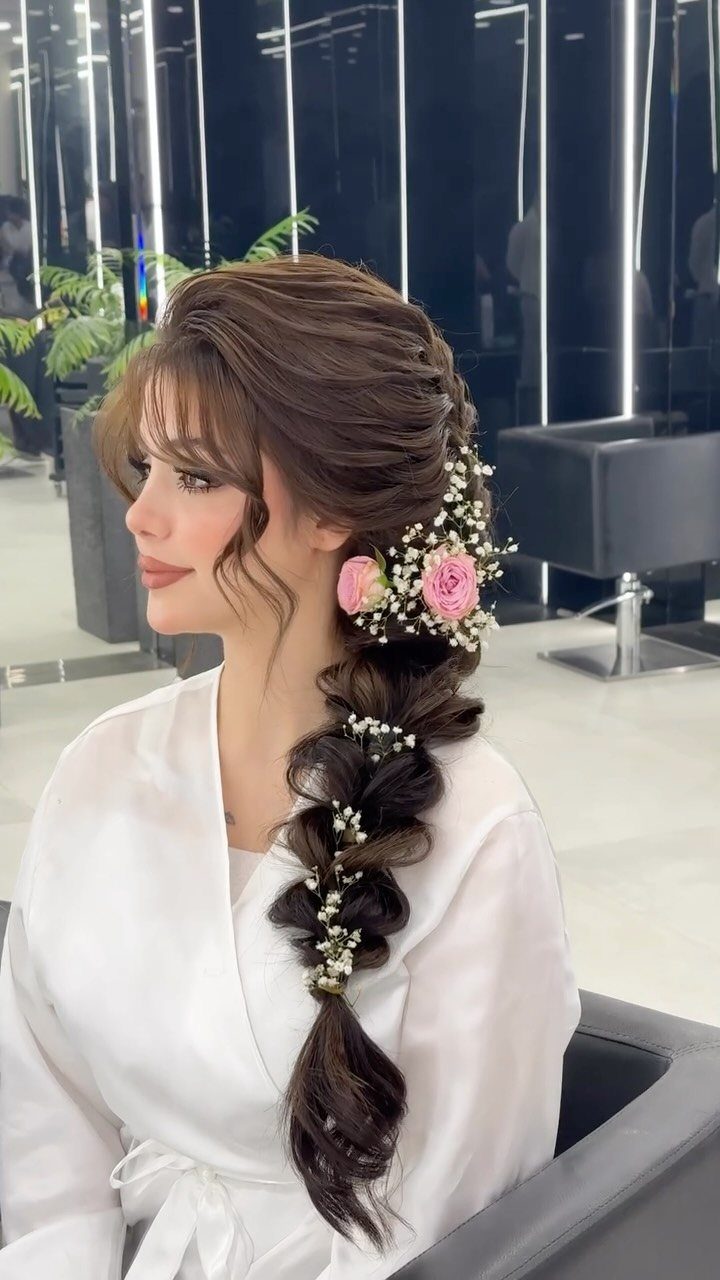
Worn over one shoulder, a long side braid works as a base for flowers. Pull the braid slightly loose so it looks full, then tuck blooms along its length instead of bunching them in one spot.
Pink roses with baby’s breath keep the look soft. Fresh flowers can wilt, so I would ask for them to be added last, right before photos.
23. Half-up, Half-down
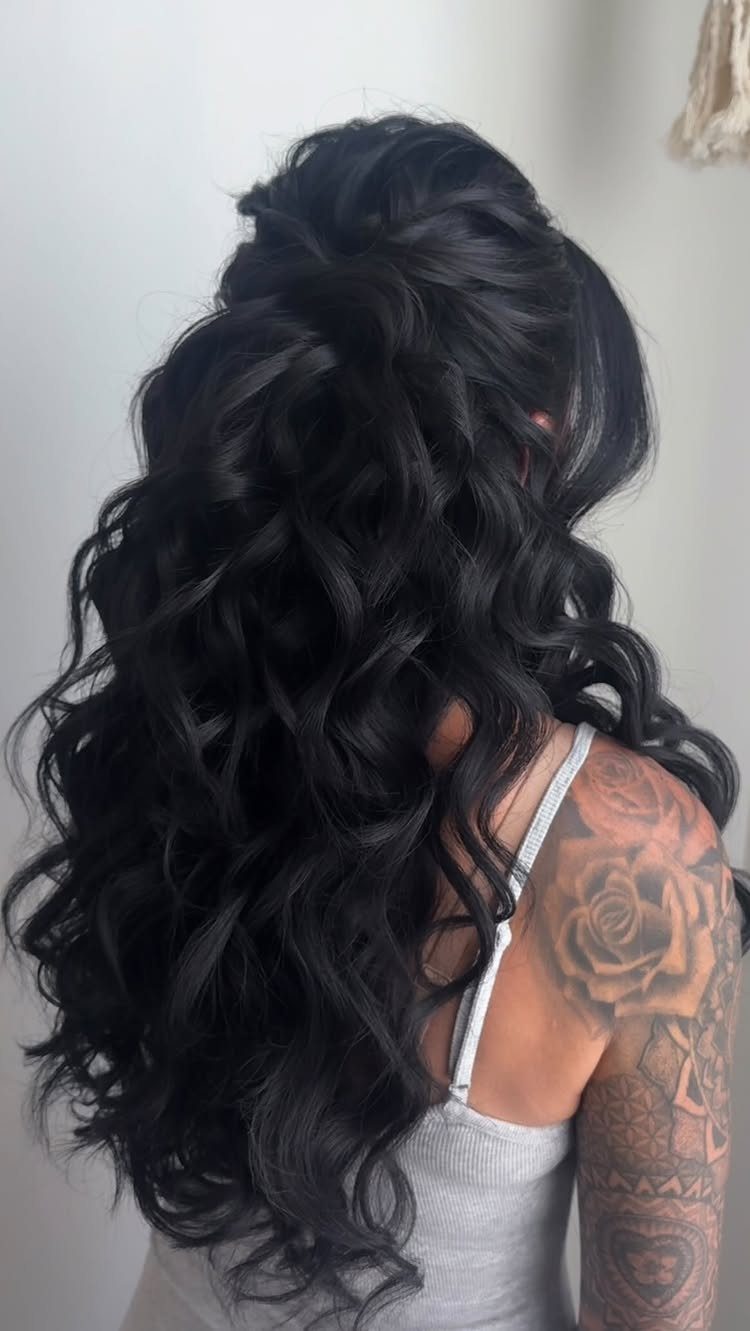
Long curls suit half-up, half-down because the top section lifts away from the face while the rest keeps its full shape. Secure the upper hair at the crown or back of the head and leave the curls untouched below.
This is a good pick if you don’t want your whole head pinned. Dark, defined curls give the style a lot of body, and an open back lets that length show.
24. Slicked-back Bun
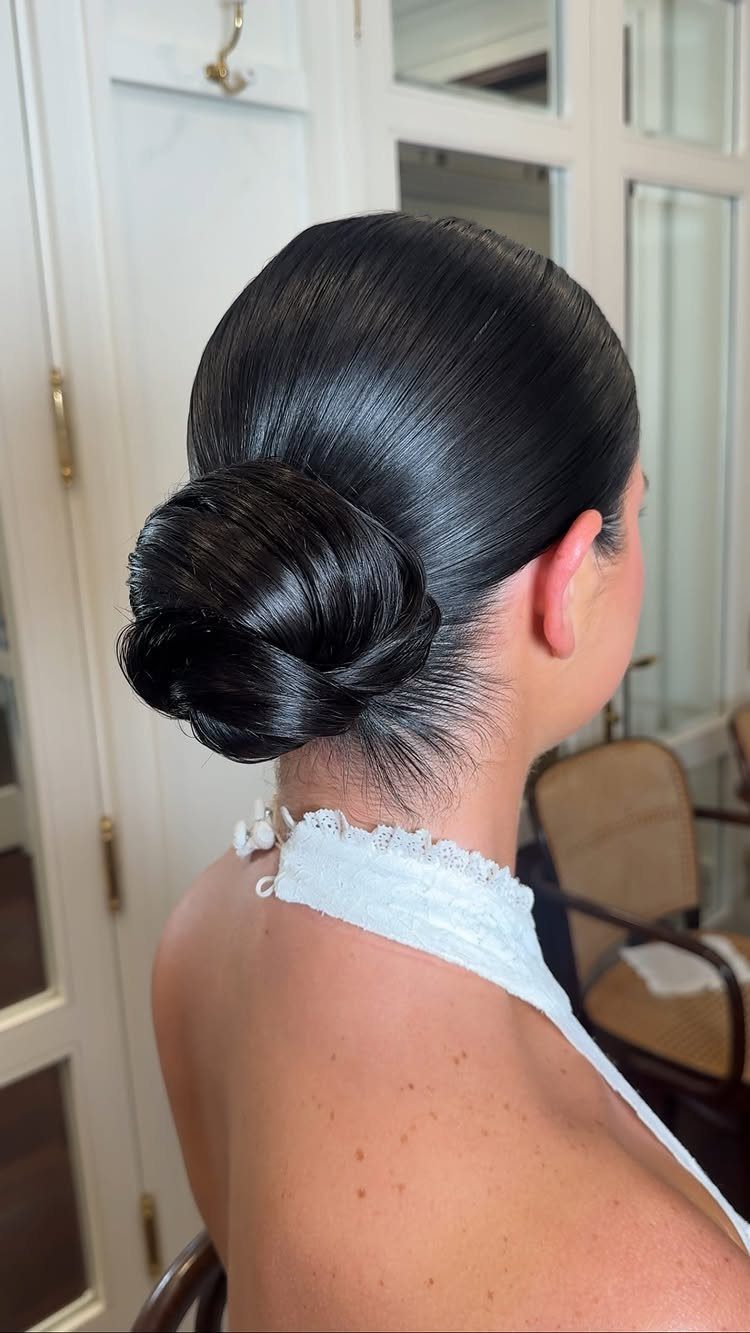
Gloss is everything here: dark hair pulled smooth into a low bun, with no bumps along the sides or crown. Brush it back in even strokes, then fix the base so the bun sits low and tidy.
Because the bun is so smooth, it pairs well with a dress that has more going on, lace included. This style is unforgiving on a messy surface, so I would book a trial and look at it from the side.
25. Doughnut Bun
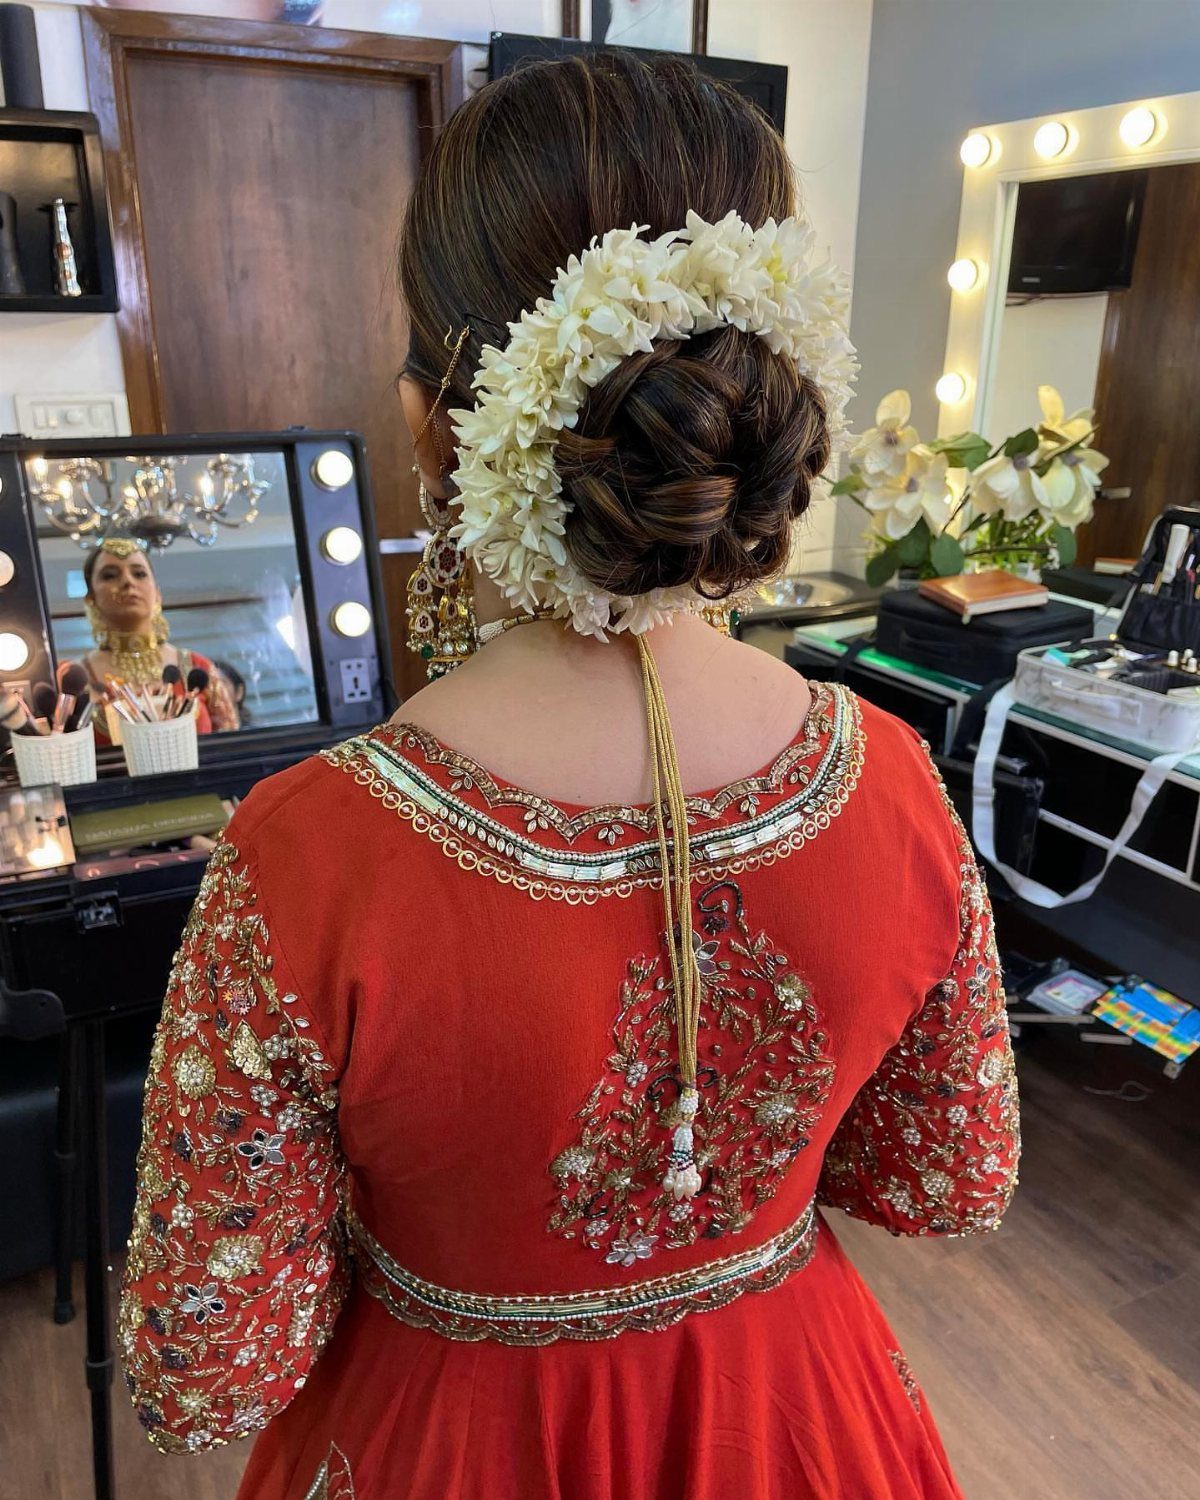
Extra volume is what sets a doughnut bun apart from a flat twist, and the rounded, wound shape gives flowers a wide surface to sit on.
Tuck the blooms in after the bun is pinned so they don’t loosen the coil.
Dark brown hair makes white flowers stand out clearly. A low, centered bun suits this shape best, because the round form reads cleanly from behind, where most guests will see it.
26. Braided Crown Updo
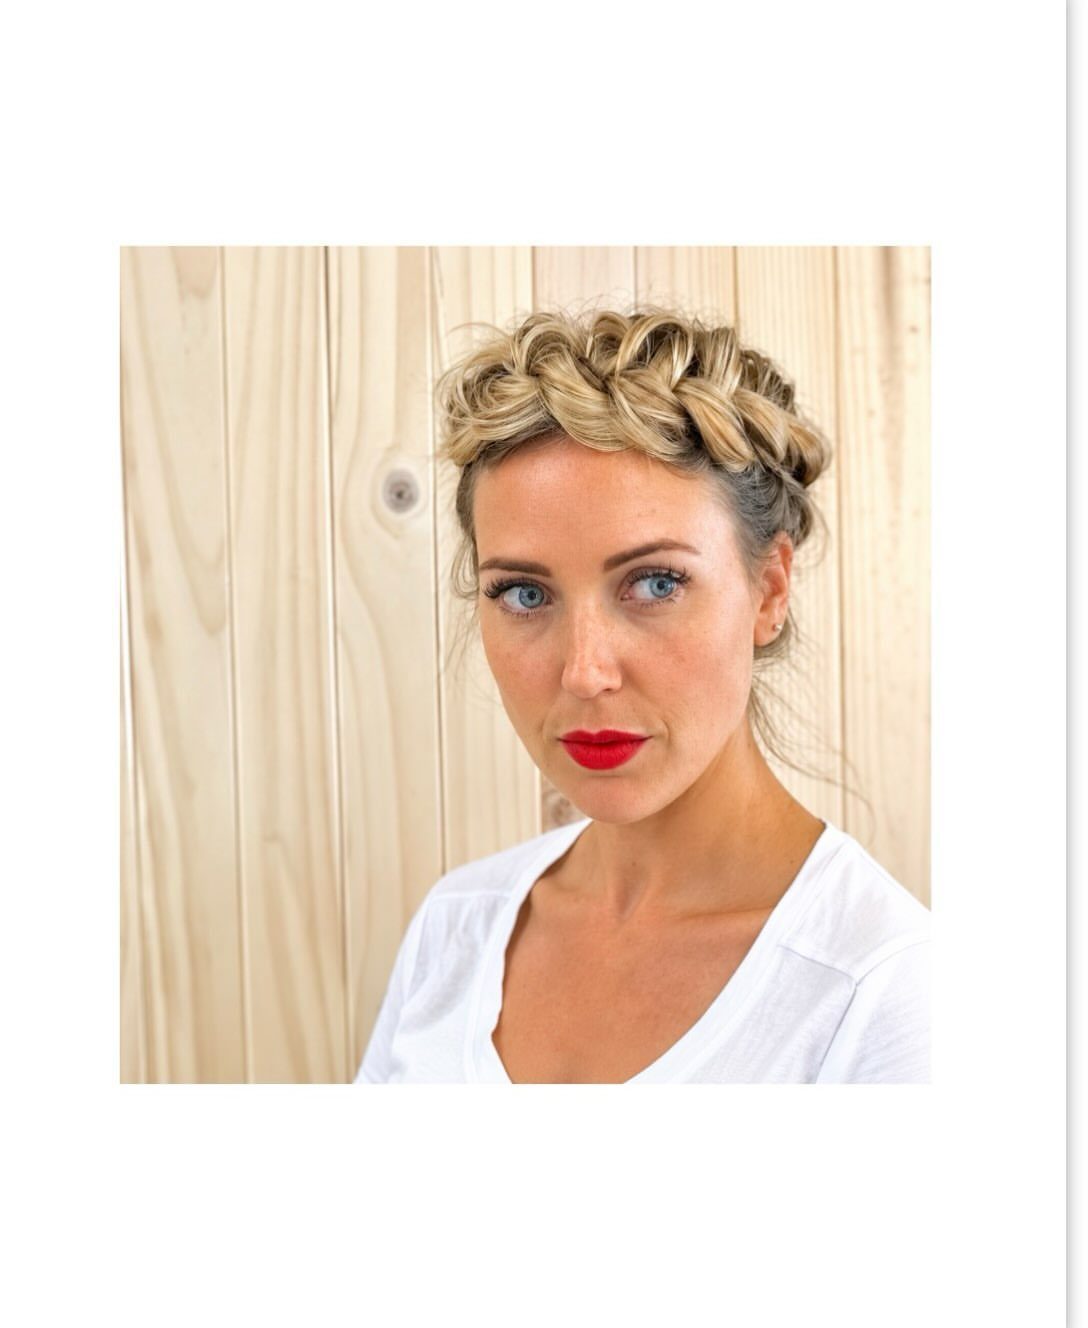
A thick braid carried around the head like a band makes this crown updo, and blonde hair shows each weave of it. Pin the braid flat against the head as you wrap it, so no gaps open between the loops.
Because the braid is the whole design, I would skip extra accessories. A plain, simple outfit lets the crown stay the one detail people notice.
27. Side-swept Updo with Tendril
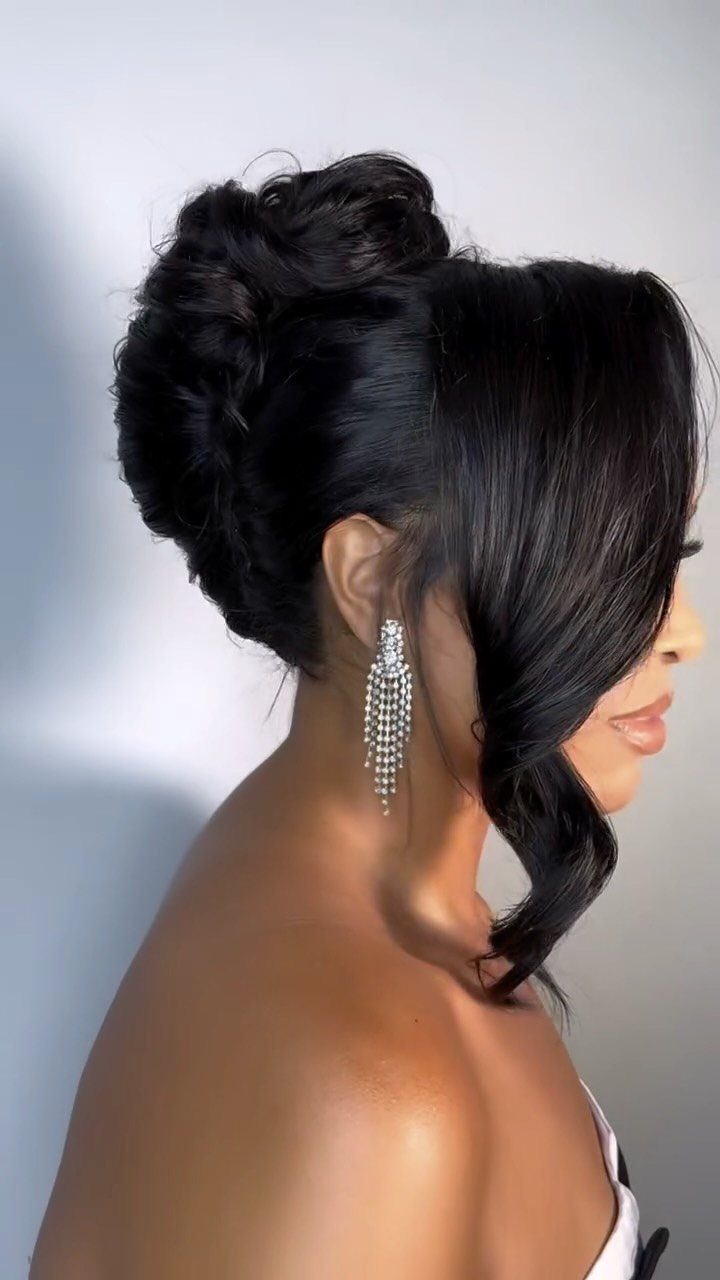
Smooth on one side and full on top, this updo leans on contrast. Sweep the side section flat first, then build the volume above it, and leave one curled tendril out near the face.
Long, sparkly earrings sit well against the open side, so I would pick them over a necklace that competes with the profile. Curl the tendril last, once everything else is pinned.
28. Floral-adorned Updo
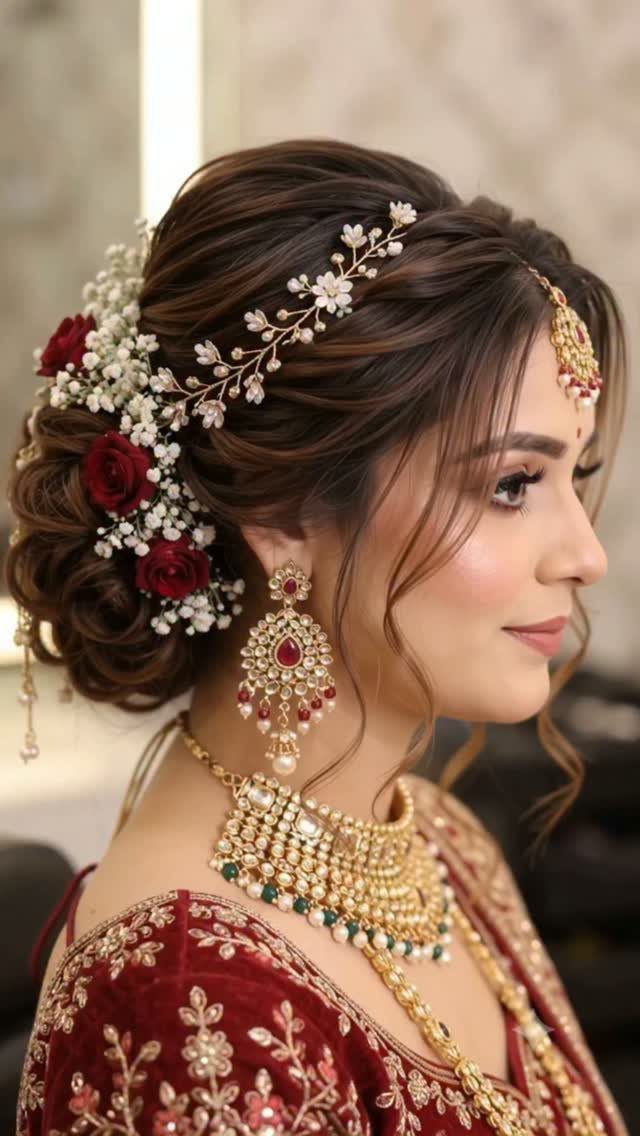
Red and white flowers set into an updo, paired with gold jewelry, give a bridal look that feels full even if a veil never enters the picture. Space the blooms along the shape instead of grouping them in one patch.
Match the metal of your earrings and necklace to any jeweled pins you add, so the pieces read as one set. Pin the flowers in last.
29. Sculpted Curled Updo
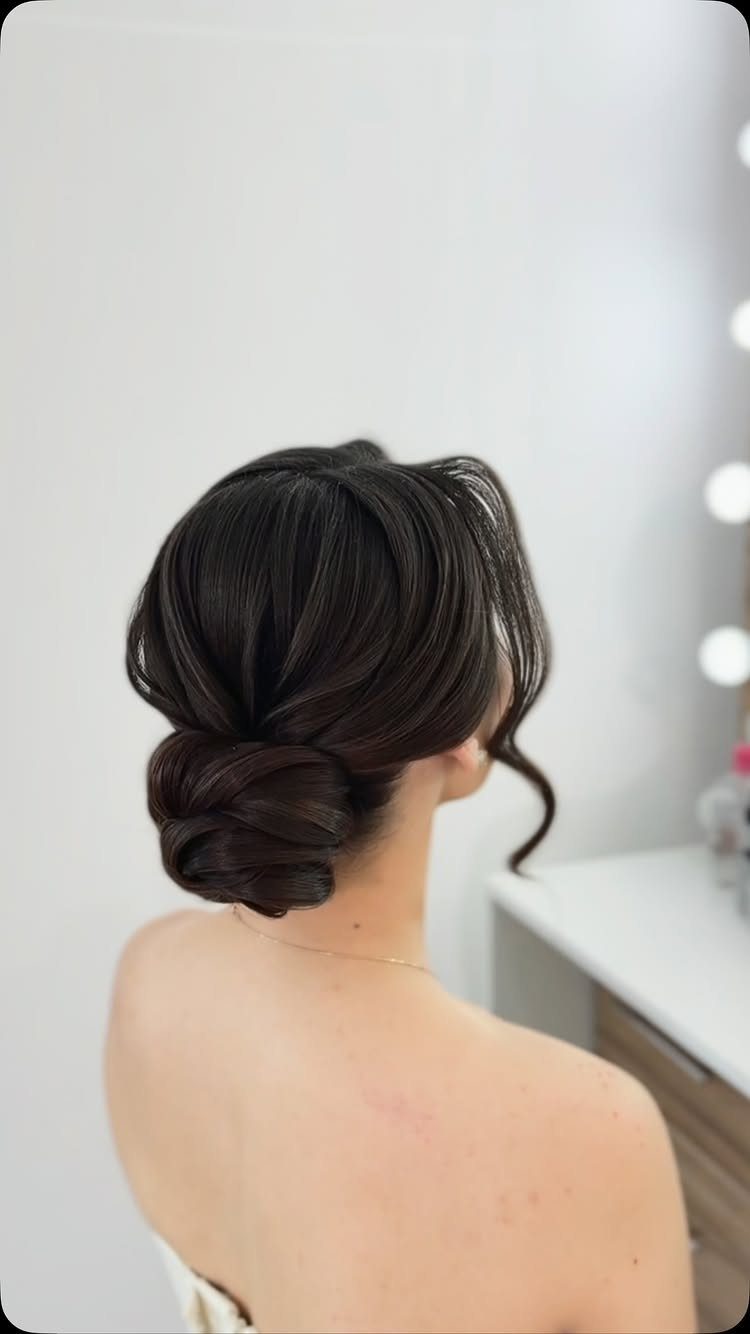
A low updo built from shaped, pinned sections looks sculpted because every curve is placed on purpose. Leave one loose curl free so the polish doesn’t turn stiff.
From behind, the shaping is all you see, so check the back in a mirror as you work. A simple gold necklace is enough with it; the hair already carries the detail.
30. Half-up with Flowers
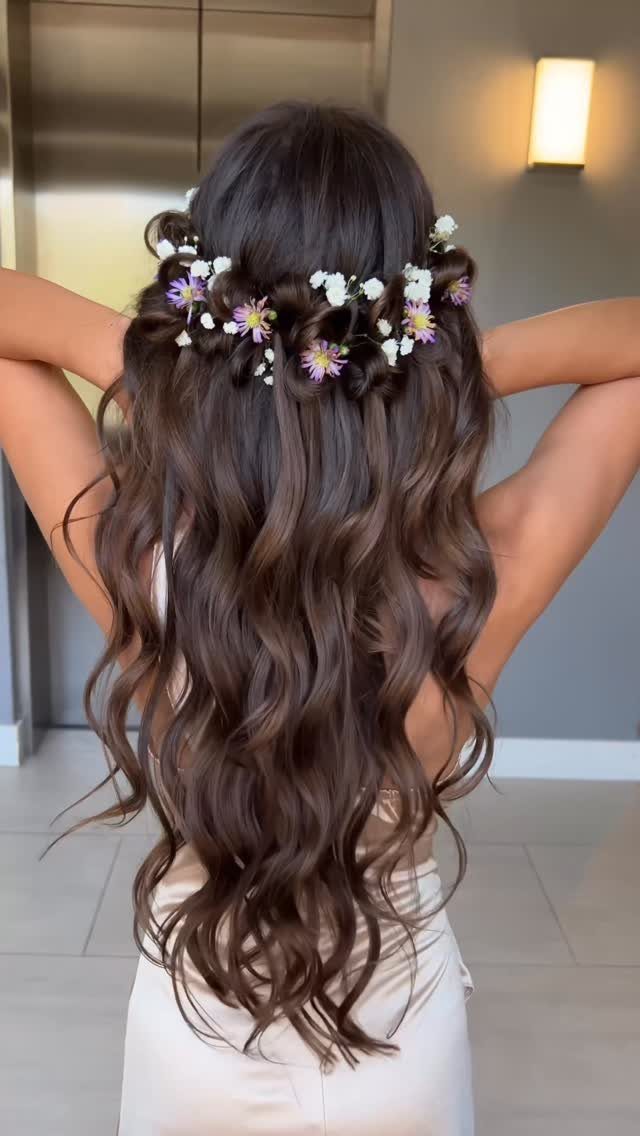
Long waves pinned back at the crown, with small white and purple flowers set along the pinned section, keep this half-up soft and loose. Leave the rest of the hair down so the waves keep their length.
If you want the flowers to stay put, tuck them in after the waves are set.
31. Curled Updo Ponytail
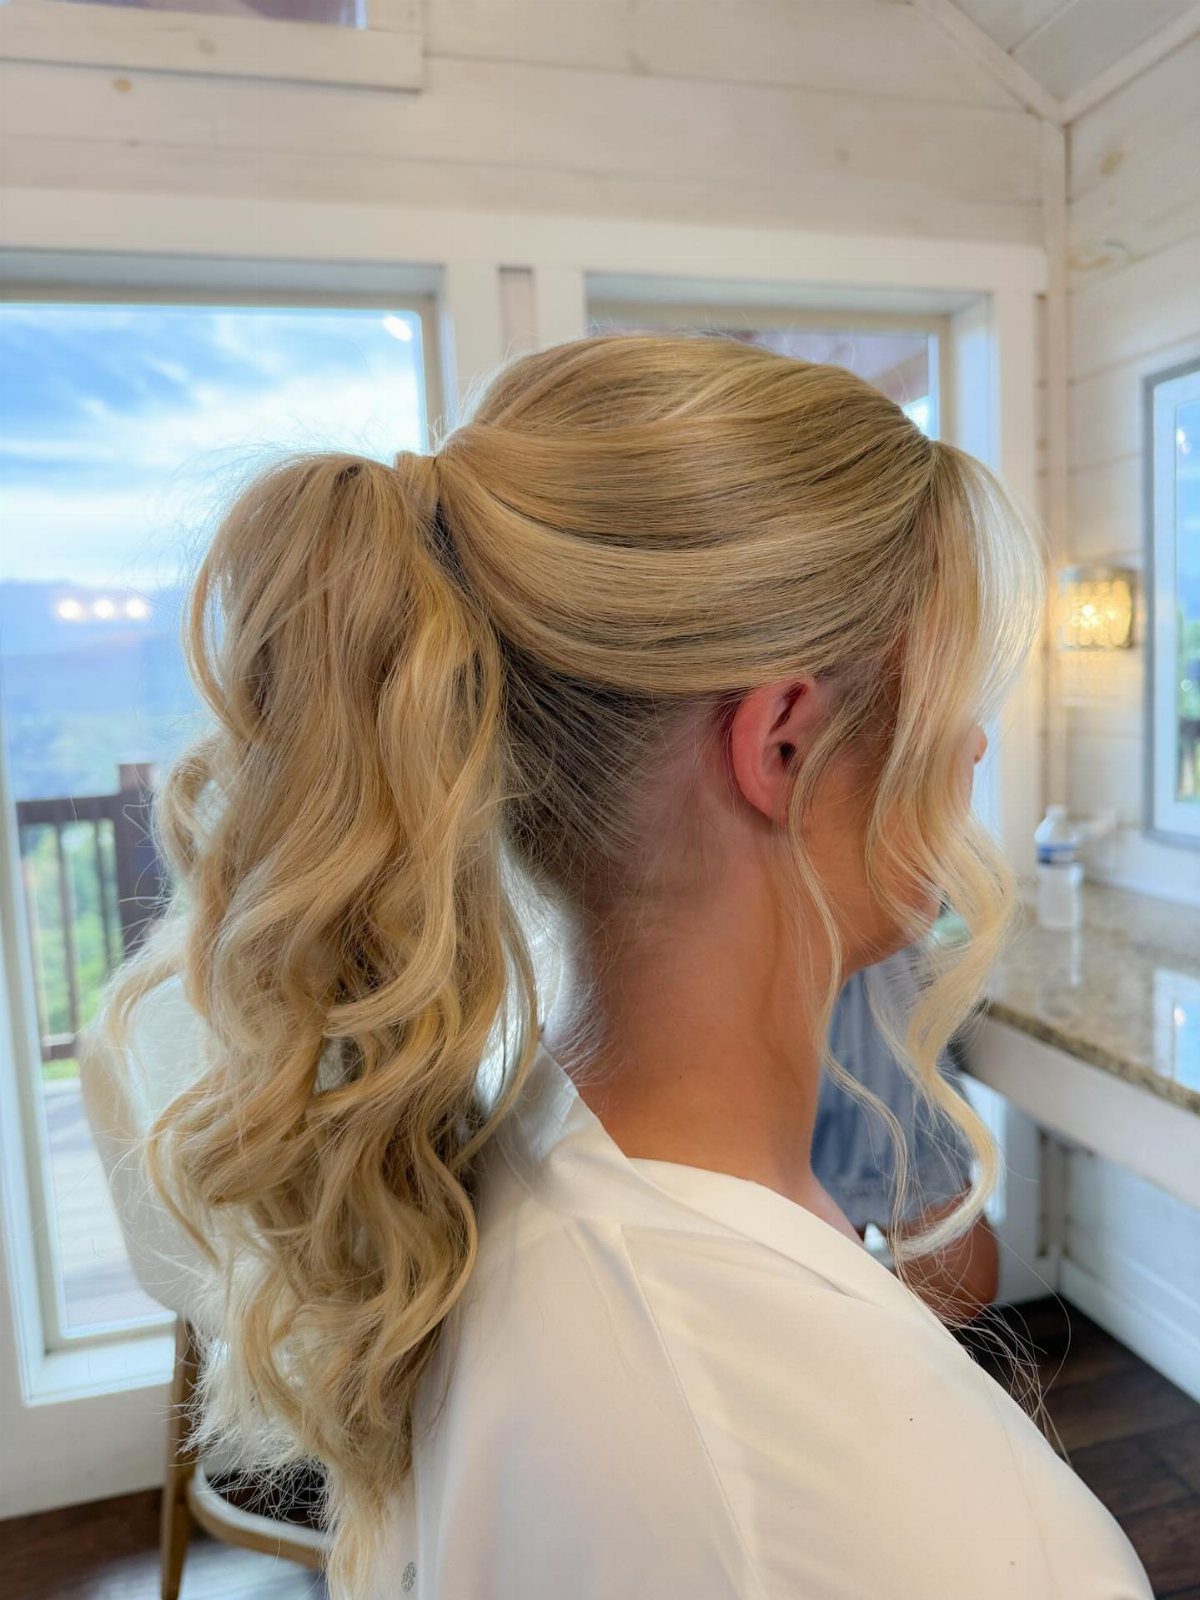
Volume at the crown, then a long fall of curls down the back: that handoff is what makes this ponytail read as an updo and not a casual tie.
Pin the top section smooth and lifted first, and curl the length last so the spirals stay defined.
Light blonde catches the shadows between curls, so the ringlets read clearly in profile.
Enough length to cascade past the shoulders matters here, or the ponytail loses its drama. I would book a trial and check the profile, since that is the angle where the lift and the curls meet.
Choosing Up or Down
Weather and schedule should settle this before looks do. An outdoor ceremony, a humid venue or a packed dance floor all favor secured hair, because wind, heat and hugging guests can’t undo pinned hair.
Pulling hair away from the face puts the neck and jawline on display, so the face looks longer and more defined.
Earrings and a detailed gown back only get seen when the hair is up, and that alone settles it for me.
Comfort counts too. Pinned hair can pull on the scalp over a long day, while loose hair often needs fixing between the ceremony and the reception.
If you can’t choose, I’d go half-up. Wear your trial style for a full evening if you can, and note where it pulls.
Matching Dress and Veil
Pick the veil before you lock in the hairstyle, because the veil decides how much hold the hair needs.
Cathedral and chapel veils need secure anchoring, and smooth buns, soft curls and textured updos all give a comb something to grip.
A half-up style holds a fingertip veil in place at the crown, and the veil still falls past the shoulders so its length shows. A short birdcage veil needs pinned or secured hair to sit properly.
Then check the gown.
High necklines and detailed collars suit hair worn up, and a backless dress is shown off by pinned-up hair. If you’re skipping the veil, you can choose on the dress and your comfort alone.
DIY Styling and Hair Length
Practice the style more than once before the day.
Buy plain bobby pins, a firm-hold hairspray and a smoothing serum, then keep a handful of spare pins nearby for stray pieces; jeweled pins can stay in as part of the look.
Short hair has real options. A pomade stick slicks back shorter strands, and a sleek finish, a textured one with movement, or a partial updo on a bob or lob all work.
A decorative comb or a pair of tight French braids will keep a style secure.
Some short-hair updos need extensions, so settle that with your stylist early. Longer hair leaves room for elaborate braids, twists or chignons, though a simple version is just as good.
Frequently Asked Questions
Should you wear your hair up or down for your wedding day?
Up, in my view, if the day brings wind, heat, a packed dance floor or a lot of hugging, since pinned hair stays where you put it.
Pulling hair back also puts earrings, a neckline and a detailed gown back on display, and it makes the face look longer and more defined.
Half-up is my pick for anyone undecided, and wearing the trial style through a full evening shows exactly where it pulls.
Which dress styles look best with a wedding updo?
Gowns with something to show at the neck, shoulders or back gain the most: strapless cuts, unusual necklines, embellished straps, high necklines, detailed collars and backless designs all stand out when the hair is up.
A clean neckline pairs well with a simple sleek knot, because the hair becomes the only detail.
When the bodice already has a lot going on, a simpler hairstyle keeps the look balanced. An updo can work with any gown, so treat this as a guide and not a rule.
Should you DIY your wedding updo?
Yes, if the style is simple and you practice it more than once before the day.
Messy buns forgive the most at home, since a slipped section just looks intentional. Coiling a braided bun is where DIY attempts tend to go wrong, so I’d book a stylist trial for this one.
Can a wedding updo work with any hair length?
Yes, including short hair. Braids, twists and chignons all have room to get elaborate on long hair, though a plain version looks just as good.
Short updos often rely on a decorative comb or two tight French braids to anchor the style, and some need extensions, so raise that with your stylist early.
How does face shape affect wedding hairstyle choice?
Wearing hair up shows the whole face, so it reads longer and more defined.
From there, oval faces suit many styles, round faces can use volume at the crown, and square faces look softer with waves or loose tendrils. Heart-shaped faces do well with fullness near the nape or jaw.
How do weather and venue affect wedding hair?
Humidity, wind, rain and summer heat all favor secured styles, as do an outdoor ceremony and a packed dance floor, because pinned hair holds up where loose hair gets undone.
Venue formality counts too: a formal setting suits a structured updo, while a relaxed one leaves room for looser hair.